a little bit of FRST engine bay restoration
62 posts • Page 1 of 2 • 1, 2
a little bit of FRST engine bay restoration
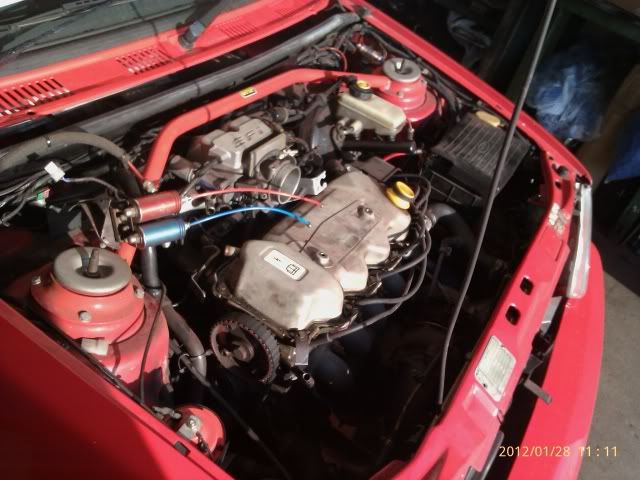
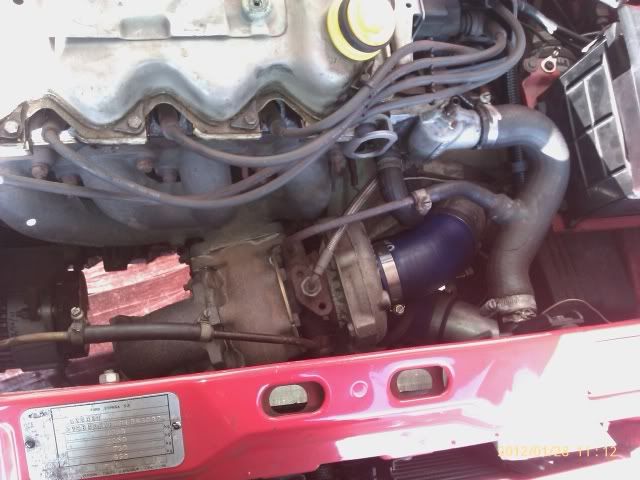
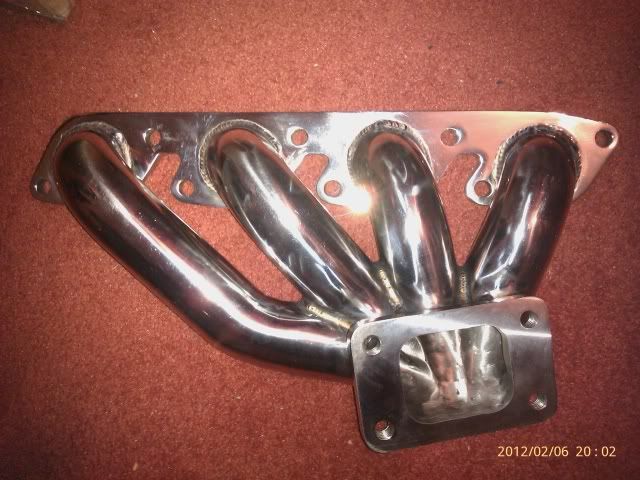
its been a while coming but finally got spare time to get some hard work done in the old Bay. there's lots to do and new bits to buy. im rebuilding the original 1.6 cvh with polished crank, new bearings, pistons and steel rods. a nice flowed head, camshaft and followers and bought a auto specialist tubular exhaust manifold so will see how that goes. ideally would like to get it to Grove Garage for mapping once finished.
gearbox is being overhauled, turbo will be sent off soon.
all the front suspesion and engine bay brackets (everything thats black!) will be sent off for power coating.
all the zinc (silver and gold) will be redone
going to get some wrinkle finish done on the charge pipework, inlet manifold and cam cover
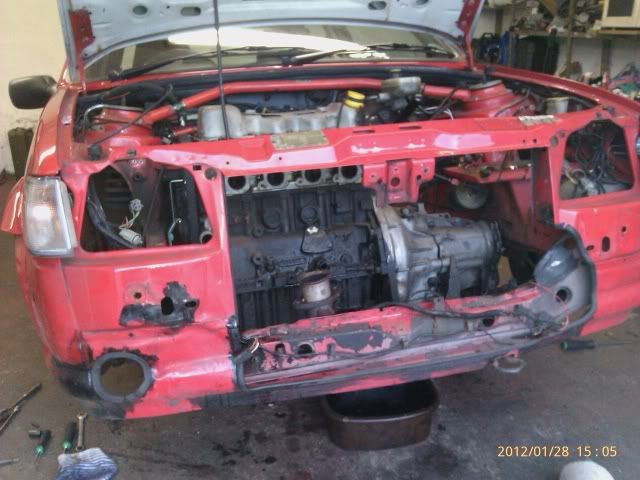
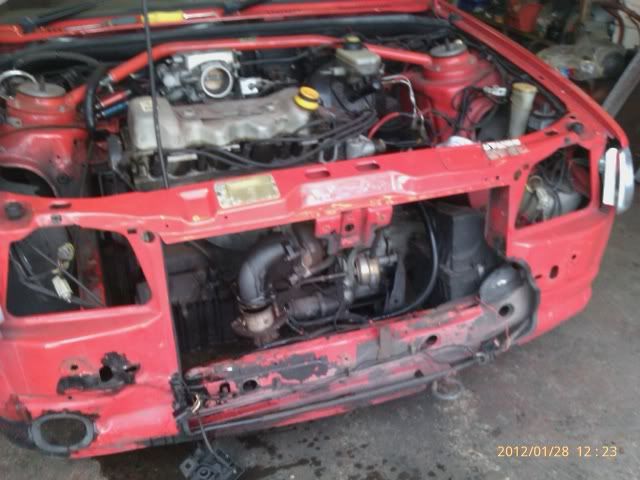
but first of all, a stripping session and a clean up and some rust removal
here's the pics
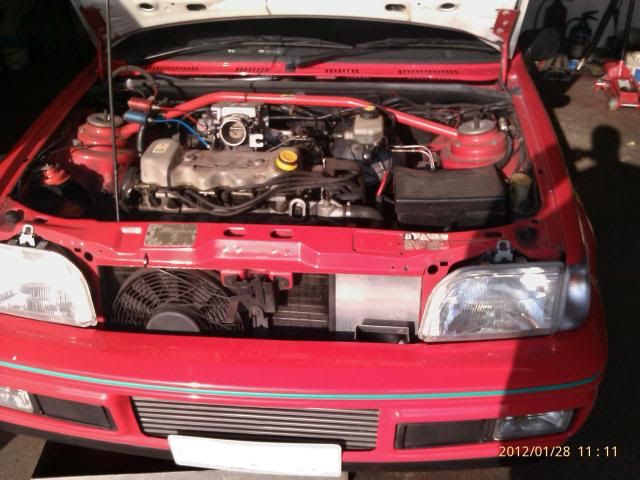
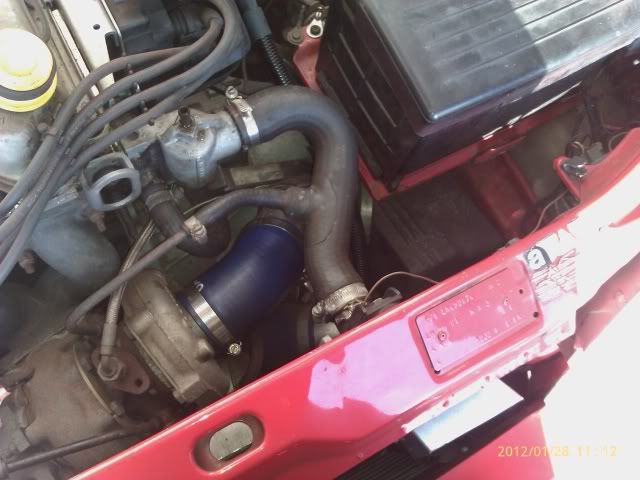
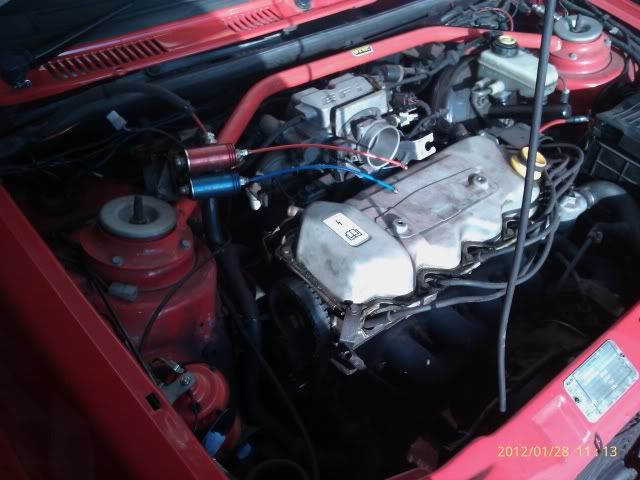
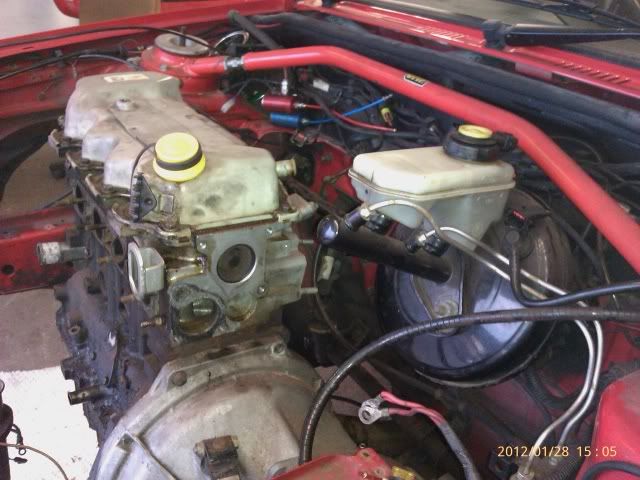
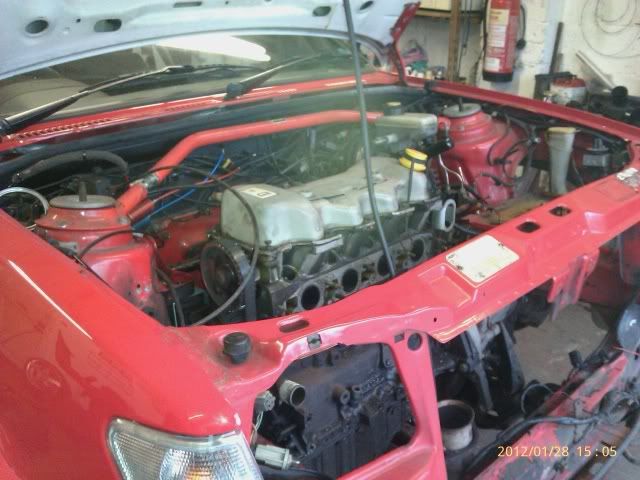
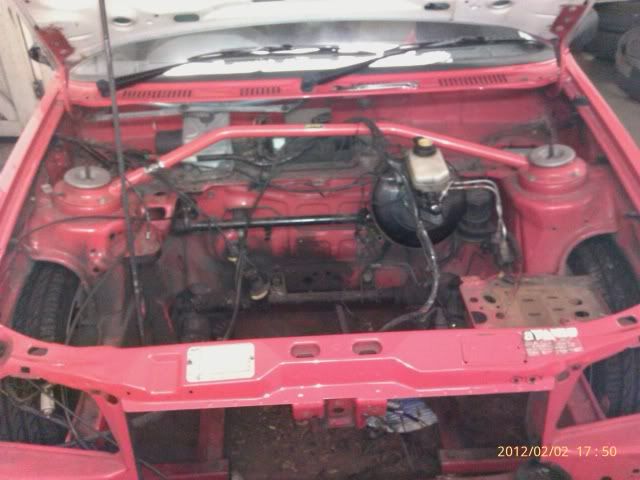
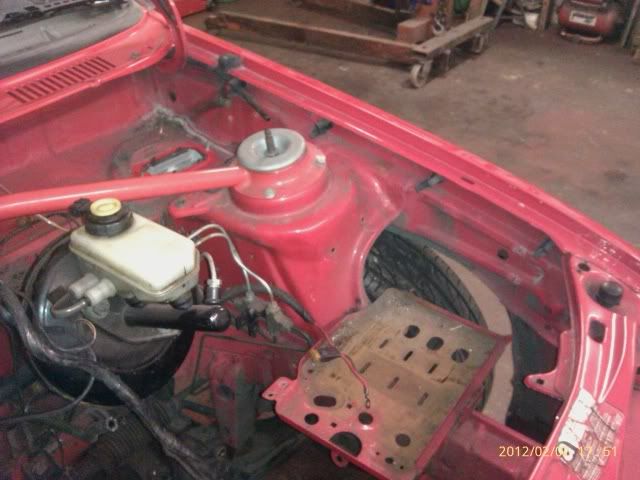
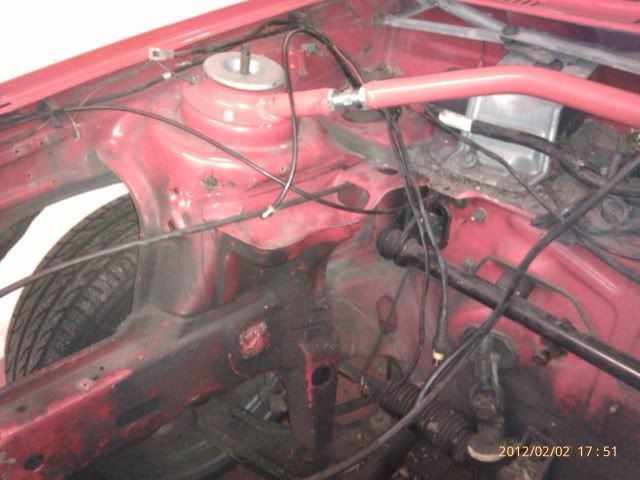
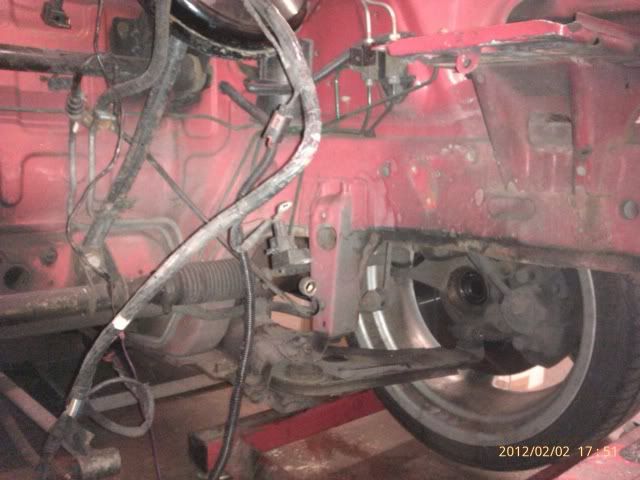
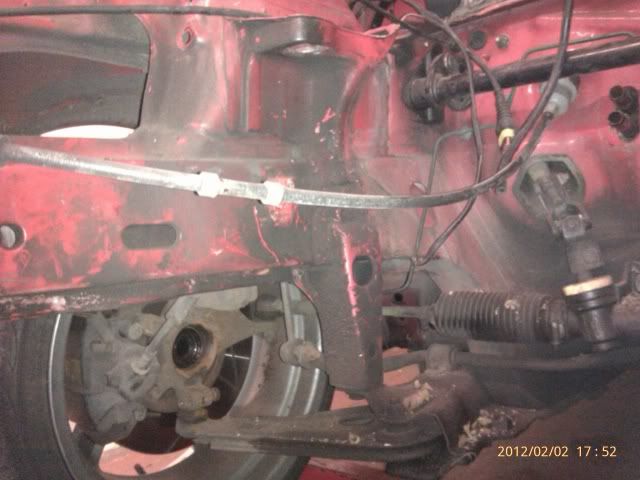
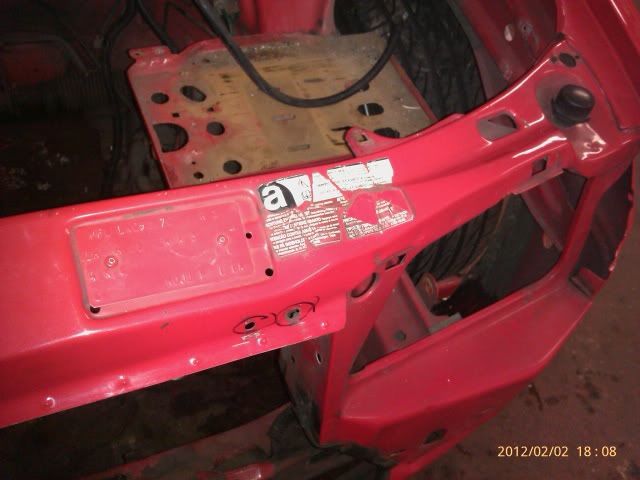
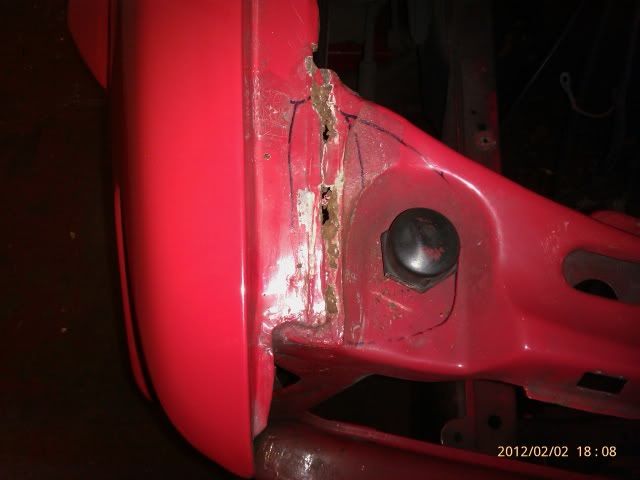
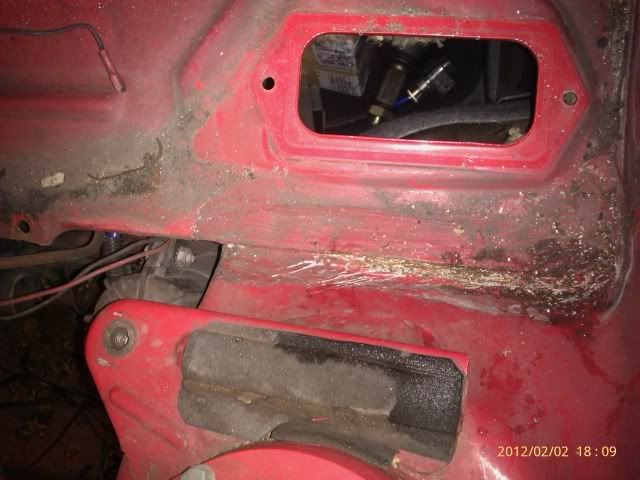
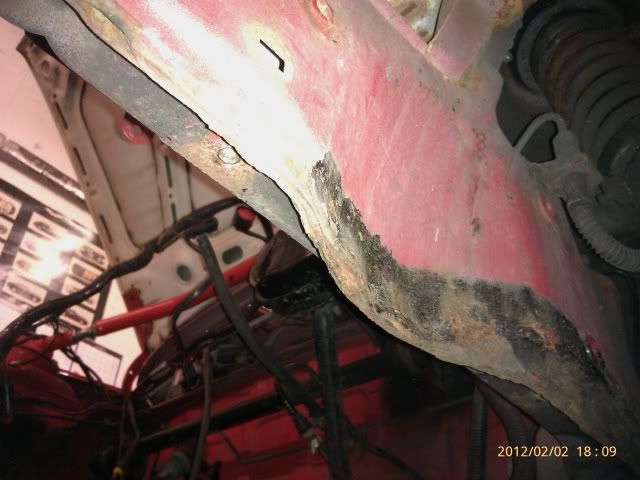
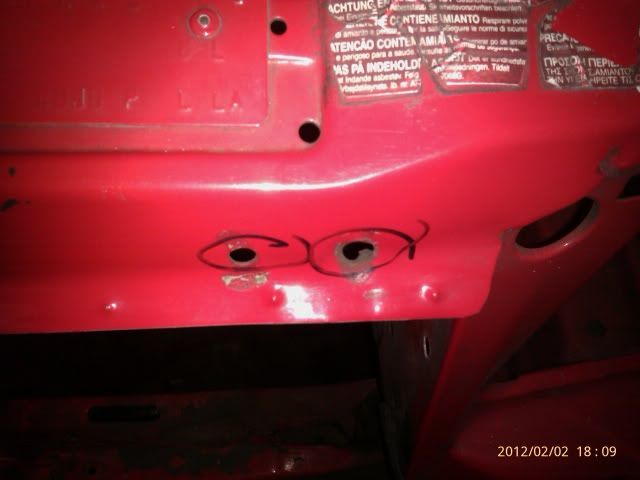
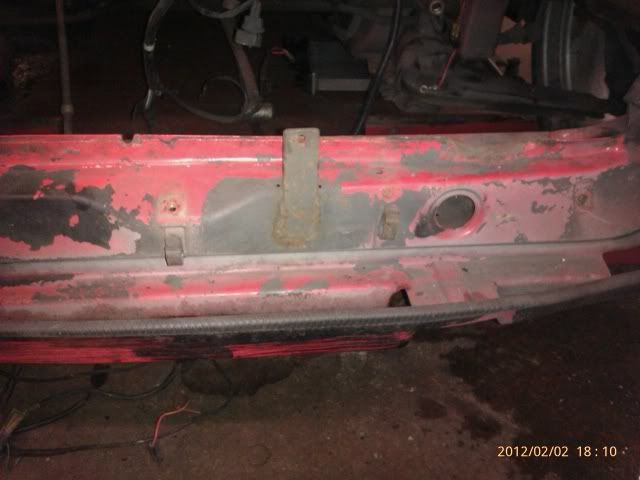
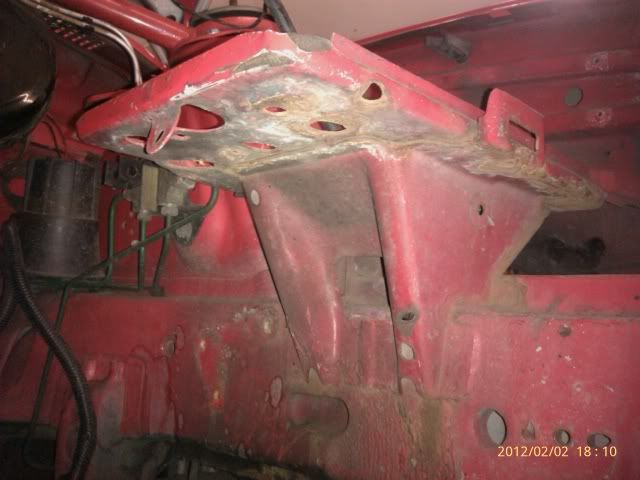
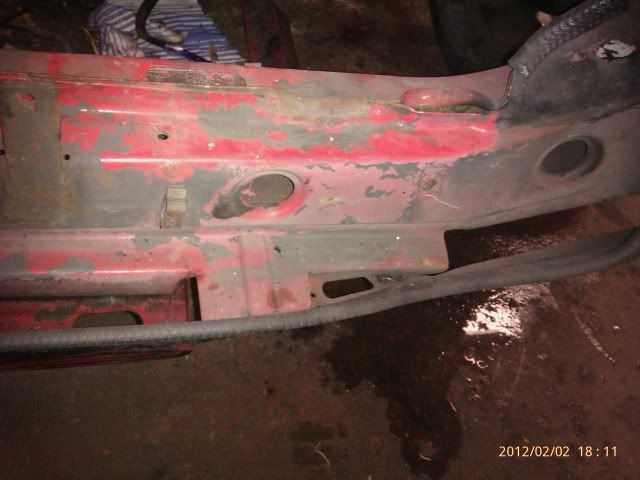
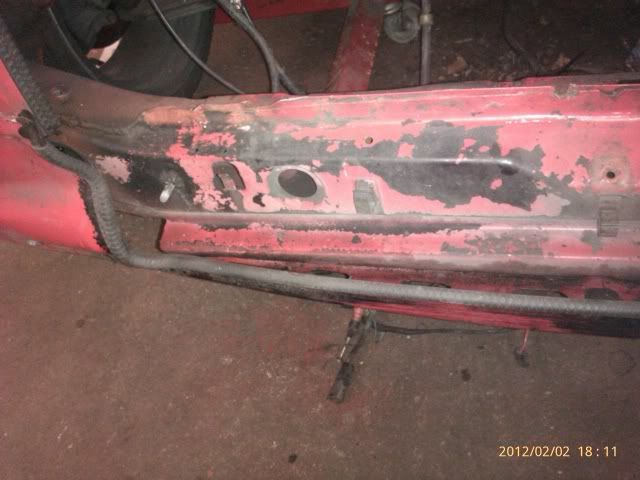
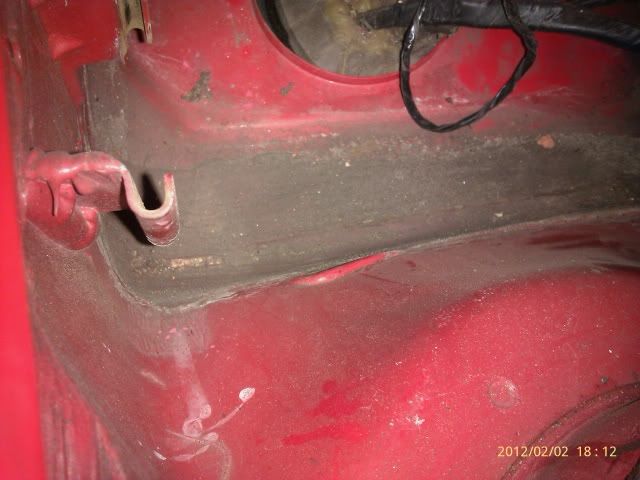
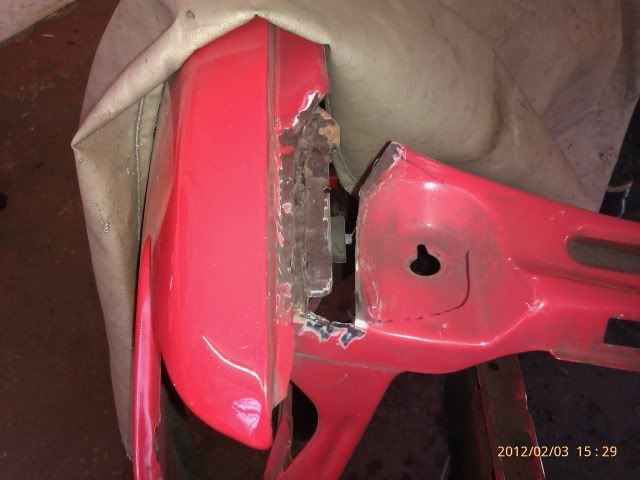
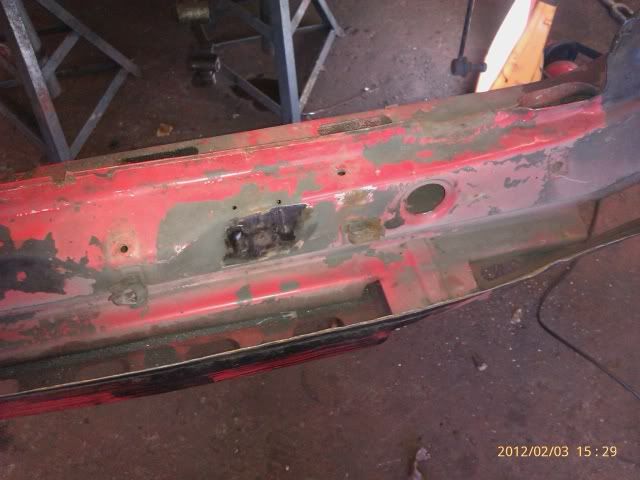
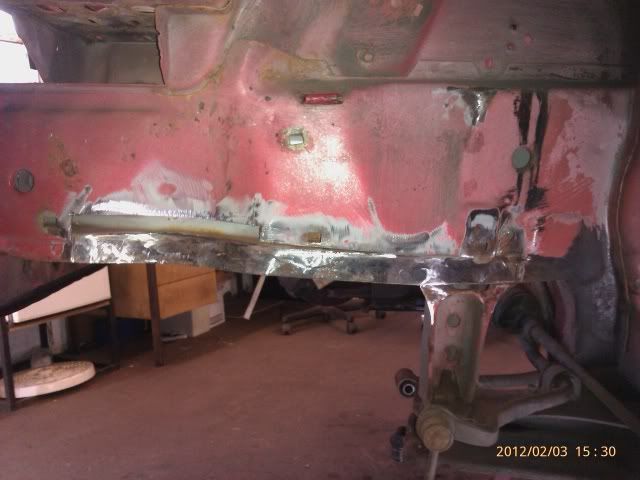
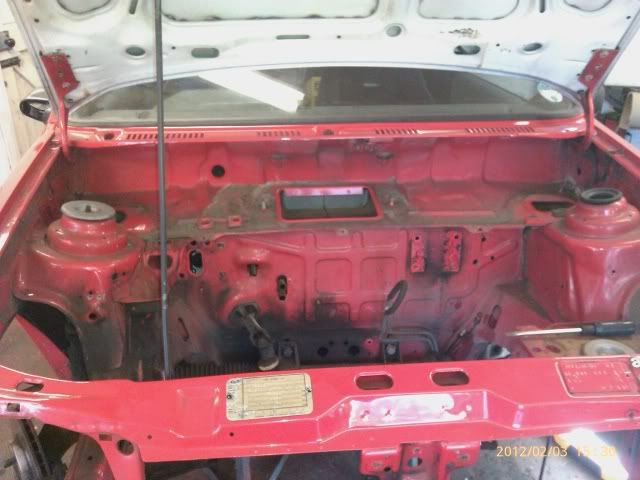
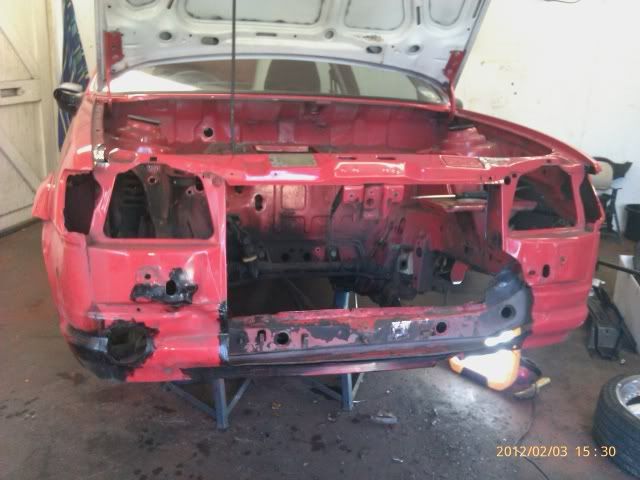
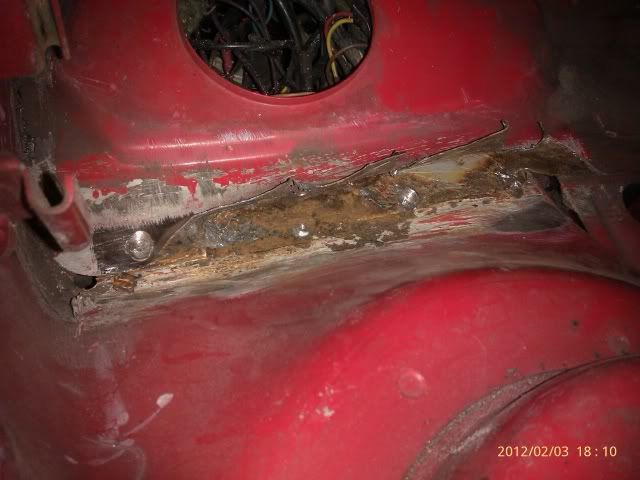
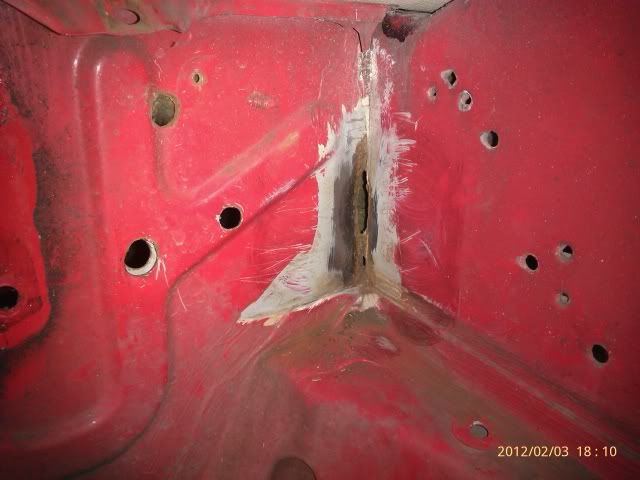
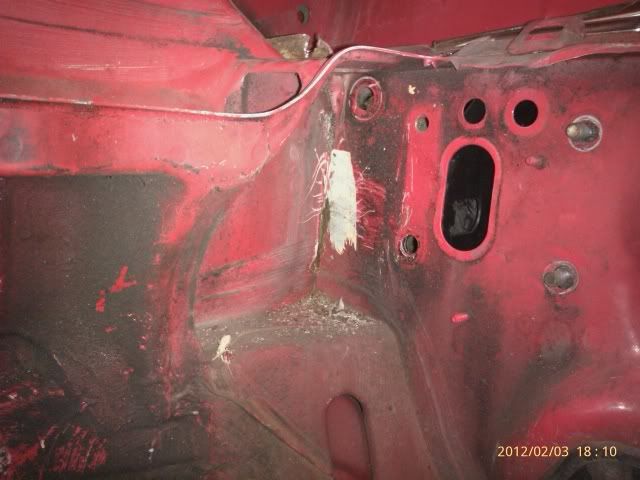
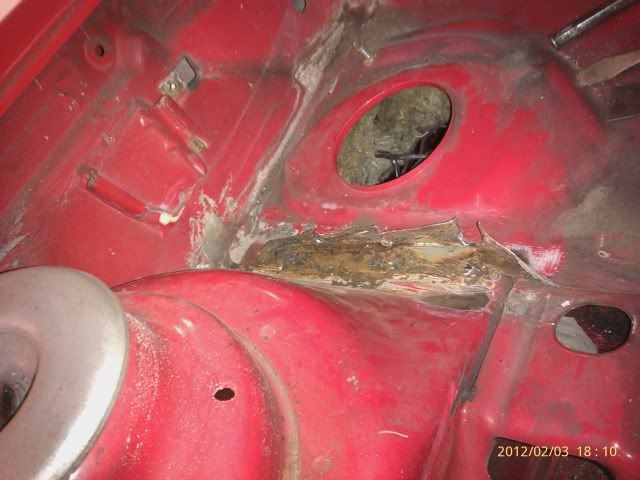
will do some notes on the photot later, ta
gearbox is being overhauled, turbo will be sent off soon.
all the front suspesion and engine bay brackets (everything thats black!) will be sent off for power coating.
all the zinc (silver and gold) will be redone
going to get some wrinkle finish done on the charge pipework, inlet manifold and cam cover
but first of all, a stripping session and a clean up and some rust removal
here's the pics


will do some notes on the photot later, ta
Last edited by 285Andy on Fri Feb 17, 2012 10:07 pm, edited 5 times in total.
PPL, f*****g over music listners since 1934
- 285Andy
- Elite Post Master


- Posts: 4890
- Joined: Sun Aug 05, 2001 1:00 am
- Location: park bench. obviously: Drunk
- Your car: fiesta rs turbo
Car: 1991 Ford Fiesta RS Turbo
Re: a little bit of engine bay restoration
Excellent work there mate, looks like you are getting ontop of it all just in time 

- Dave G fsi
- Elite Post Master

- Posts: 2918
- Joined: Mon Feb 16, 2009 11:35 pm
- Location: Sheffield
- Your car: Mk1 FRS and FRST
Re: a little bit of engine bay restoration
thanks dave. you right about getting in there in time. there's not really much to do but once ive done it i cant rest easy knowing its all good  some PITA bits to do in the strut corners where it meets the bulkhead as im probably going to have to take the dash and carpets out to get to it properly
  still,,, no problems

PPL, f*****g over music listners since 1934
- 285Andy
- Elite Post Master


- Posts: 4890
- Joined: Sun Aug 05, 2001 1:00 am
- Location: park bench. obviously: Drunk
- Your car: fiesta rs turbo
Car: 1991 Ford Fiesta RS Turbo
Re: a little bit of engine bay restoration
Whats the rest of the car like condition wise? Lets hope pulling up the carpets doesnt give you a surprise!
- - Danny Boy -
- Elite Post Master

- Posts: 3844
- Joined: Mon Sep 10, 2007 5:49 pm
- Location: Portsmouth
- Your car: Fiesta Si 2.0
Re: a little bit of engine bay restoration
At least you're the best man for the job, Andy!
I really like your car, just seems to get better and better each time you do a little something to it
I really like your car, just seems to get better and better each time you do a little something to it
- Smo
- Elite Post Master


- Posts: 8658
- Joined: Sun Dec 29, 2002 12:33 am
- Location: My indecisive mind, in Thanet, Kent.
Car: 1990 Ford Fiesta Popular Plus
Re: a little bit of engine bay restoration
thanks smo  cant ever see me getting rid of it somehow
hi Danny!, ive had this old banger some 11 odd years now and im happy to say that the shell although a little warped shall we say.... (had some roof repair in the past
 ) is very solid considering. it still has atleast 85 percent of its original sills and the offside has never been welded yet ( i feel like a proud dad when i say that
  ) coming years will see a rear wheel arch on the offside and sill end repair but ive been crafty with the waxoyl and canny with the sunroof drains and its really made it last. floor wise ive only ever had to repair the floor where the jacking points are at the front on both sides. the inner sills where both good and solid still and didnt need anything doing to them.
this is the first time ive really found any drama with it but as it seems in its infancy i can sort it out and keep it away
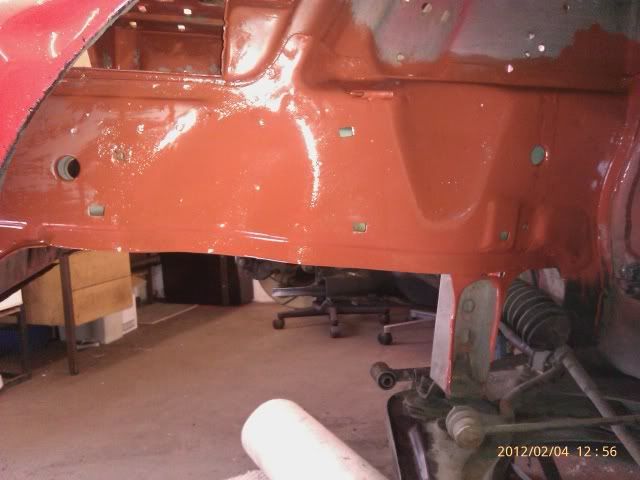
got some more pics from todays work. nearside front chassis rail has been rusty since ive had the car and every year the MOT advise it... not any more though!!
cut out and cleaned up
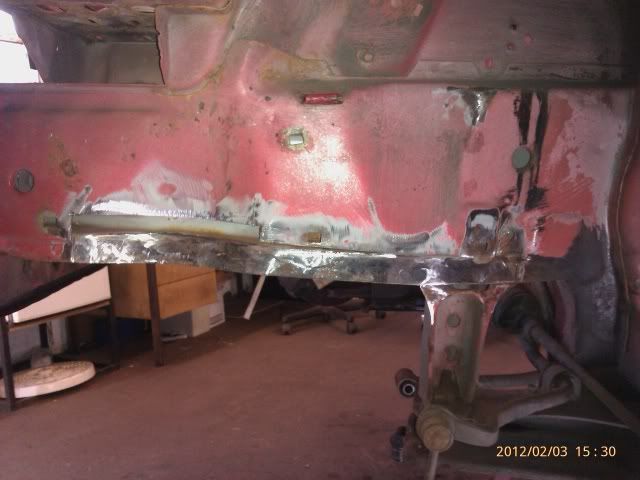
new piece made up and clamped into place
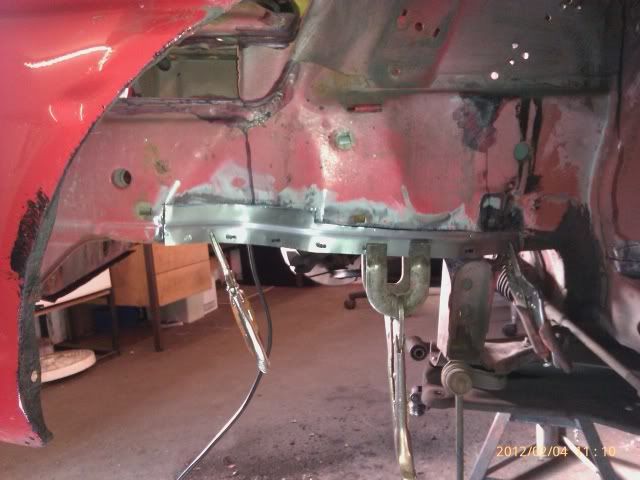
welded up and tidied
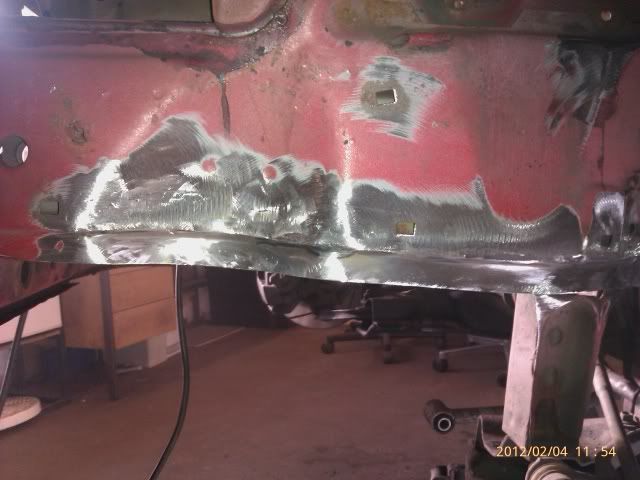
then finished off with zinc primer. this will all get loaded with waxoyl when finished
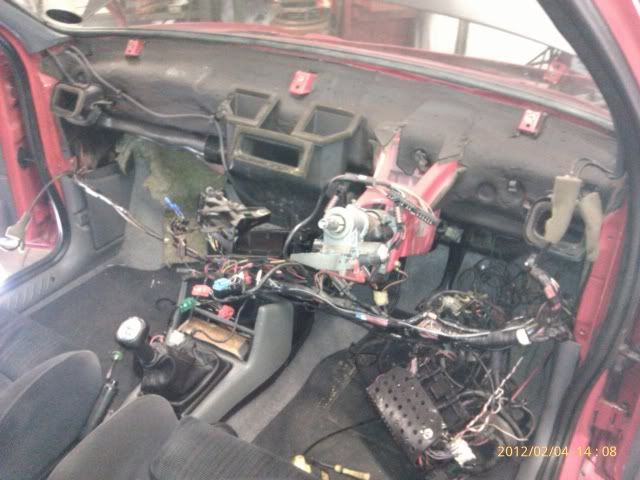
had to take the dash out to get to these area's where the strut turret meets the bulkhead.
passenger side, not too bad just a strip about 2 inches long
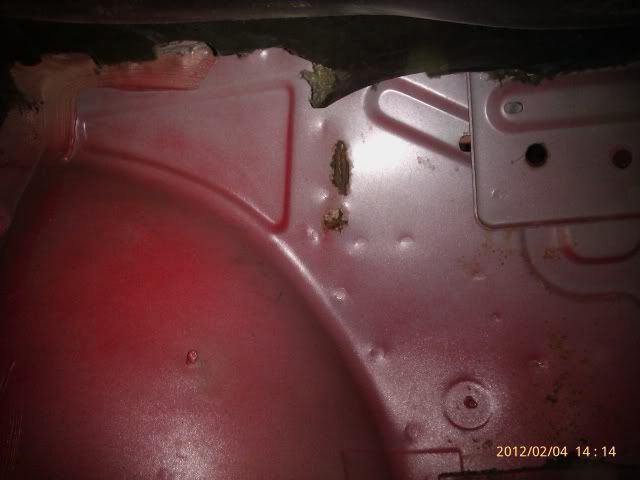
cut out and cleaned..
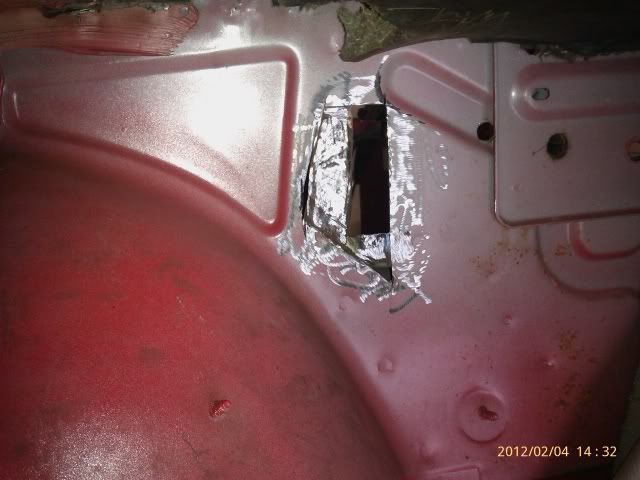
drivers side fared a little worse so looks like wiring out and pedal box.. dam it!
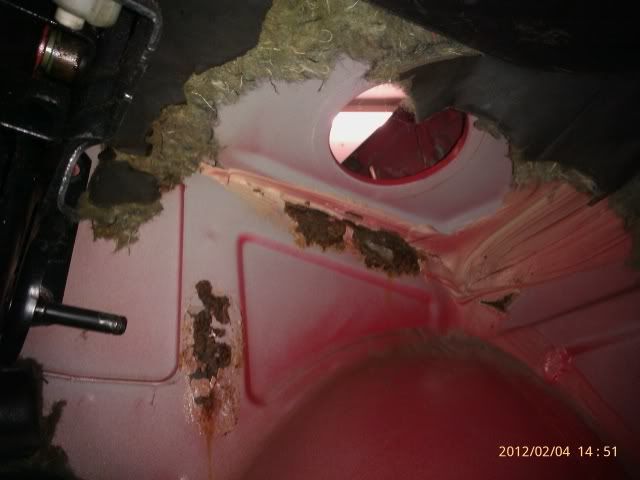
thats all for now! will be back next week for more
hi Danny!, ive had this old banger some 11 odd years now and im happy to say that the shell although a little warped shall we say.... (had some roof repair in the past
this is the first time ive really found any drama with it but as it seems in its infancy i can sort it out and keep it away
got some more pics from todays work. nearside front chassis rail has been rusty since ive had the car and every year the MOT advise it... not any more though!!
cut out and cleaned up

new piece made up and clamped into place

welded up and tidied

then finished off with zinc primer. this will all get loaded with waxoyl when finished

had to take the dash out to get to these area's where the strut turret meets the bulkhead.

passenger side, not too bad just a strip about 2 inches long

cut out and cleaned..

drivers side fared a little worse so looks like wiring out and pedal box.. dam it!

thats all for now! will be back next week for more

PPL, f*****g over music listners since 1934
- 285Andy
- Elite Post Master


- Posts: 4890
- Joined: Sun Aug 05, 2001 1:00 am
- Location: park bench. obviously: Drunk
- Your car: fiesta rs turbo
Car: 1991 Ford Fiesta RS Turbo
Re: a little bit of engine bay restoration
looks like the rust has got yours in all the usual places for a mk3
i stripped my rs down to a bare shell to find it in all them places.
looking good so far with the rust removal. make sure you use loads of seam sealant and under body coatings inside them arches and engine bay.
i stripped my rs down to a bare shell to find it in all them places.
looking good so far with the rust removal. make sure you use loads of seam sealant and under body coatings inside them arches and engine bay.


~nomad~ :Good god I love Clark.
- knuckles
- Elite Post Master


- Posts: 6841
- Joined: Thu May 19, 2005 2:40 pm
- Location: Hertfordshire
- Your car: Fiesta Rs turbo
Re: a little bit of FRST engine bay restoration
Awesome stuff Andy  Will be nice when its all done
- - Danny Boy -
- Elite Post Master

- Posts: 3844
- Joined: Mon Sep 10, 2007 5:49 pm
- Location: Portsmouth
- Your car: Fiesta Si 2.0
Re: a little bit of FRST engine bay restoration
i had the car booked in to the paint shop on monday as i had a "few bits" to sort out over the weekend  should have known better really
  i still cant help but get exited about fresh paint though for some reason

PPL, f*****g over music listners since 1934
- 285Andy
- Elite Post Master


- Posts: 4890
- Joined: Sun Aug 05, 2001 1:00 am
- Location: park bench. obviously: Drunk
- Your car: fiesta rs turbo
Car: 1991 Ford Fiesta RS Turbo
- Dave G fsi
- Elite Post Master

- Posts: 2918
- Joined: Mon Feb 16, 2009 11:35 pm
- Location: Sheffield
- Your car: Mk1 FRS and FRST
Re: a little bit of FRST engine bay restoration
ev'nin all. got a bit more done over the last couple of days so here's the piccys
rusty wing/slam panel area. always hated the way the wing didnt match the original nearside wing. and as it was getting crusty, it had to be dealt with
as a recap, how it first looked (sh**)

both wing and slam panel rust cut out

first off made a piece for the slam panel and tig welded it in. the grey "muck" is a heat absorbing paste. saved the paintwork then skurffed off flush
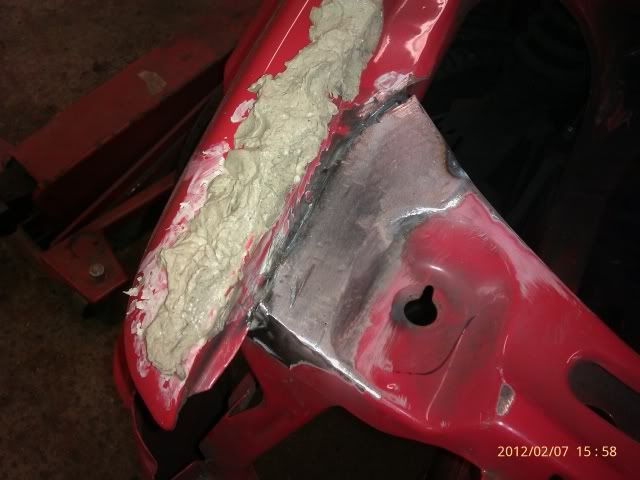
then made a piece to imitate the nearside, again tig welded in and skurffed off smooth. will need the tiniest bit of pudd to make good. although not noticable, each layer i treated with a anti rust zinc coat.
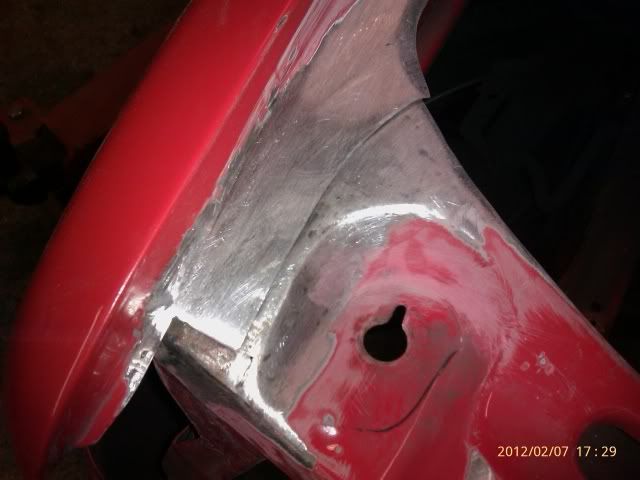
sorted out the neaside strut rust.
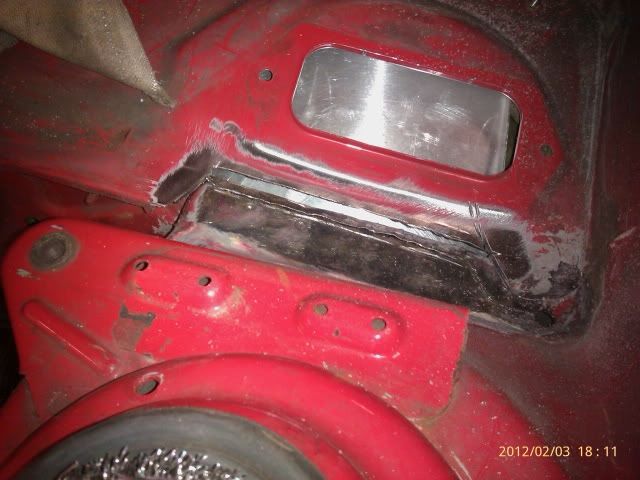
repaired the bulkhead layer
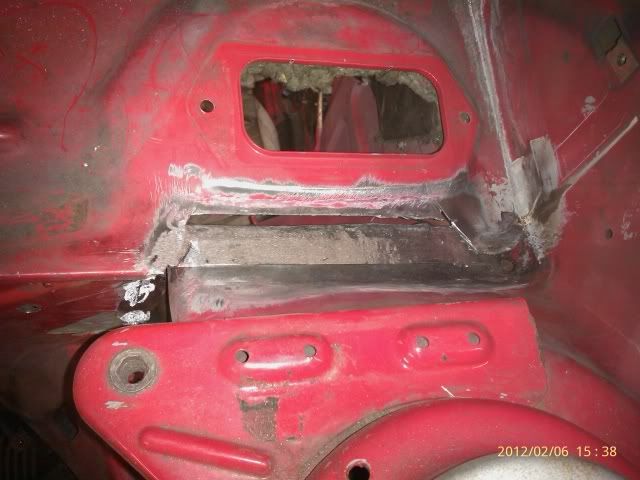
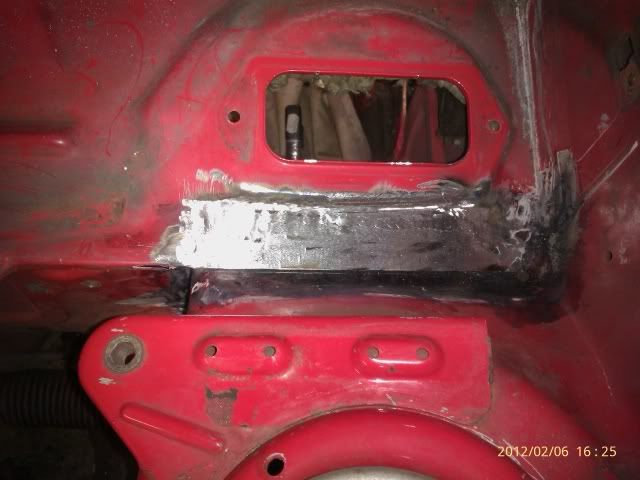
then made the top layer, welded in and cleaned up. will get a treating of zinc coating and 3M's finest seam sealer when ive finished all the other welding
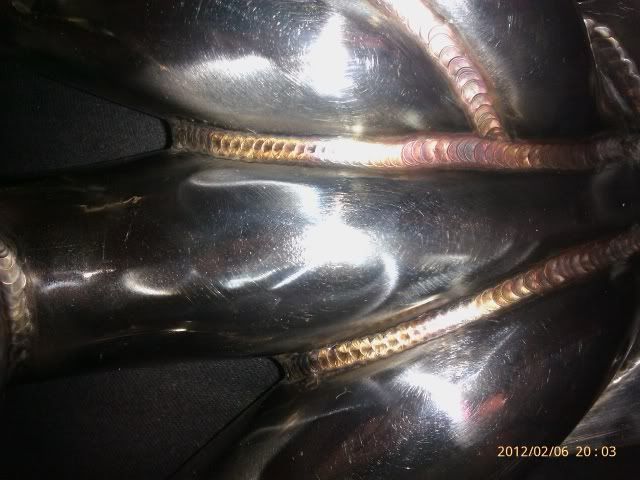
got this in the post from Auto Specialist the other day
knarley piece of welding!!
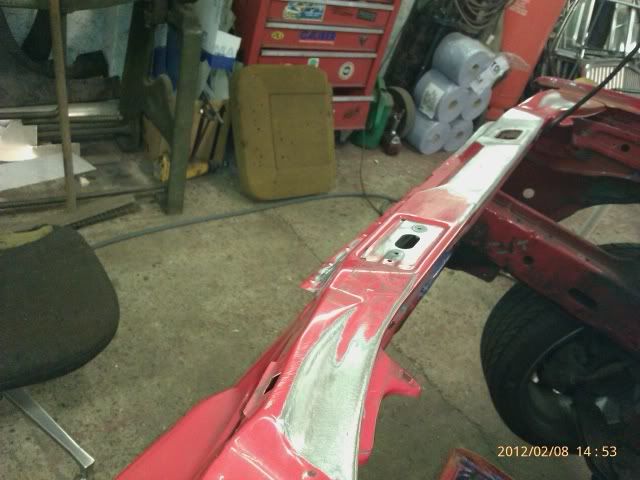
smoothed off my front panel for nothing else other than looks as im hoping my engine bay will turn out custom but stil as OEM as i can
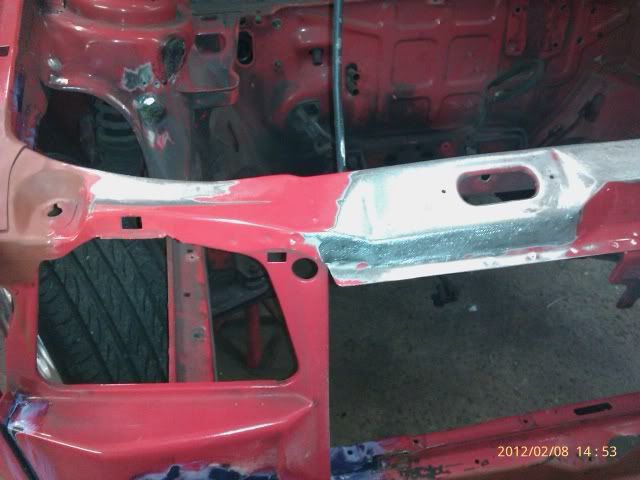
other than that, ive just started on the offstide strut tower so pics will follow
ttfn!
rusty wing/slam panel area. always hated the way the wing didnt match the original nearside wing. and as it was getting crusty, it had to be dealt with
as a recap, how it first looked (sh**)

both wing and slam panel rust cut out

first off made a piece for the slam panel and tig welded it in. the grey "muck" is a heat absorbing paste. saved the paintwork

then made a piece to imitate the nearside, again tig welded in and skurffed off smooth. will need the tiniest bit of pudd to make good. although not noticable, each layer i treated with a anti rust zinc coat.

sorted out the neaside strut rust.

repaired the bulkhead layer

then made the top layer, welded in and cleaned up. will get a treating of zinc coating and 3M's finest seam sealer when ive finished all the other welding

got this in the post from Auto Specialist the other day

knarley piece of welding!!

smoothed off my front panel for nothing else other than looks as im hoping my engine bay will turn out custom but stil as OEM as i can


other than that, ive just started on the offstide strut tower so pics will follow
ttfn!

PPL, f*****g over music listners since 1934
- 285Andy
- Elite Post Master


- Posts: 4890
- Joined: Sun Aug 05, 2001 1:00 am
- Location: park bench. obviously: Drunk
- Your car: fiesta rs turbo
Car: 1991 Ford Fiesta RS Turbo
Re: a little bit of FRST engine bay restoration
Wing tops look pucka mate!!! 
- RS EDDIE
- Elite Post Master

- Posts: 2724
- Joined: Wed Feb 15, 2006 9:08 pm
- Location: ESSEX RM
Re: a little bit of FRST engine bay restoration
Great work Andy. I knew you'd do a good job 
- Excursion
- Bulletin Board User


- Posts: 15265
- Joined: Thu Jan 01, 1970 1:00 am
- Location: Skynet
- Your car: Ford Fiesta
Car: 1990 Ford Fiesta XR2i
- Dave G fsi
- Elite Post Master

- Posts: 2918
- Joined: Mon Feb 16, 2009 11:35 pm
- Location: Sheffield
- Your car: Mk1 FRS and FRST
Re: a little bit of FRST engine bay restoration
nicely done mate 
- jayrs
- Elite Post Master


- Posts: 31520
- Joined: Mon Apr 19, 2004 10:32 pm
- Location: I.O.W
- Your car: FRST, XR2, ST170, ST225
Car: 1991 Ford Fiesta RS Turbo
- Dave5300
- Post Master

- Posts: 625
- Joined: Sun Sep 19, 2010 2:05 pm
- Location: Kildare, Ireland
- Your car: Black FRST, Red mk5 zetec s
Re: a little bit of FRST engine bay restoration
wow!
your an excellent welder mate!
very inspiring
your an excellent welder mate!
very inspiring
1800 Zetec 133bhp 140lbs/ft
mk2 pop 1.4i
- jonyb4
- Elite Post Master

- Posts: 9235
- Joined: Tue Aug 12, 2008 12:05 am
- Location: Port Talbot, South Wales
- Your car: Si 1.8, mk2 950, 2.0 capri
Car: 1995 Ford Fiesta Si 16v
Re: a little bit of FRST engine bay restoration
thanks for your kind words all! 
got some more done, here's the piccys
all on the offside now as the nearside is all done.
all the crap cut out from strut and bulkhead
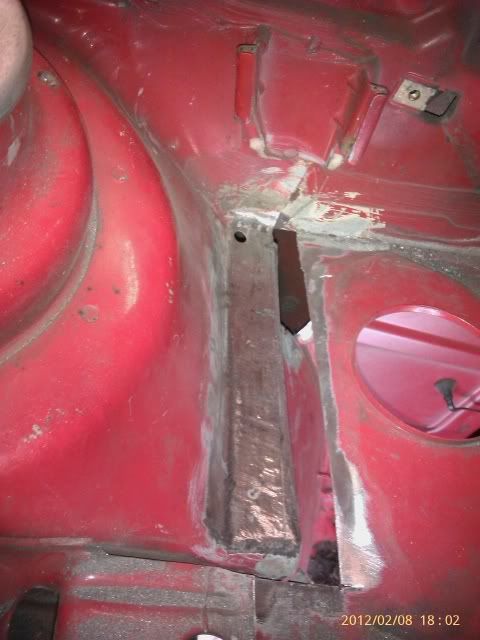
chassis leg is in great condition and will just need a underseal and wax coating
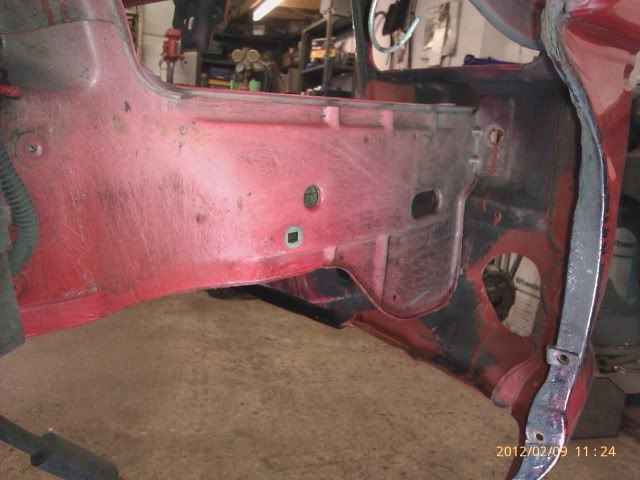
rust had spread into the inner wing re-inforcer and this isnt repaired as well as id have liked. to do correctly would have meant removing the wing and the car isnt in a bad enough state to warrent doing that at this moment in time. i will add though that all the rust was cut out and there is a wheel arch liner so is only incorrect if you can see it if you know what i mean
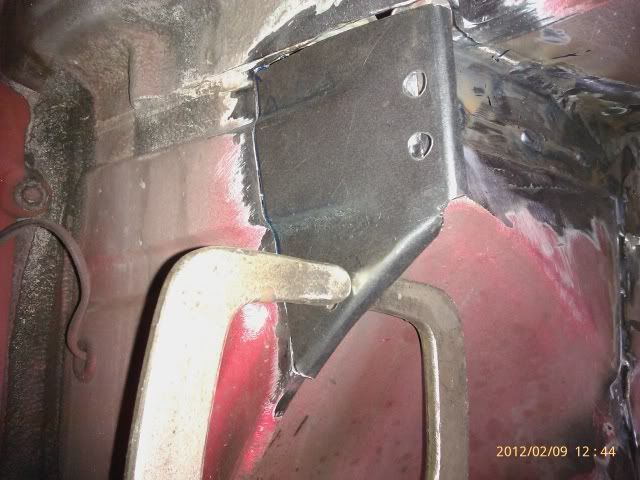
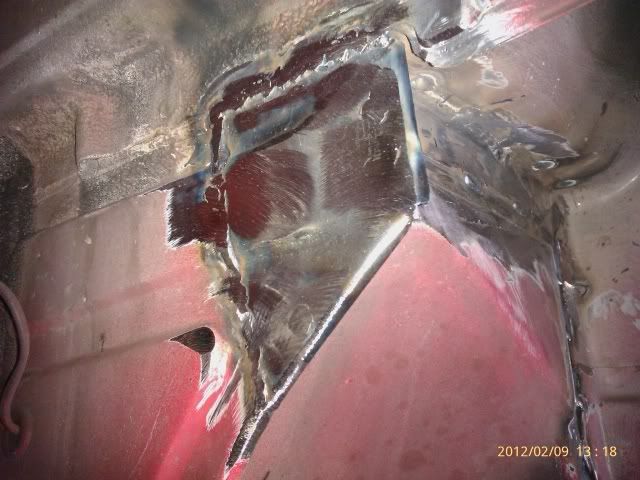
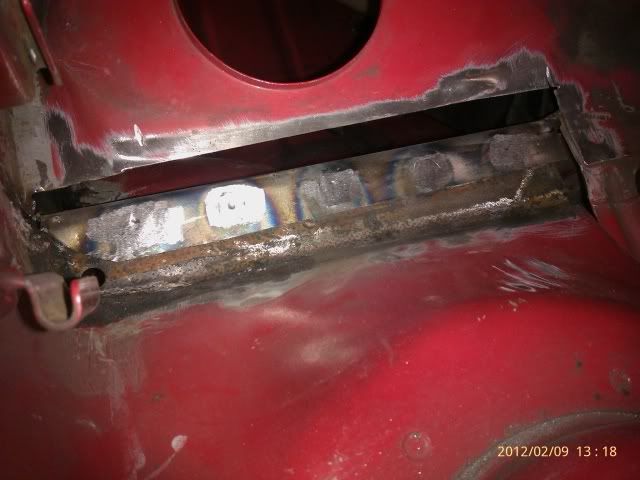
repaired first layer (wraps over strut) which is the bulkhead
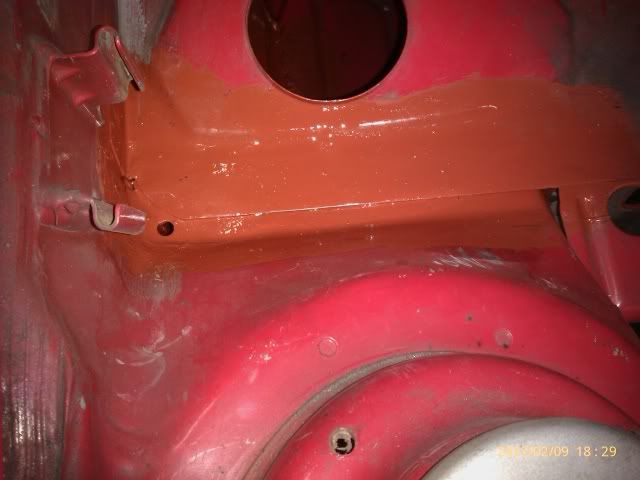
then repaired the top layer which is the panel the heater sits on and painted up
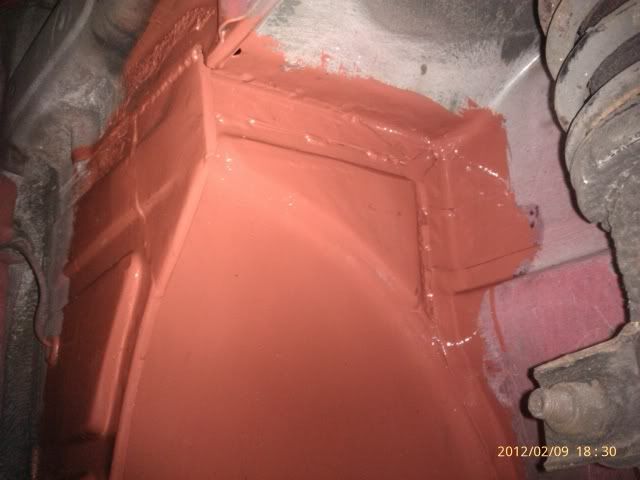
also painted up under wing
its now down the paint shop and im expecting it back on monday or teusday so i can start the refit
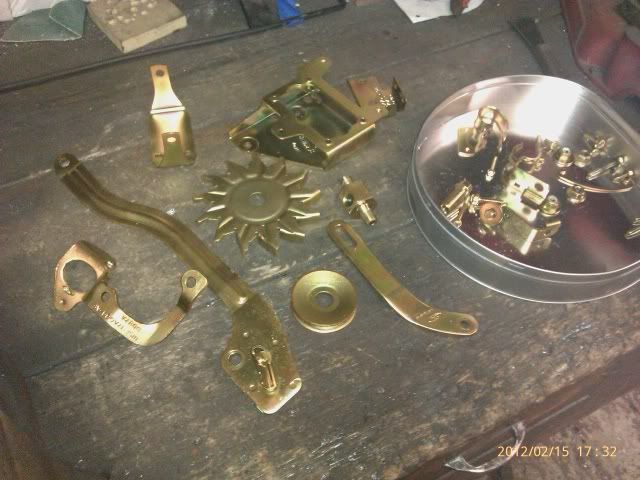
got most of the gold zinc done! looks awsome! also got a bucket full of bits i want done in zinc silver ready and waiting to be done
trying to be a bit diffenert, i want a larger throttle body and so went donw to my local scrappy and went through his parts bin and found this GM one. same outer diameter but just over 1/4" larger throttle plate
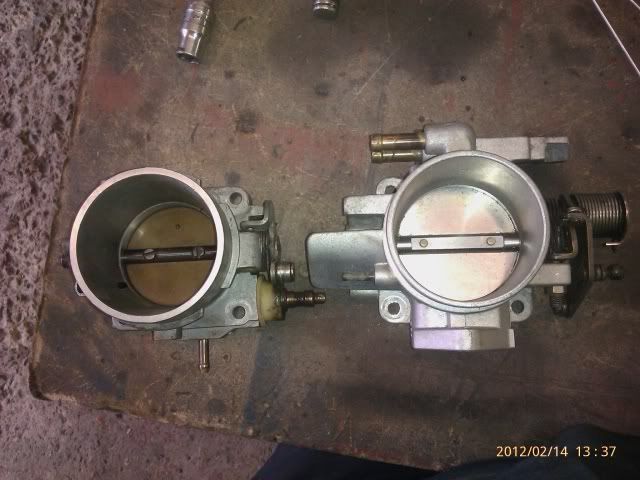
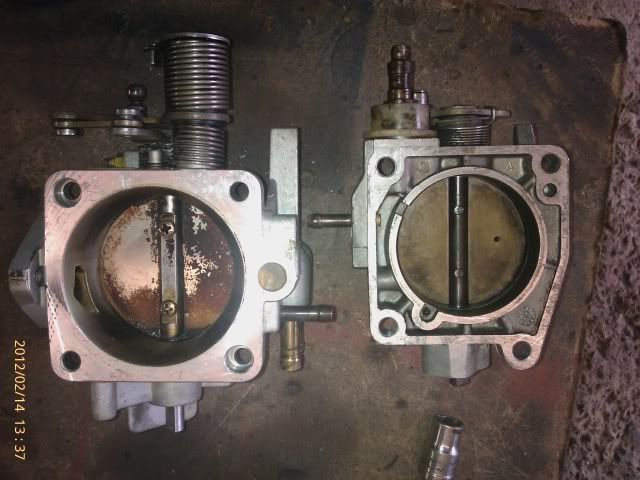
the engineer next door is going to bore this out to match. (blue line is just to give you an idea of how much bigger the hole needs to be.) and the hole on the throttle body need to be elonggated about 2mm each one apart from the top left hand one.
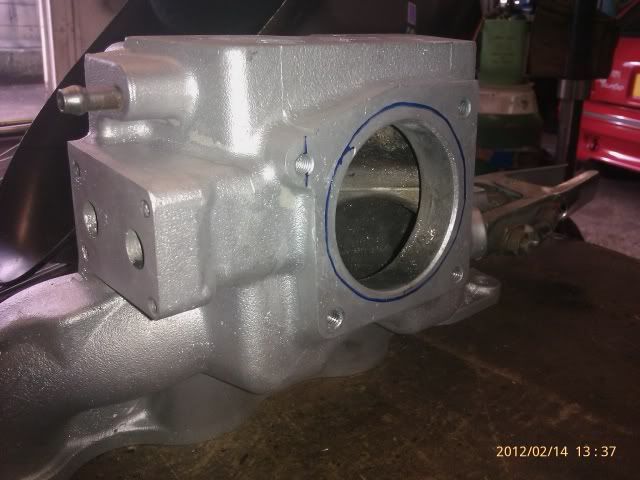
top left hand bolt hole is an odd one for the standard frst body so built the area up with weld
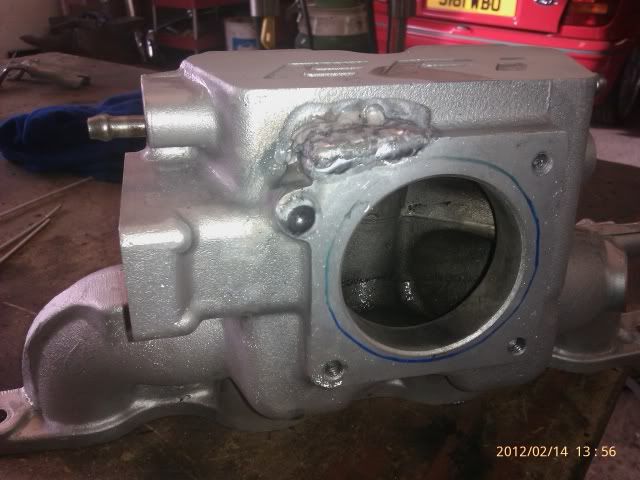
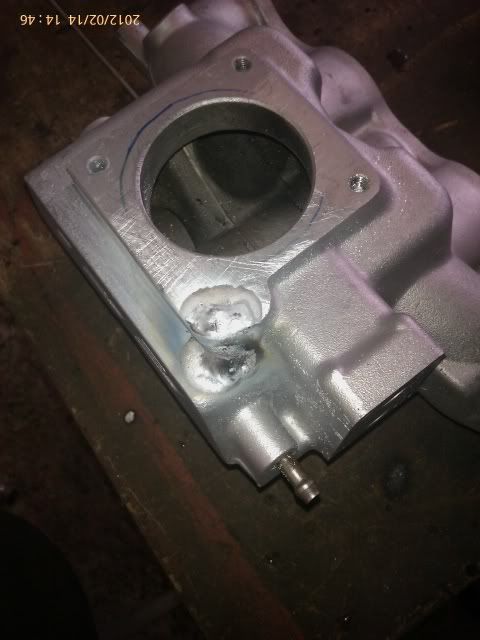
will takcle the throttle cable operation next but will be a while yet. may even dump this if i find something more suitable. i have a few spare inlet manifolds to play with lol!
thats it for now , cheers!
got some more done, here's the piccys
all on the offside now as the nearside is all done.
all the crap cut out from strut and bulkhead

chassis leg is in great condition and will just need a underseal and wax coating

rust had spread into the inner wing re-inforcer and this isnt repaired as well as id have liked. to do correctly would have meant removing the wing and the car isnt in a bad enough state to warrent doing that at this moment in time. i will add though that all the rust was cut out and there is a wheel arch liner so is only incorrect if you can see it if you know what i mean


repaired first layer (wraps over strut) which is the bulkhead

then repaired the top layer which is the panel the heater sits on and painted up

also painted up under wing

its now down the paint shop and im expecting it back on monday or teusday so i can start the refit
got most of the gold zinc done! looks awsome!

trying to be a bit diffenert, i want a larger throttle body and so went donw to my local scrappy and went through his parts bin and found this GM one. same outer diameter but just over 1/4" larger throttle plate


the engineer next door is going to bore this out to match. (blue line is just to give you an idea of how much bigger the hole needs to be.) and the hole on the throttle body need to be elonggated about 2mm each one apart from the top left hand one.

top left hand bolt hole is an odd one for the standard frst body so built the area up with weld


will takcle the throttle cable operation next but will be a while yet. may even dump this if i find something more suitable. i have a few spare inlet manifolds to play with lol!
thats it for now , cheers!

PPL, f*****g over music listners since 1934
- 285Andy
- Elite Post Master


- Posts: 4890
- Joined: Sun Aug 05, 2001 1:00 am
- Location: park bench. obviously: Drunk
- Your car: fiesta rs turbo
Car: 1991 Ford Fiesta RS Turbo
Re: a little bit of FRST engine bay restoration
Great work, Andy. FYI the TB flows enough for well over 400bhp,s o stepping up in size won't necessarily add anything but may harm response. It's the manifold that's poor 
- Excursion
- Bulletin Board User


- Posts: 15265
- Joined: Thu Jan 01, 1970 1:00 am
- Location: Skynet
- Your car: Ford Fiesta
Car: 1990 Ford Fiesta XR2i
- Dave G fsi
- Elite Post Master

- Posts: 2918
- Joined: Mon Feb 16, 2009 11:35 pm
- Location: Sheffield
- Your car: Mk1 FRS and FRST
Re: a little bit of FRST engine bay restoration
Excursion :Great work, Andy. FYI the TB flows enough for well over 400bhp,s o stepping up in size won't necessarily add anything but may harm response. It's the manifold that's poor
thats usefull to know! thanks mark
thanks fella's!

PPL, f*****g over music listners since 1934
- 285Andy
- Elite Post Master


- Posts: 4890
- Joined: Sun Aug 05, 2001 1:00 am
- Location: park bench. obviously: Drunk
- Your car: fiesta rs turbo
Car: 1991 Ford Fiesta RS Turbo
Re: a little bit of FRST engine bay restoration
good work mate, i bet there is no other road with 2x FRST'S in it 

- rob pace
- Elite Post Master

- Posts: 4702
- Joined: Fri May 06, 2005 2:10 pm
- Location: west wickham, kent
Re: a little bit of FRST engine bay restoration
must be the only one in England i reckon Rob 
got the car back today. here's some pics.
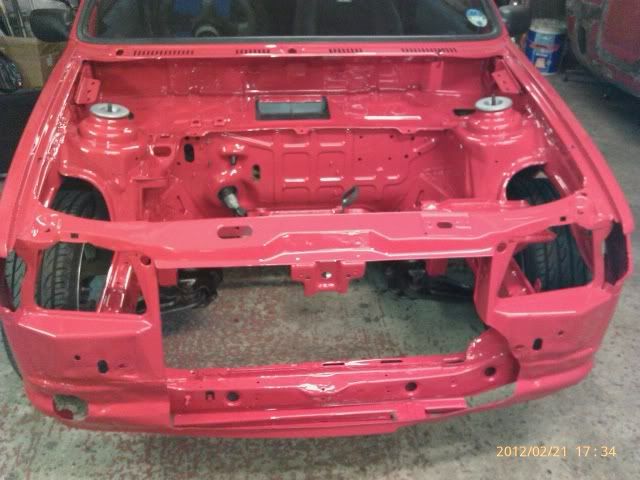
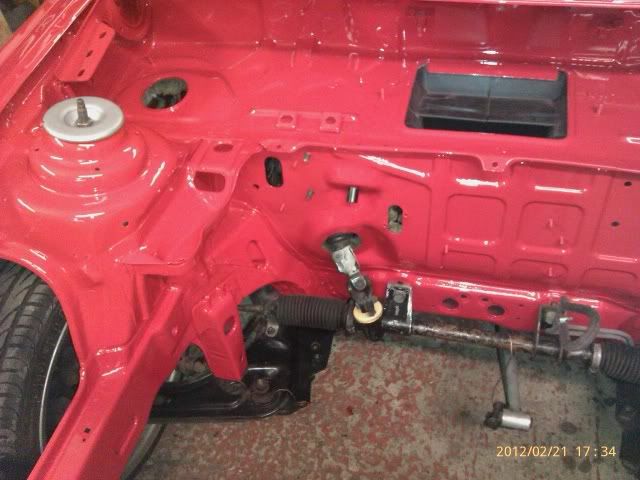
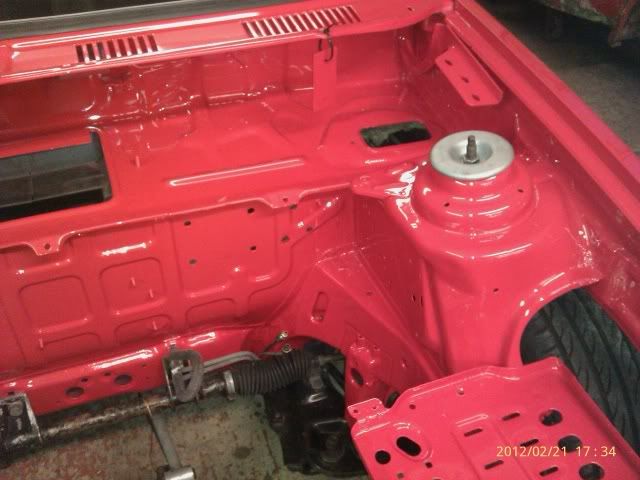
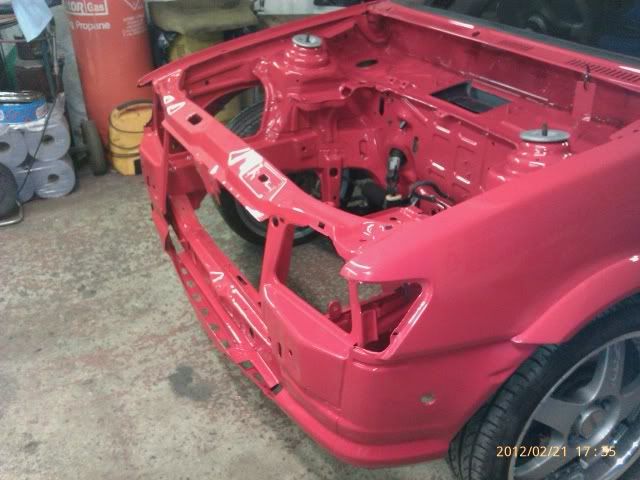
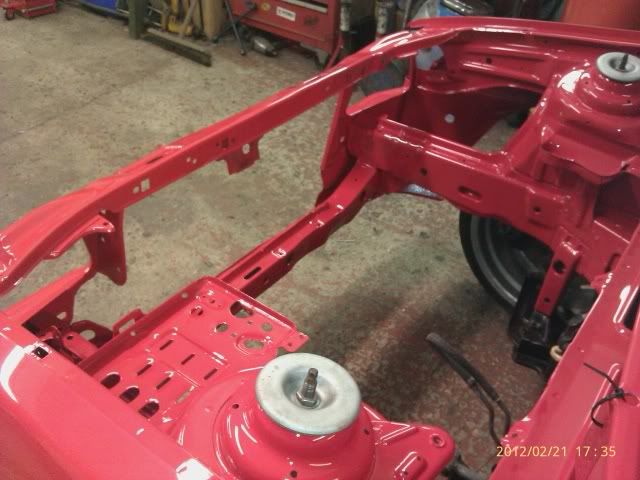
will get stuck in over the next few days re-fitting it
got the car back today. here's some pics.


will get stuck in over the next few days re-fitting it

PPL, f*****g over music listners since 1934
- 285Andy
- Elite Post Master


- Posts: 4890
- Joined: Sun Aug 05, 2001 1:00 am
- Location: park bench. obviously: Drunk
- Your car: fiesta rs turbo
Car: 1991 Ford Fiesta RS Turbo
- Dave G fsi
- Elite Post Master

- Posts: 2918
- Joined: Mon Feb 16, 2009 11:35 pm
- Location: Sheffield
- Your car: Mk1 FRS and FRST
- Ratspeed
- Elite Post Master

- Posts: 2787
- Joined: Sat Dec 08, 2007 4:54 pm
- Your car: Mk1 pop plus & Focus ESP
Re: a little bit of FRST engine bay restoration
looking good mate 
- jayrs
- Elite Post Master


- Posts: 31520
- Joined: Mon Apr 19, 2004 10:32 pm
- Location: I.O.W
- Your car: FRST, XR2, ST170, ST225
Car: 1991 Ford Fiesta RS Turbo
Re: a little bit of FRST engine bay restoration
aww thats gorgeous man! very fresh, dont damage it on the rebuild 

1800 Zetec 133bhp 140lbs/ft
mk2 pop 1.4i
- jonyb4
- Elite Post Master

- Posts: 9235
- Joined: Tue Aug 12, 2008 12:05 am
- Location: Port Talbot, South Wales
- Your car: Si 1.8, mk2 950, 2.0 capri
Car: 1995 Ford Fiesta Si 16v
Re: a little bit of FRST engine bay restoration
It takes me longer to get around to installing a dashboard 
 The joys of living 200 miles from your project
Great job Andy!
Great job Andy!
- Excursion
- Bulletin Board User


- Posts: 15265
- Joined: Thu Jan 01, 1970 1:00 am
- Location: Skynet
- Your car: Ford Fiesta
Car: 1990 Ford Fiesta XR2i
Re: a little bit of FRST engine bay restoration
now that is fresh!  cant put an unpainted engine back in there!


- Dave5300
- Post Master

- Posts: 625
- Joined: Sun Sep 19, 2010 2:05 pm
- Location: Kildare, Ireland
- Your car: Black FRST, Red mk5 zetec s
Re: a little bit of FRST engine bay restoration
hehe! thanks for your kind words all! i also hope i dont scratch it on fitting it up jony 
 i cant see me not making a mark on it somewhere though
got a little bit more done on the car over the last couple of days
here's some pics
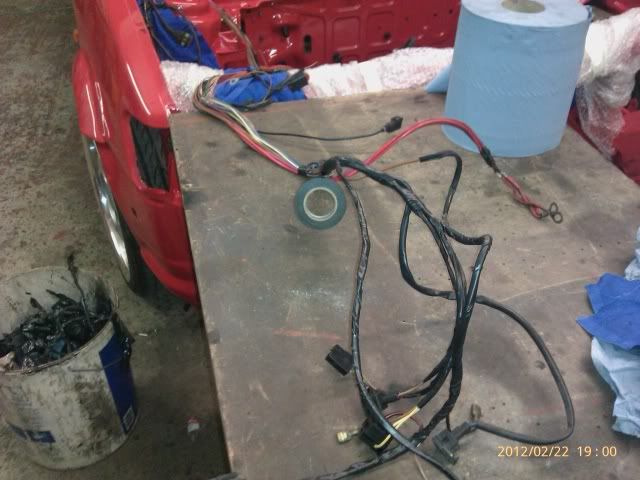
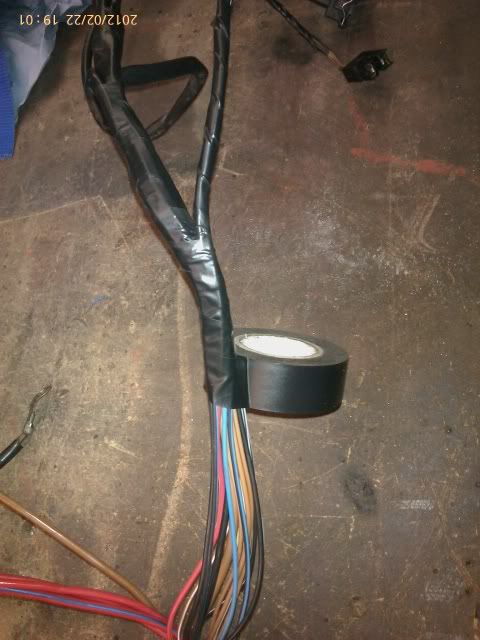
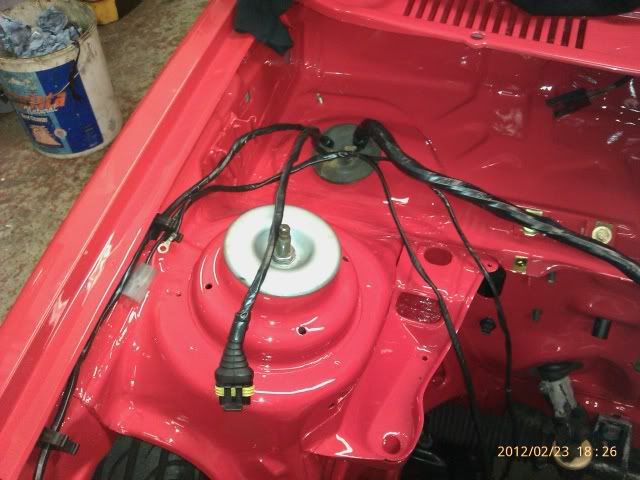
starting out, i stripped off all the old insulation tape from the main loom and re-taped it. it took ages because if its too slack, it looks whack and you got to get all the branches looking right or it'll again look toot
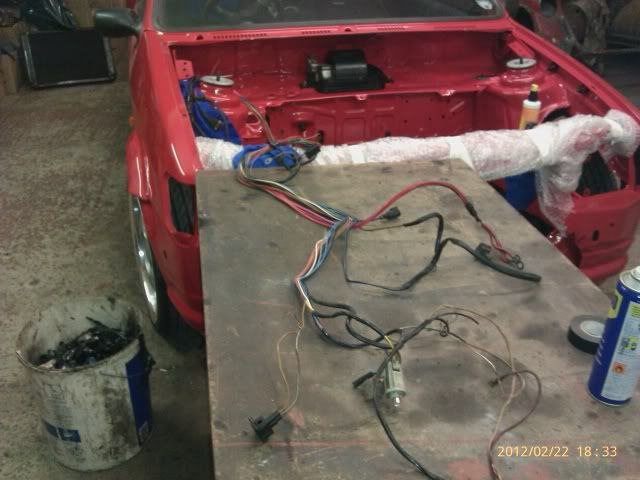
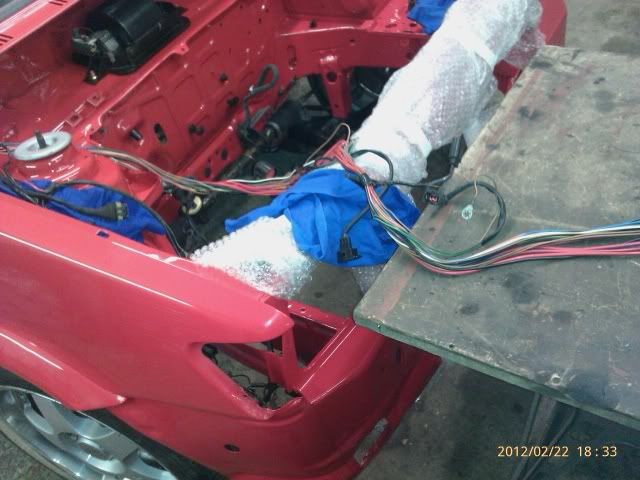
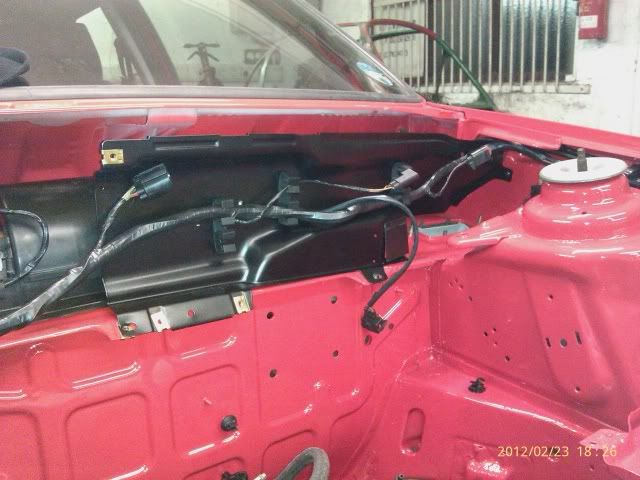
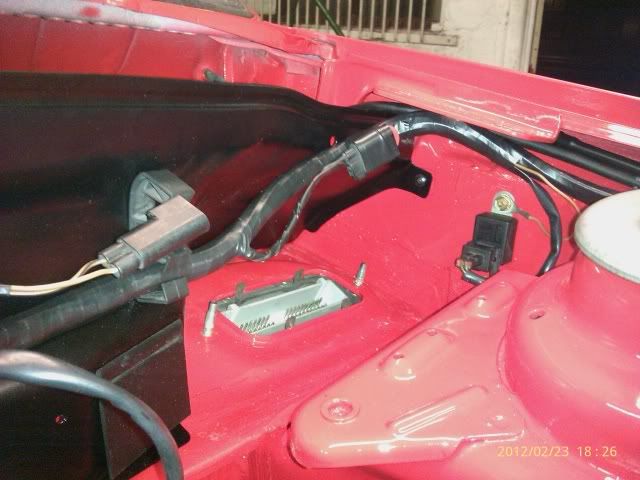
yes, your right, thats is a lambda sensor plug. ive fitted a lambda sensor in the exhaust so may help with mapping but if not ive fitted a air/fuel meter to plug it into. white plug next to it is for nitrous solonoids
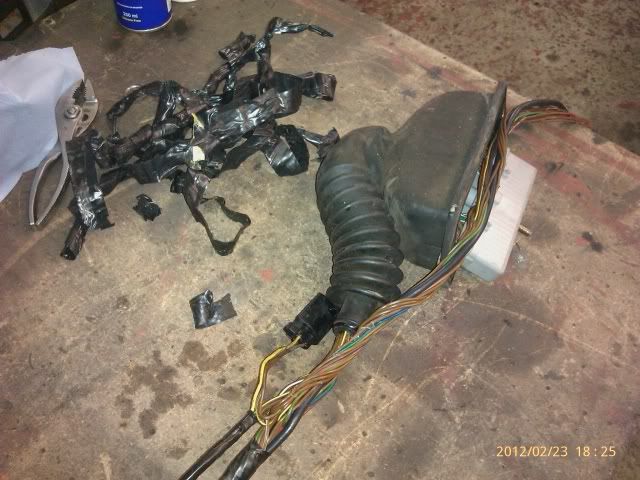
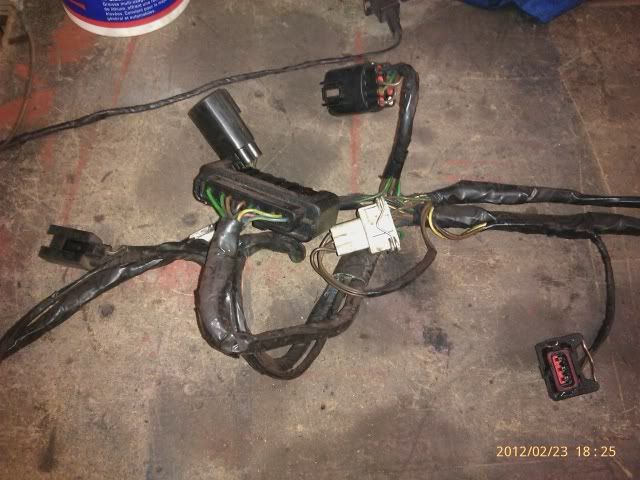
next im going to tackle the engine managment loom. proper scruffy
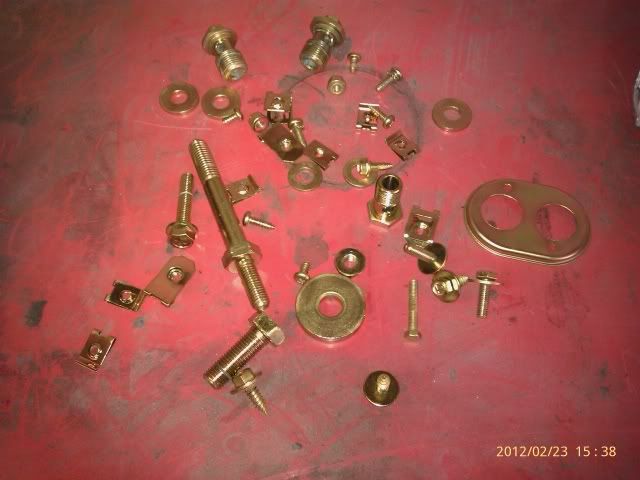
and lastly, got some more gold zinc done
cheers all!!
got a little bit more done on the car over the last couple of days
here's some pics
starting out, i stripped off all the old insulation tape from the main loom and re-taped it. it took ages because if its too slack, it looks whack


yes, your right, thats is a lambda sensor plug. ive fitted a lambda sensor in the exhaust so may help with mapping but if not ive fitted a air/fuel meter to plug it into. white plug next to it is for nitrous solonoids

next im going to tackle the engine managment loom. proper scruffy


and lastly, got some more gold zinc done

cheers all!!

PPL, f*****g over music listners since 1934
- 285Andy
- Elite Post Master


- Posts: 4890
- Joined: Sun Aug 05, 2001 1:00 am
- Location: park bench. obviously: Drunk
- Your car: fiesta rs turbo
Car: 1991 Ford Fiesta RS Turbo
- Dave G fsi
- Elite Post Master

- Posts: 2918
- Joined: Mon Feb 16, 2009 11:35 pm
- Location: Sheffield
- Your car: Mk1 FRS and FRST
Re: a little bit of FRST engine bay restoration
Looks great! Will you also add some new underbonnet decal?
- MircoJ
- Poster

- Posts: 154
- Joined: Mon Feb 20, 2012 11:29 am
- Location: Cologne, Germany
- Your car: Ford Fiesta MK3
Re: a little bit of FRST engine bay restoration
MicroJ, im not sure on decals yet. they can sometimes be a bit pricey and i dont think they would add to the bay anyway 
cheers for all your comments people
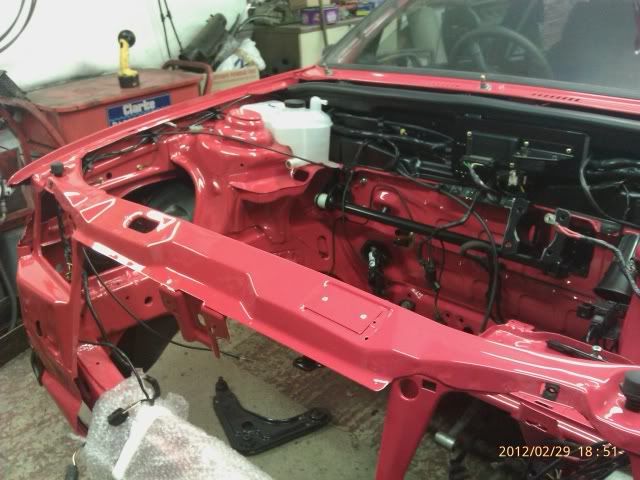
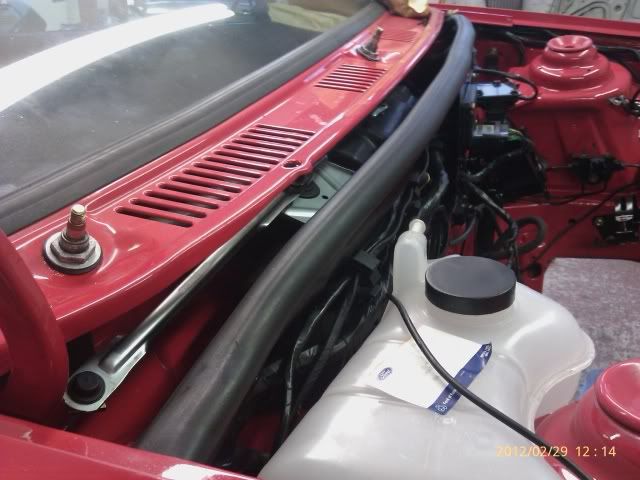
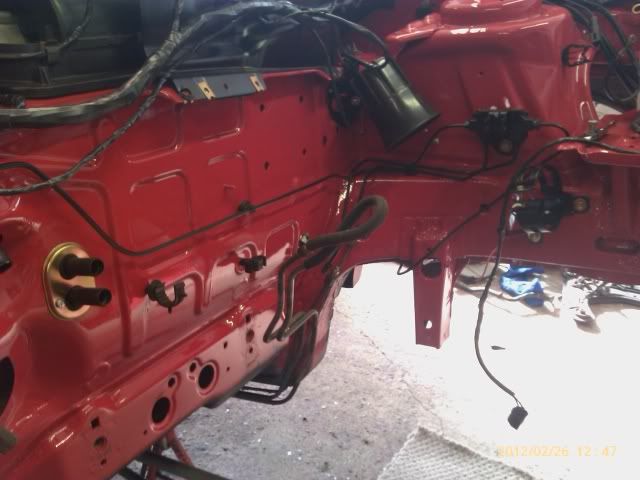
more piccys time! fitted up some more parts as they arrived back from powdercoating.
i had a bit of a problem with the wiper motor. i gave it to the platers with the alloy ends still in as they are pressed in and pinched. they kinda shrunk in the wash so to speak and the outer spindle nuts didnt fit anymore so i had to buy another one. this time though i just glass bead blasted it and clear laquered it. the inner spindles and linkage rods where zinced ok though so still used them.
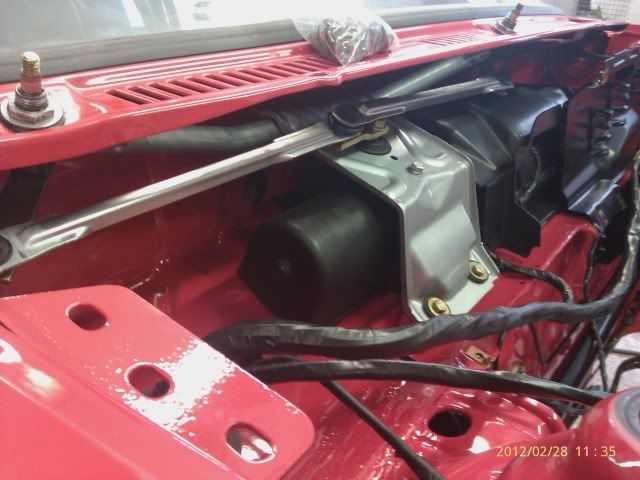
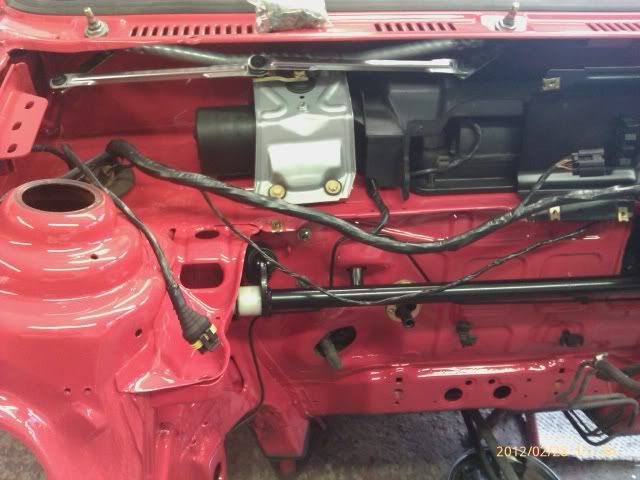
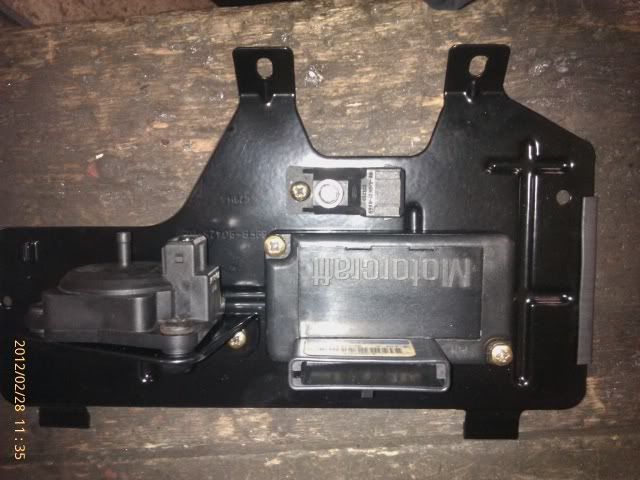
fitted all the rear bay panels. soo glad i got them done in matt finish as they turned out great! all the rest of the black so far is all in satin black including the sensor panel.
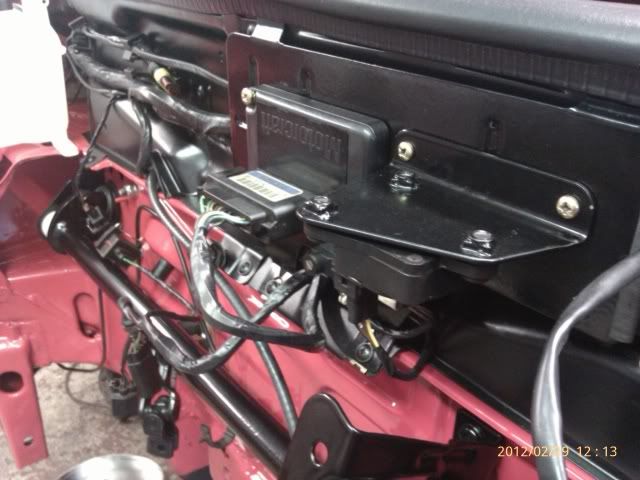
fitted lots of new parts like steering rack, universal joint, heater matrix, track rod ends, top mounts, antiroll bar bushes, brake pipes. still need to get fuel filter, servo and master cylinder, gearbox mounts, header tank cap, wiper blades and clutch cable to name a few off the top of my head...
here's the rest of the pics anyway
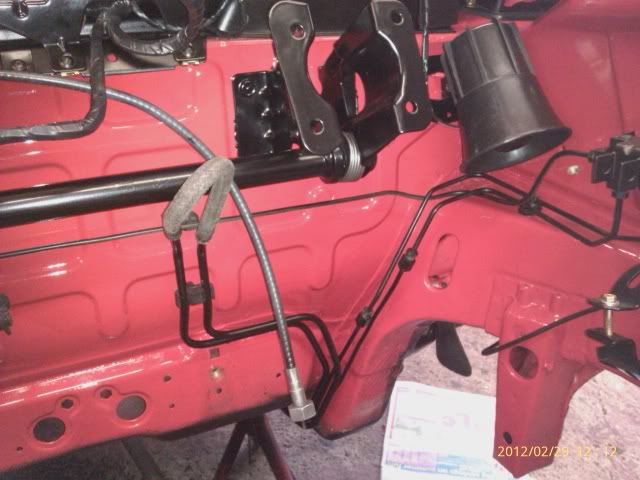
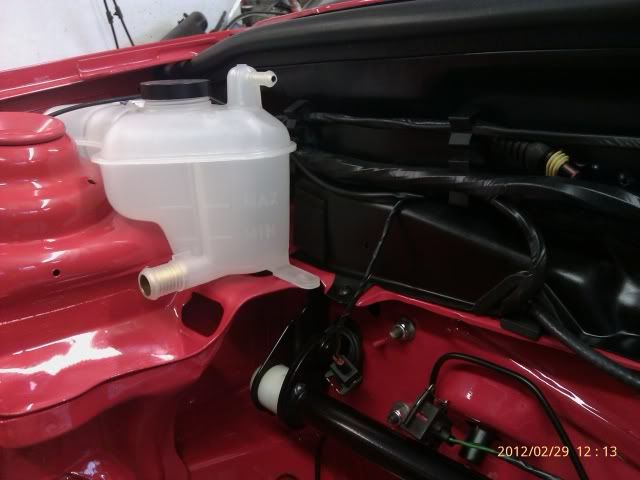
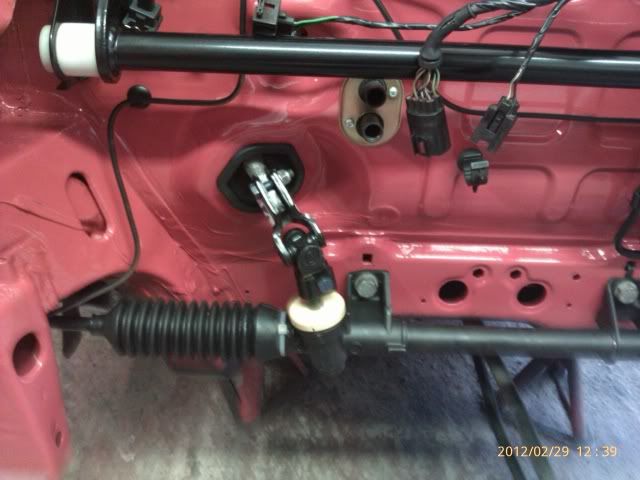
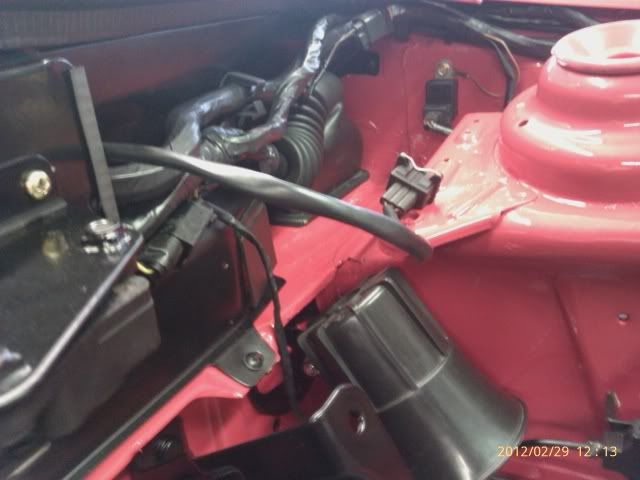
thats all for now. got a second round of powder coating going on atm. also still waiting to hear about pistons which is now holding me up for rebuilding the bottom end gearbox is done and ready to pick up and havnt sent the turbo away yet either.
cheers for now!!
cheers for all your comments people
more piccys time! fitted up some more parts as they arrived back from powdercoating.
i had a bit of a problem with the wiper motor. i gave it to the platers with the alloy ends still in as they are pressed in and pinched. they kinda shrunk in the wash so to speak and the outer spindle nuts didnt fit anymore so i had to buy another one. this time though i just glass bead blasted it and clear laquered it. the inner spindles and linkage rods where zinced ok though so still used them.


fitted all the rear bay panels. soo glad i got them done in matt finish as they turned out great! all the rest of the black so far is all in satin black including the sensor panel.


fitted lots of new parts like steering rack, universal joint, heater matrix, track rod ends, top mounts, antiroll bar bushes, brake pipes. still need to get fuel filter, servo and master cylinder, gearbox mounts, header tank cap, wiper blades and clutch cable to name a few off the top of my head...
here's the rest of the pics anyway


thats all for now. got a second round of powder coating going on atm. also still waiting to hear about pistons which is now holding me up for rebuilding the bottom end
cheers for now!!

PPL, f*****g over music listners since 1934
- 285Andy
- Elite Post Master


- Posts: 4890
- Joined: Sun Aug 05, 2001 1:00 am
- Location: park bench. obviously: Drunk
- Your car: fiesta rs turbo
Car: 1991 Ford Fiesta RS Turbo
Re: a little bit of FRST engine bay restoration
Great work looks lovely wish i could have done this to mine.
2014 Fiesta ST3 & Mk6 Fez ST
- mrorange2
- Elite Post Master

- Posts: 2807
- Joined: Sat Dec 03, 2005 7:42 pm
- Location: Doncaster\Scunthorpe
- Your car: 2014 Fiesta ST3, Mk6 Fez ST
62 posts • Page 1 of 2 • 1, 2


Twitter
The second 20th Anniversary article, a dive into the history of how the site came about is available here: https://t.co/kbCfZ4sf0R
17:44, 4th December 2021 Twitter Web App
To celebrate https://t.co/wXVkvJipaS being 20 years old this year, I've written a series of articles detailing the… https://t.co/B0vE0Y3KvP
17:42, 4th December 2021 Twitter Web App
Follow fiestaturbo.com on Twitter:
http://twitter.com/fiestaturbo/
Facebook
New article! fiestaturbo.com is 20 years old this year and I'm writing a series delving into the history of it. …
Saturday, 4th December 2021 12:49
Some awesome Escorts from the Fair - FORD FAIR 2021: ESCORT EXHIBITION - …
Sunday, 31st October 2021 17:05
All the best Focuses from Ford Fair - FORD FAIR 2021: FOCUS PEEKING - Which was your …
Thursday, 7th October 2021 22:21
Become a fan:
http://www.facebook.com/fiestaturbo/
RSS Feeds
Subscribe to the RSS feed
What is RSS?
RSS is a technology that lets you use special applications or modern browsers to notify you you when a site is updated. You can then read the updated content in that application or your browser.
To subscribe to these RSS feeds you need to copy the links above. For instructions on how to add it to the feeds you keep track of, consult the documentation of your RSS reader.