[[GUIDE]] DIY Wheel Refurb
17 posts • Page 1 of 1
[[GUIDE]] DIY Wheel Refurb
Hi all, just after atempting a refurb on my own wheels I thought I would do a guide for people to have a go at it themselfs. (1st guide so hope it is ok)
So here goes
Tools needed:
a variety of wet and dry sand paper, ranging from 80gritt to 1200gritt
primer
choise of wheel colour
laquer
filler (i used Davids Isopon P38)
thinners
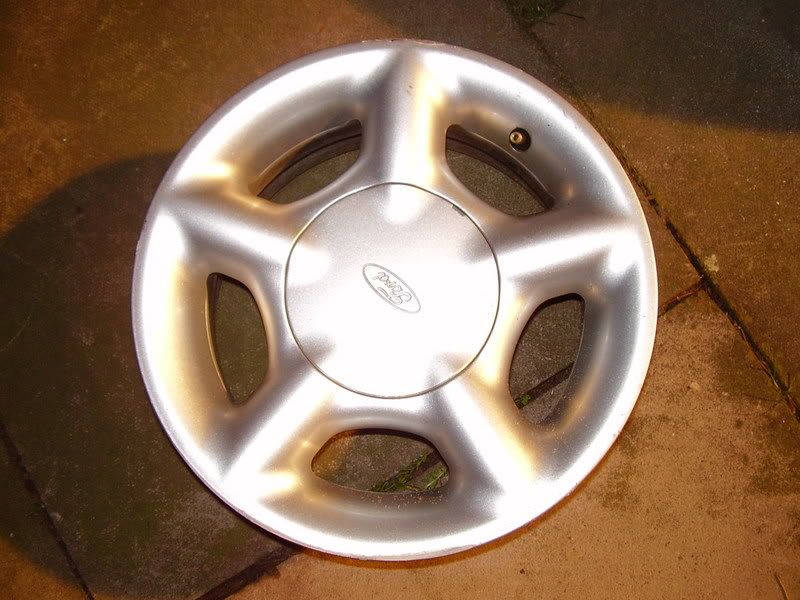
To start off with I got my wheel and got the tyre taken off, and I had this
I used 80gritt wet and dry sandpaper, and sanded the whole wheel down, inside and out. I then used some thinners and cleaned the whole wheel to get all the dirt and dust off the rim, I got he filler and placed it onto the kurbed mark on the rim, let it set and then sand with 300gritt wet paper, do this a few times to get all the imperfections out of the filler and to get the lines of the rim right. You then need to wet sand the whole wheel with anything above 300gritt, and clean off with thinners again to make sure the wheel is clean.
Now its time for some primer, dry your wheel a few light coats of primer, giving 15mins between each coat, and leave to dry, I left mine to dry overnight, then use your 1200gritt sand paper and wet sand the whole wheel untill really smooth.
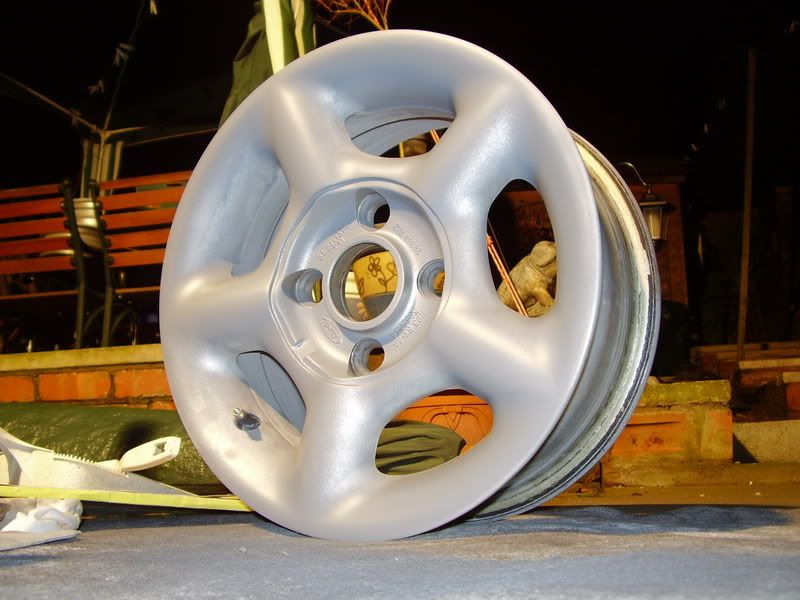
Now all that is done, make sure your wheel is clean, give it a few few coats of colour, leaving it 15mins between coats, make sure you cover all the wheel in equal layers, to get something like this
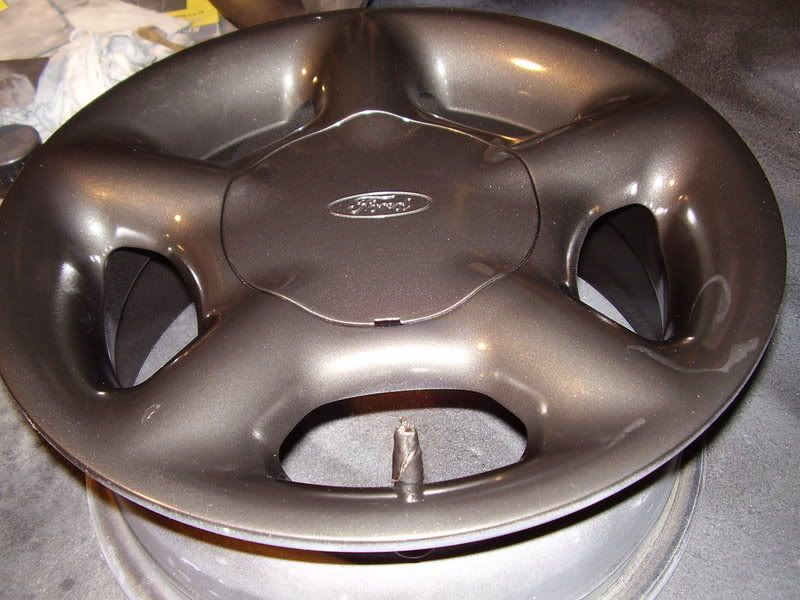
Give it a slight rub down with 1200gritt wet, clean off and five it one last coat of colour, and then leave to dry over night.
Then it is time for the laquer, take you time with this as I manged to mess one wheel up by over spraying and causing runs, so spray very thin layers, untill you are happy with the outcome, i have done 2 coats, but i will do another and 2 coats on the inside of the wheel.
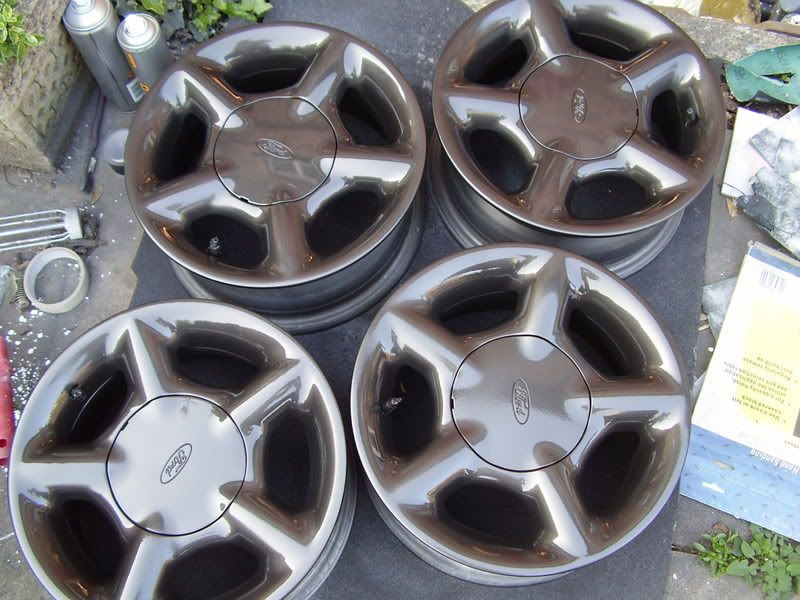
You should finally end up with something like this,
Do the same to the rest of the wheels and then you are done to fit them to your car and show them off
cheers
:: blade ::
So here goes
Tools needed:
a variety of wet and dry sand paper, ranging from 80gritt to 1200gritt
primer
choise of wheel colour
laquer
filler (i used Davids Isopon P38)
thinners
To start off with I got my wheel and got the tyre taken off, and I had this

I used 80gritt wet and dry sandpaper, and sanded the whole wheel down, inside and out. I then used some thinners and cleaned the whole wheel to get all the dirt and dust off the rim, I got he filler and placed it onto the kurbed mark on the rim, let it set and then sand with 300gritt wet paper, do this a few times to get all the imperfections out of the filler and to get the lines of the rim right. You then need to wet sand the whole wheel with anything above 300gritt, and clean off with thinners again to make sure the wheel is clean.
Now its time for some primer, dry your wheel a few light coats of primer, giving 15mins between each coat, and leave to dry, I left mine to dry overnight, then use your 1200gritt sand paper and wet sand the whole wheel untill really smooth.

Now all that is done, make sure your wheel is clean, give it a few few coats of colour, leaving it 15mins between coats, make sure you cover all the wheel in equal layers, to get something like this

Give it a slight rub down with 1200gritt wet, clean off and five it one last coat of colour, and then leave to dry over night.
Then it is time for the laquer, take you time with this as I manged to mess one wheel up by over spraying and causing runs, so spray very thin layers, untill you are happy with the outcome, i have done 2 coats, but i will do another and 2 coats on the inside of the wheel.
You should finally end up with something like this,

Do the same to the rest of the wheels and then you are done to fit them to your car and show them off
cheers
:: blade ::
Drives: Generation 6 Toyota Celica GT
- :: blade ::
- Elite Post Master

- Posts: 2138
- Joined: Tue May 24, 2005 3:32 pm
- Location: manchester
fooookin amazing!!! nice simple and different!
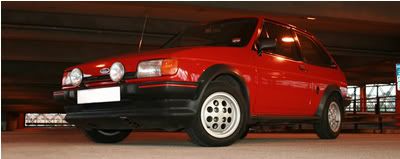
how did you manage to get the wheel cap lookin so new without sanding away the Ford logo or flooding it with paint if you kno what i mean. gotta go in the guides section though thanks!
how did you manage to get the wheel cap lookin so new without sanding away the Ford logo or flooding it with paint if you kno what i mean. gotta go in the guides section though thanks!
- taylor5788
- Elite Post Master

- Posts: 1635
- Joined: Sat Sep 03, 2005 1:00 am
- Location: southend
nope tyres arnt on yet, and im waiting for the weekend to get more laquer so i can do the inner part of the wheel, then i can get the tyres on, the filler was fine, not cracked or anything, but i will have to say when it gets on the road, they havnt really took that long, about a few days, but spread over a long period (about 2weeks) 
with the center cap, i only sanded it with 1200gritt to get the shine off, adn then gave it a few thin coats of paint on, and its turned out like that
Also on the last coat of colour put the center caps in so they will end up the same colour as the wheel and the paint is halfords own paint
:: blade ::
with the center cap, i only sanded it with 1200gritt to get the shine off, adn then gave it a few thin coats of paint on, and its turned out like that
Also on the last coat of colour put the center caps in so they will end up the same colour as the wheel
:: blade ::
Drives: Generation 6 Toyota Celica GT
- :: blade ::
- Elite Post Master

- Posts: 2138
- Joined: Tue May 24, 2005 3:32 pm
- Location: manchester
- Chris 2i
- Elite Post Master


- Posts: 4370
- Joined: Thu May 13, 2004 10:39 pm
- Location: Swindon
- jayrs
- Elite Post Master


- Posts: 31520
- Joined: Mon Apr 19, 2004 10:32 pm
- Location: I.O.W
- Your car: FRST, XR2, ST170, ST225
Car: 1991 Ford Fiesta RS Turbo
its gun metal grey, or as it says on the halfords tin for ford colours 'graphite grey' and cheers 
Drives: Generation 6 Toyota Celica GT
- :: blade ::
- Elite Post Master

- Posts: 2138
- Joined: Tue May 24, 2005 3:32 pm
- Location: manchester
- jonboisescort
- Elite Post Master


- Posts: 2055
- Joined: Mon Jun 11, 2007 1:48 pm
- Location: christchurch dorset
Car: 1994 Ford Fiesta
- jayrs
- Elite Post Master


- Posts: 31520
- Joined: Mon Apr 19, 2004 10:32 pm
- Location: I.O.W
- Your car: FRST, XR2, ST170, ST225
Car: 1991 Ford Fiesta RS Turbo
Re: [[GUIDE]] DIY Wheel Refurb
think i might do this, just untill i saved money for new alloys. looks rlly good mate.
thanks chris
thanks chris
- festafoff
- Poster

- Posts: 100
- Joined: Sun Aug 19, 2007 10:42 pm
Re: [[GUIDE]] DIY Wheel Refurb
Got any pics of them on the car? I've gotta refurb some mondy alloys soon, so this article is a great find! =]
PS: Lush colour!
PS: Lush colour!
- Lex_Mk4
- Poster

- Posts: 81
- Joined: Thu Jan 17, 2008 11:09 pm
17 posts • Page 1 of 1



Twitter
The second 20th Anniversary article, a dive into the history of how the site came about is available here: https://t.co/kbCfZ4sf0R
17:44, 4th December 2021 Twitter Web App
To celebrate https://t.co/wXVkvJipaS being 20 years old this year, I've written a series of articles detailing the… https://t.co/B0vE0Y3KvP
17:42, 4th December 2021 Twitter Web App
Follow fiestaturbo.com on Twitter:
http://twitter.com/fiestaturbo/
Facebook
New article! fiestaturbo.com is 20 years old this year and I'm writing a series delving into the history of it. …
Saturday, 4th December 2021 12:49
Some awesome Escorts from the Fair - FORD FAIR 2021: ESCORT EXHIBITION - …
Sunday, 31st October 2021 17:05
All the best Focuses from Ford Fair - FORD FAIR 2021: FOCUS PEEKING - Which was your …
Thursday, 7th October 2021 22:21
Become a fan:
http://www.facebook.com/fiestaturbo/
RSS Feeds
Subscribe to the RSS feed
What is RSS?
RSS is a technology that lets you use special applications or modern browsers to notify you you when a site is updated. You can then read the updated content in that application or your browser.
To subscribe to these RSS feeds you need to copy the links above. For instructions on how to add it to the feeds you keep track of, consult the documentation of your RSS reader.