My MK2 Turbo
- jayrs
- Elite Post Master


- Posts: 31520
- Joined: Mon Apr 19, 2004 10:32 pm
- Location: I.O.W
- Your car: FRST, XR2, ST170, ST225
Car: 1991 Ford Fiesta RS Turbo
I really should update this thread more often 
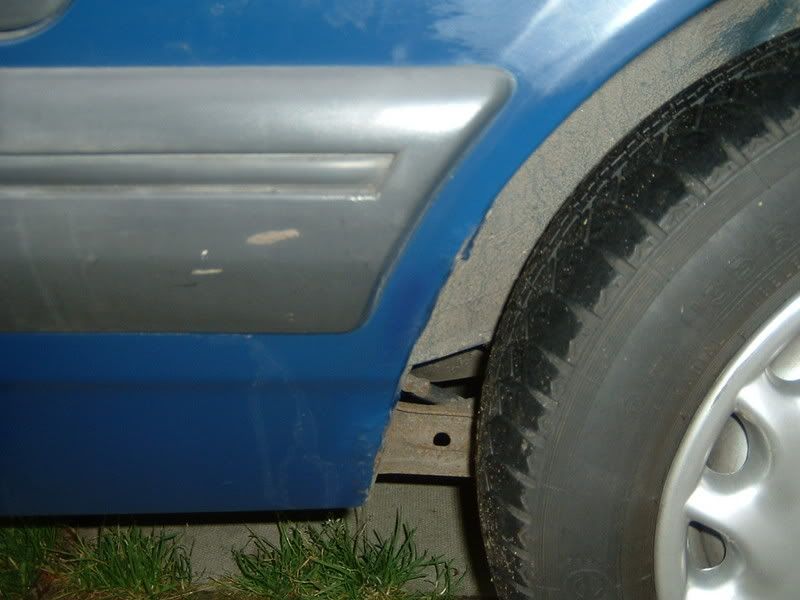
To start off I have bought a new shell I must admit its one of the best MK2 shell's I've seen. I have owned it for nearly 2 months now.
It is being sprayed white and having the kit put on to make a XR replica. My white XR shell is being scraped (monday whith a bit of luck)
anyways heres the pic of the shell
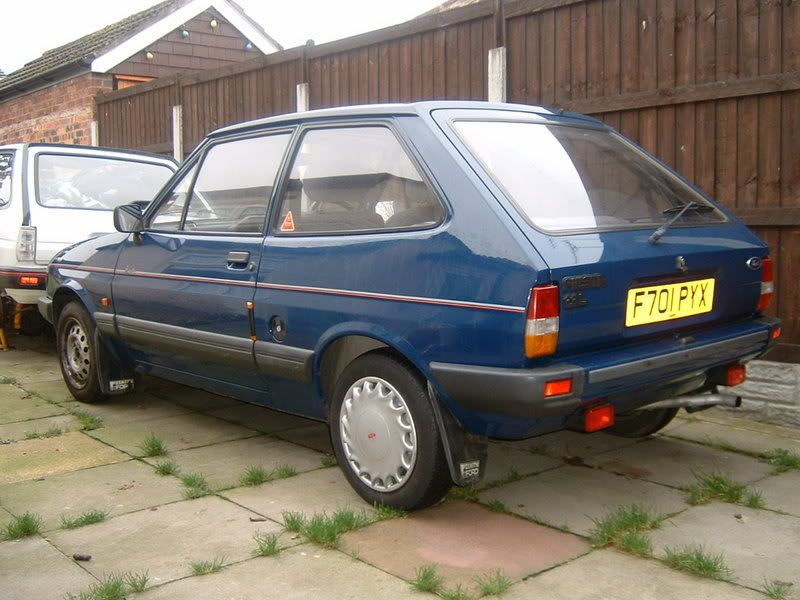
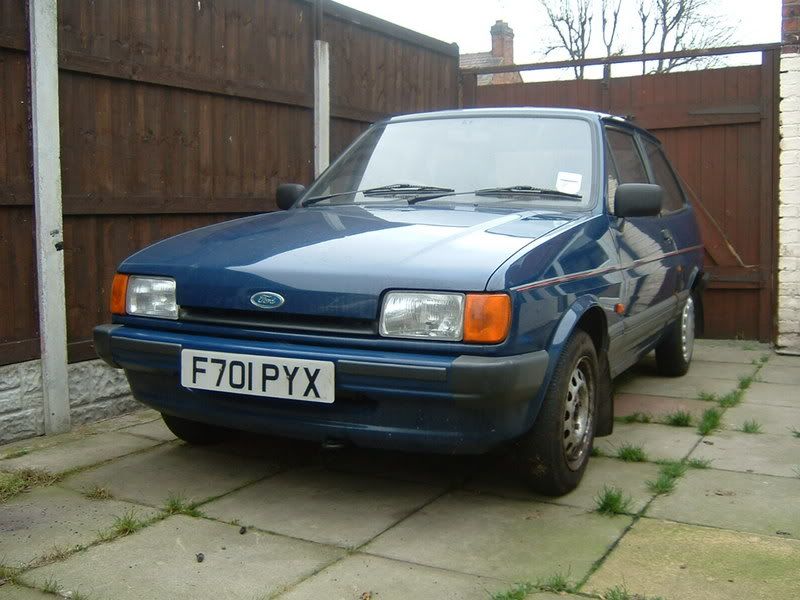
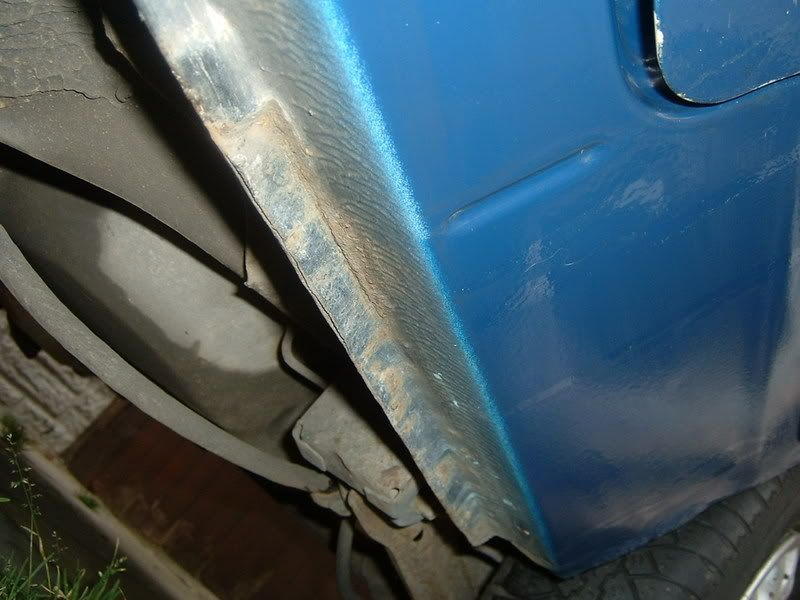
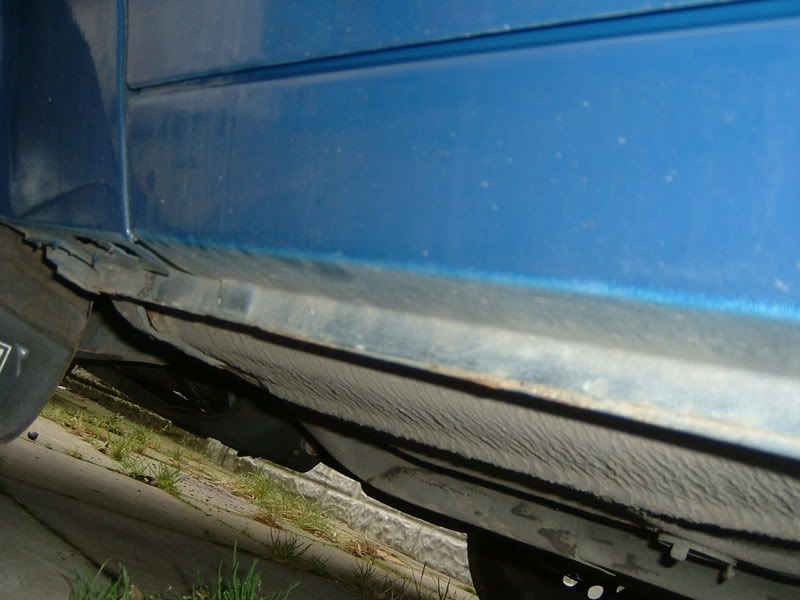
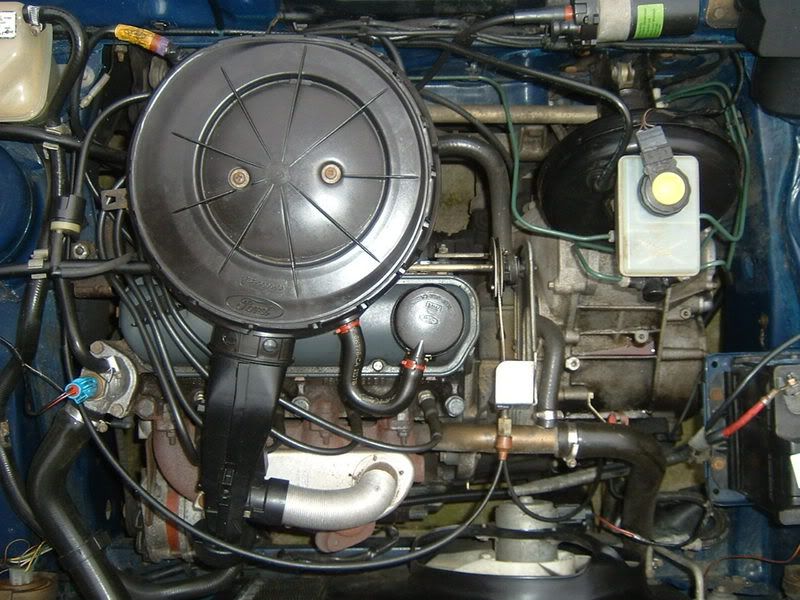
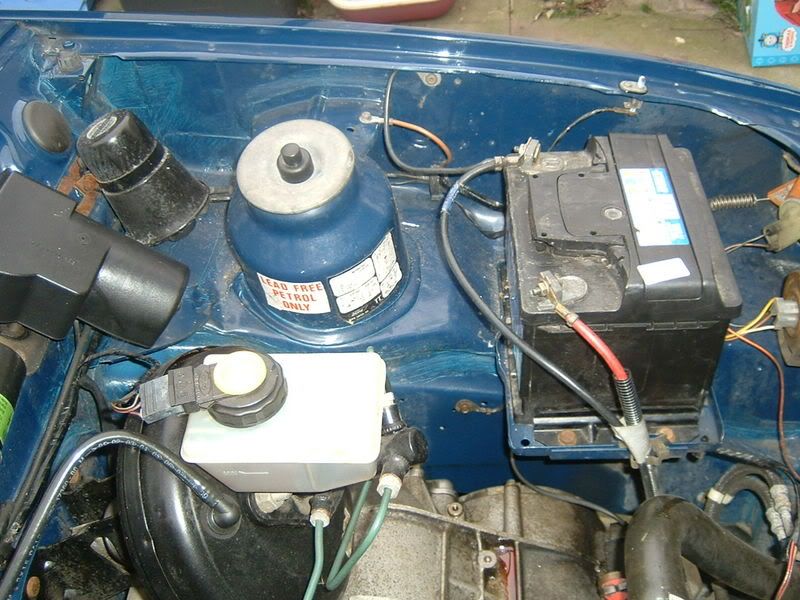
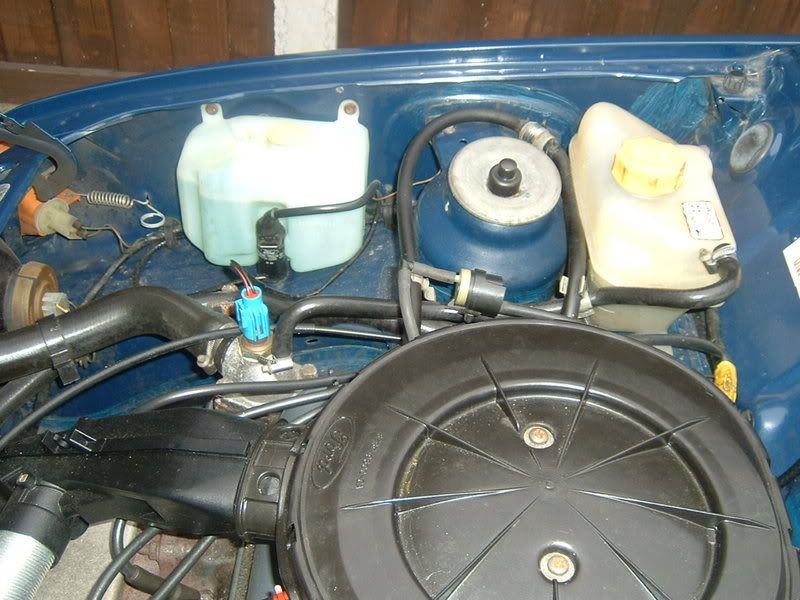
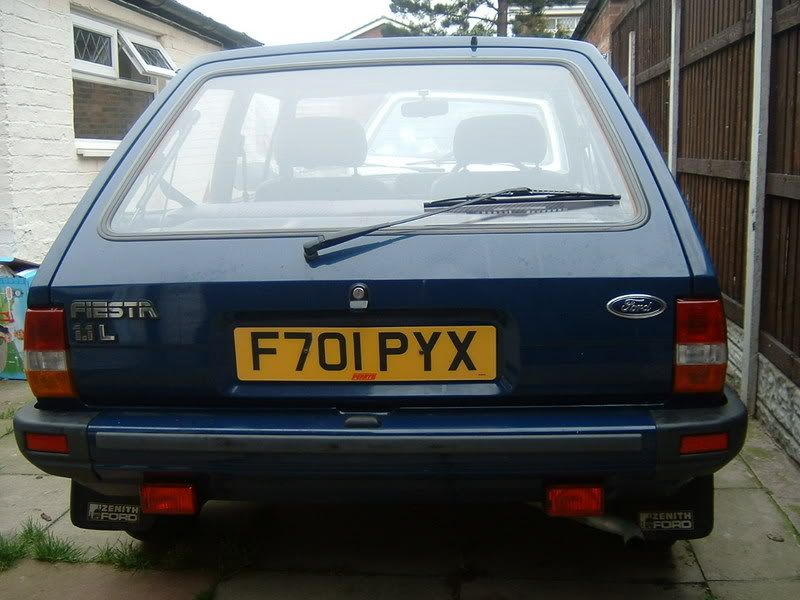
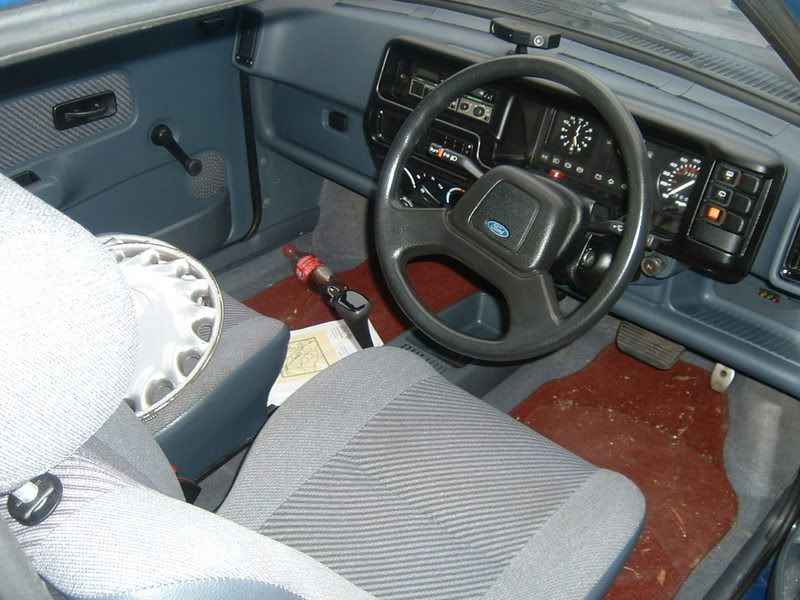
I have swoped most of the interior trim over from the white car to the new one to keep it dry because I dont have space to store it. Ive had to leave the original headlining in because it is different to the XR one. Think Im gonna paint it black with some frauds interior paint as Ive had some good dealings with it before.
heres the pic's
before
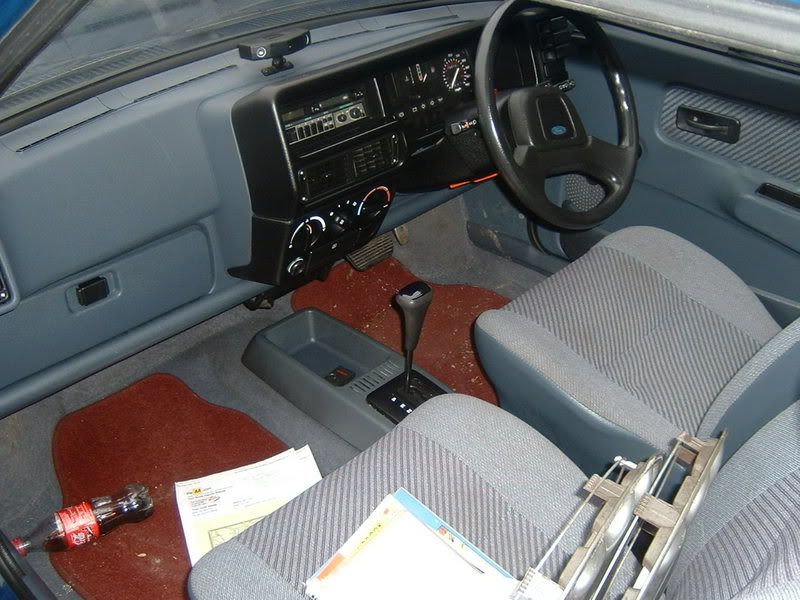
after ( very dirty but have new ones now thanks to stewie )
)
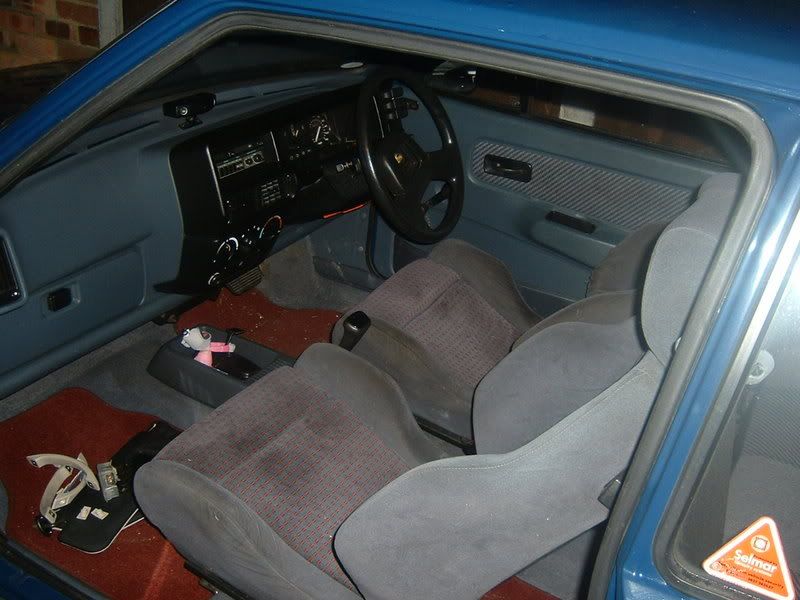
xr rear panel vs 1.1 door card not the different colour
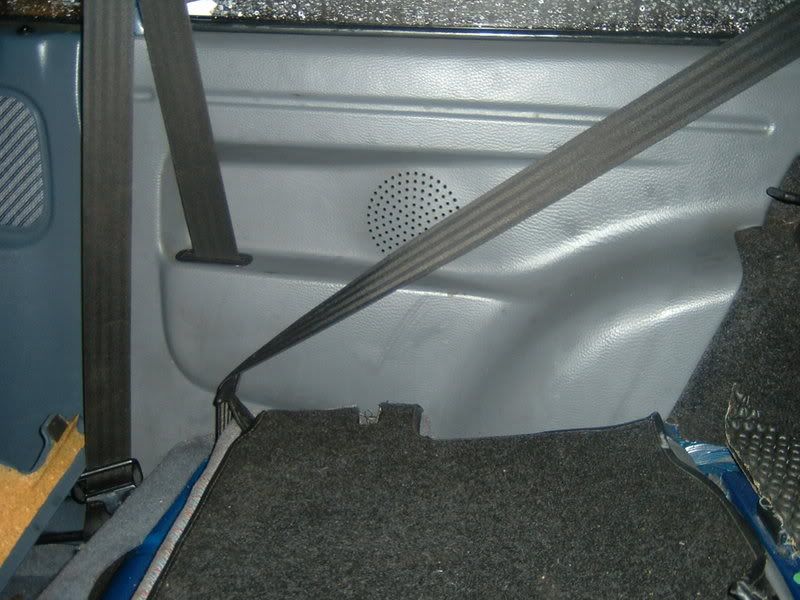
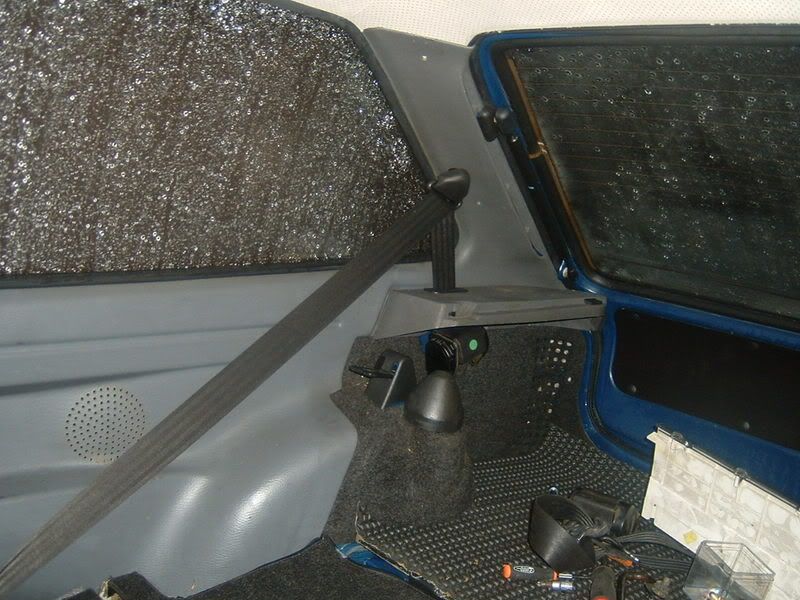
rear c pillar trim, parcel shelf holder and boot side capet trim. also sound deadener over rear wheel arch fitted.
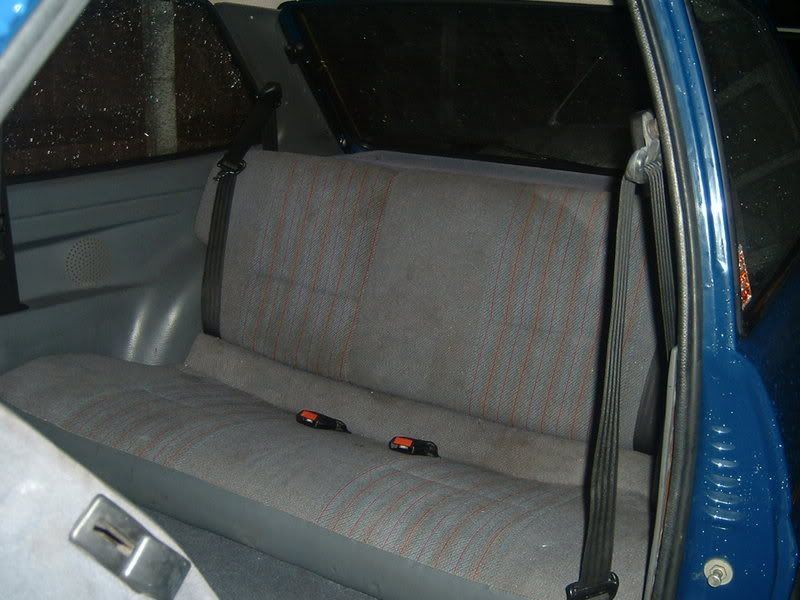
finaly rear seats (very dirty) Hoping to replace with retrimmed 88spec
I also have my friend coming to detail mask the rear window surround on before the white car goes.
on the parts list I have a new garret -31 actuator as they are smaller and a AP 4 paddle clutch
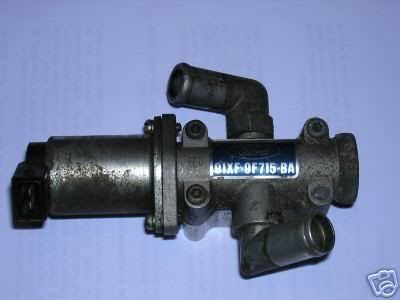
oh and also won a remote ISCV from a XR2i engine. This will sort out the issue with the manifold/iscv clearance
mart
To start off I have bought a new shell
It is being sprayed white and having the kit put on to make a XR replica. My white XR shell is being scraped (monday whith a bit of luck)
anyways heres the pic of the shell


I have swoped most of the interior trim over from the white car to the new one to keep it dry because I dont have space to store it. Ive had to leave the original headlining in because it is different to the XR one. Think Im gonna paint it black with some frauds interior paint as Ive had some good dealings with it before.
heres the pic's
before

after ( very dirty but have new ones now thanks to stewie

xr rear panel vs 1.1 door card not the different colour

rear c pillar trim, parcel shelf holder and boot side capet trim. also sound deadener over rear wheel arch fitted.

finaly rear seats (very dirty) Hoping to replace with retrimmed 88spec

I also have my friend coming to detail mask the rear window surround on before the white car goes.
on the parts list I have a new garret -31 actuator as they are smaller and a AP 4 paddle clutch
oh and also won a remote ISCV from a XR2i engine. This will sort out the issue with the manifold/iscv clearance

mart

- xrt-mart
- Senior Poster

- Posts: 280
- Joined: Thu Apr 22, 2004 1:23 pm
- Location: Crewe, Cheshire
scrapping it 
gotta say that is one clean mk2 there, shame its a auto, means ya got to take the pedal box out of the xr now
gotta say that is one clean mk2 there, shame its a auto, means ya got to take the pedal box out of the xr now
- jayrs
- Elite Post Master


- Posts: 31520
- Joined: Mon Apr 19, 2004 10:32 pm
- Location: I.O.W
- Your car: FRST, XR2, ST170, ST225
Car: 1991 Ford Fiesta RS Turbo
- jayrs
- Elite Post Master


- Posts: 31520
- Joined: Mon Apr 19, 2004 10:32 pm
- Location: I.O.W
- Your car: FRST, XR2, ST170, ST225
Car: 1991 Ford Fiesta RS Turbo
cool
many years ago when i had a old silver xr2 i was waiting to be picked up i attacket it with a axe and a concreat block.
first time i removed a front arch spat with a blcok i must say
and a axe is great fun, cut through rearpanel and inner wheel arch like it was paper

i was young at the time though
many years ago when i had a old silver xr2 i was waiting to be picked up i attacket it with a axe and a concreat block.
first time i removed a front arch spat with a blcok i must say
and a axe is great fun, cut through rearpanel and inner wheel arch like it was paper
i was young at the time though
- jayrs
- Elite Post Master


- Posts: 31520
- Joined: Mon Apr 19, 2004 10:32 pm
- Location: I.O.W
- Your car: FRST, XR2, ST170, ST225
Car: 1991 Ford Fiesta RS Turbo
Doh just realised I forgot to take the picture 
The white car has gone now to so its to late.
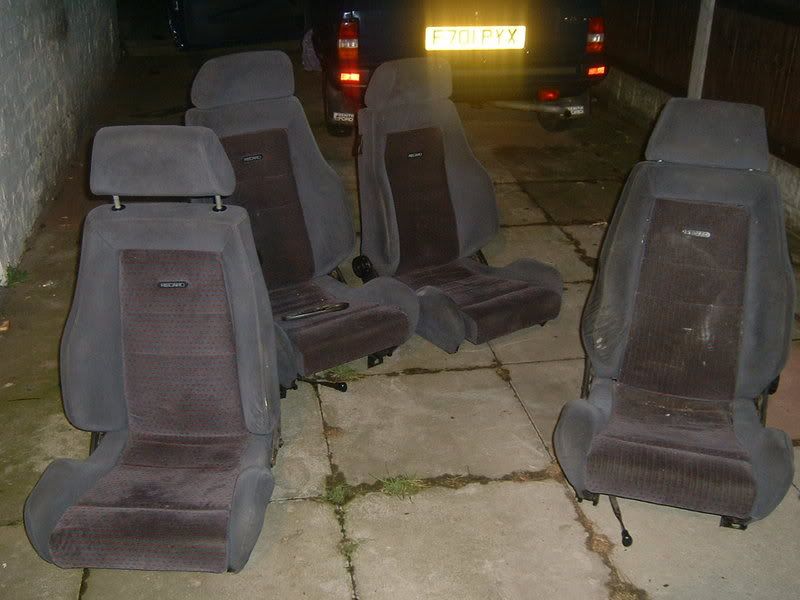
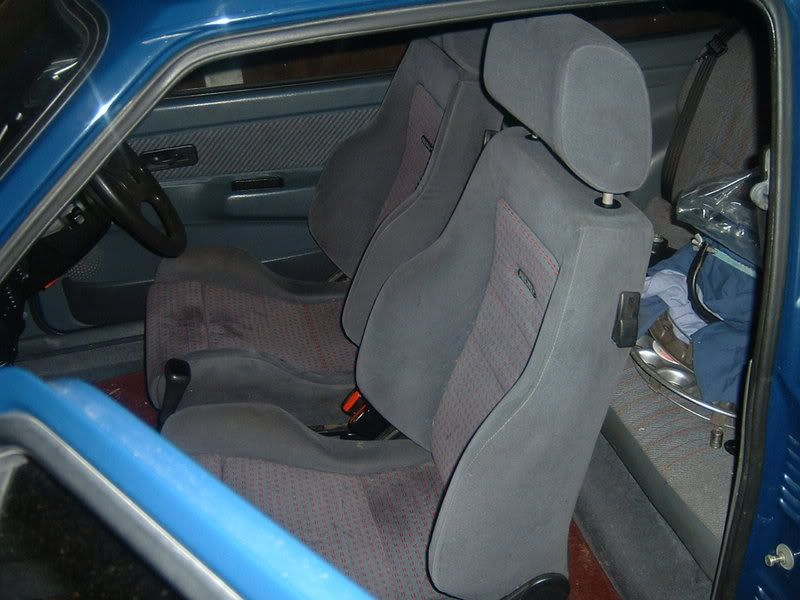
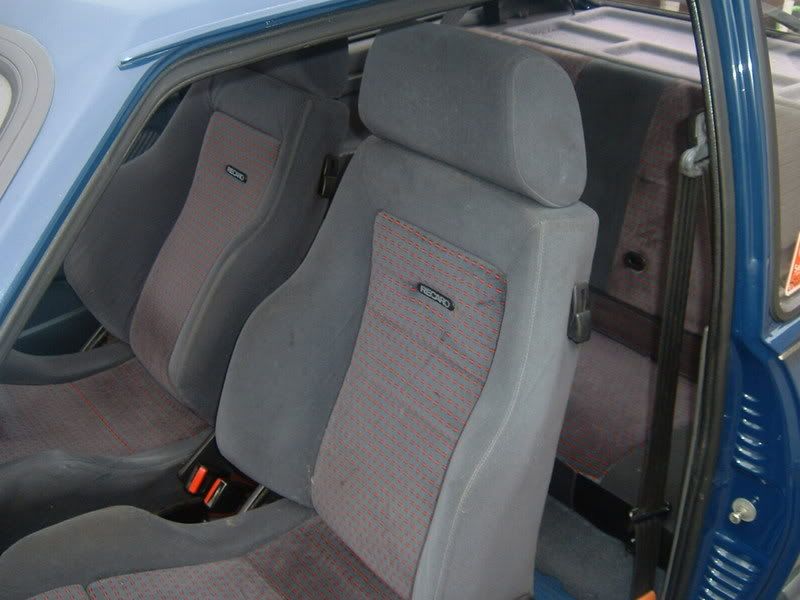
Anyway, I've been trying to make a good set of front seats out of two sets I've got. I have successfully managed to get a good pair, although they are both passenger seats but aren't they all
this is what it looked like earlier in the week (look at the original f**cked one on the right!!!)
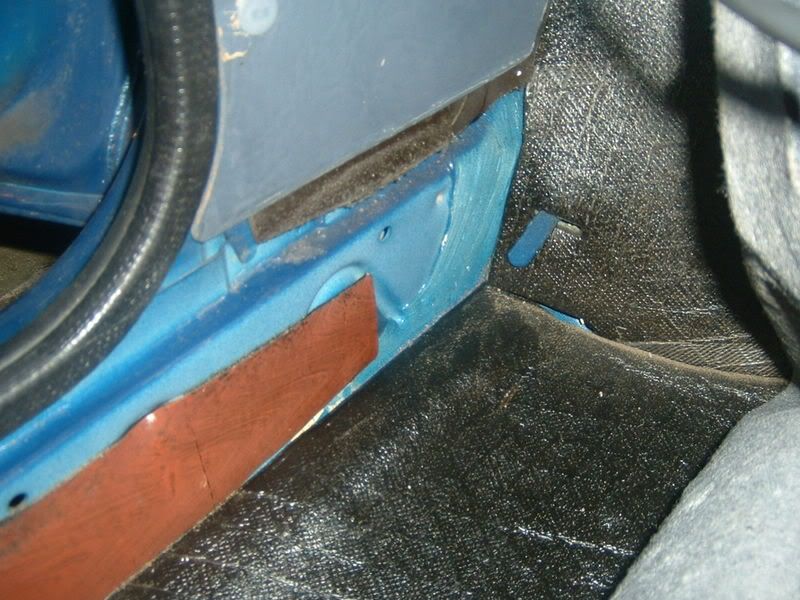
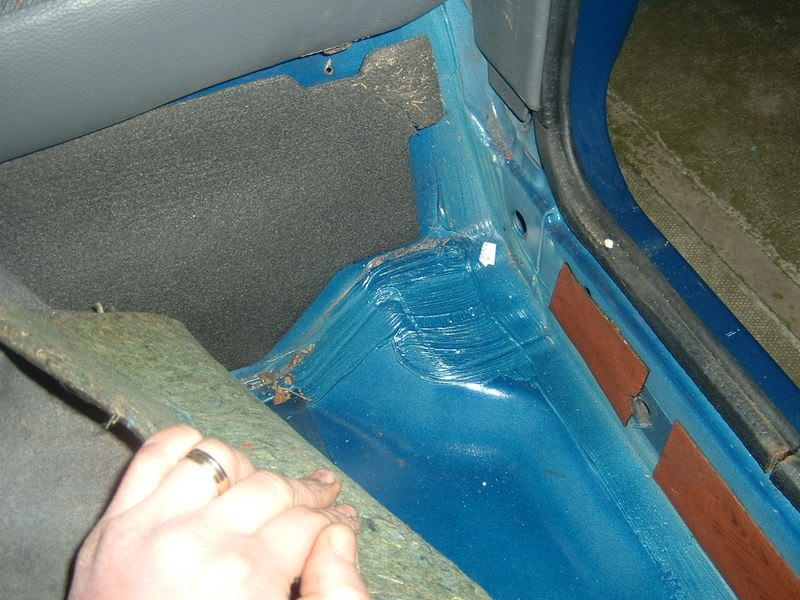
thought id take a look under the carpet too while the seat was out. very impressed again
and ended up with this
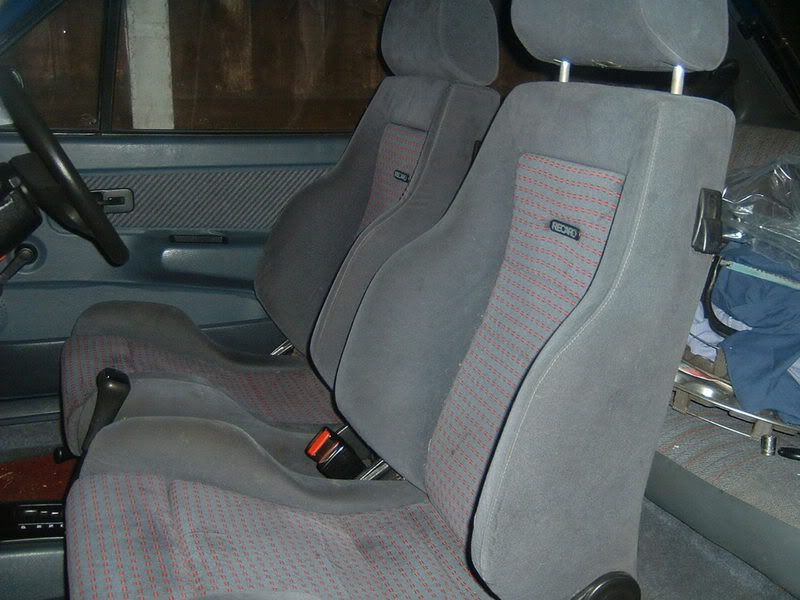

mart
The white car has gone now to so its to late.
Anyway, I've been trying to make a good set of front seats out of two sets I've got. I have successfully managed to get a good pair, although they are both passenger seats but aren't they all
this is what it looked like earlier in the week (look at the original f**cked one on the right!!!)

thought id take a look under the carpet too while the seat was out. very impressed again


and ended up with this


mart

- xrt-mart
- Senior Poster

- Posts: 280
- Joined: Thu Apr 22, 2004 1:23 pm
- Location: Crewe, Cheshire
doh no pic 
shes a clean beast mate,, im hating it, im watch a couple of mk2 topics and it so makes me wanna get another one
but i cant
shes a clean beast mate,, im hating it, im watch a couple of mk2 topics and it so makes me wanna get another one
but i cant
- jayrs
- Elite Post Master


- Posts: 31520
- Joined: Mon Apr 19, 2004 10:32 pm
- Location: I.O.W
- Your car: FRST, XR2, ST170, ST225
Car: 1991 Ford Fiesta RS Turbo
- jayrs
- Elite Post Master


- Posts: 31520
- Joined: Mon Apr 19, 2004 10:32 pm
- Location: I.O.W
- Your car: FRST, XR2, ST170, ST225
Car: 1991 Ford Fiesta RS Turbo
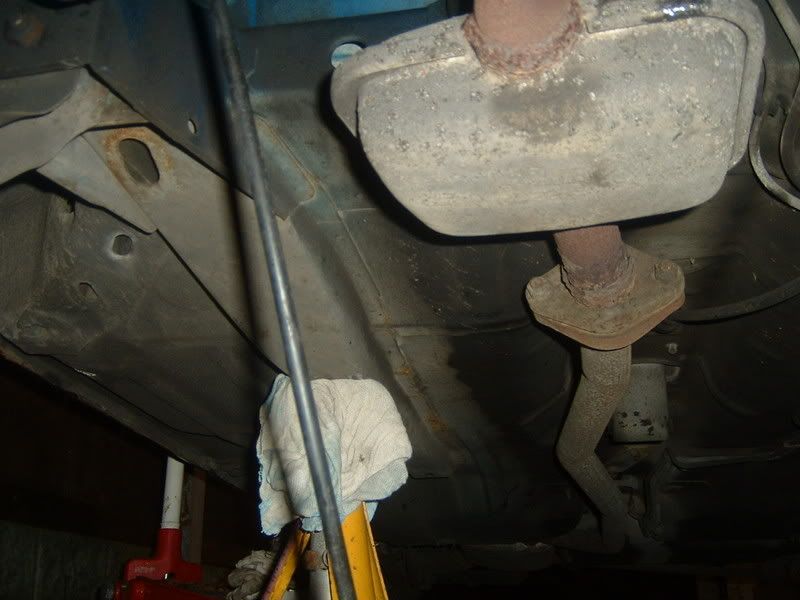
I have managed to take some of the engine parts out recently because I was feeling bored. So took a few pics while I was there 
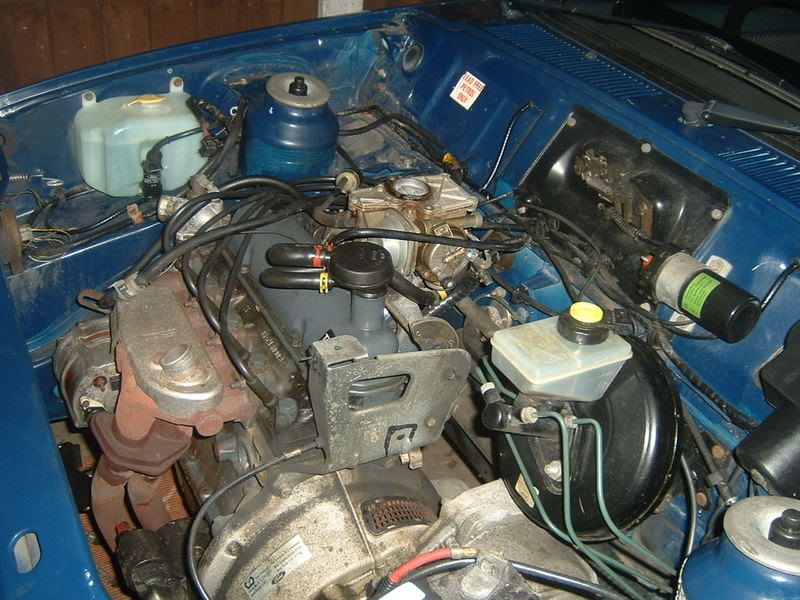
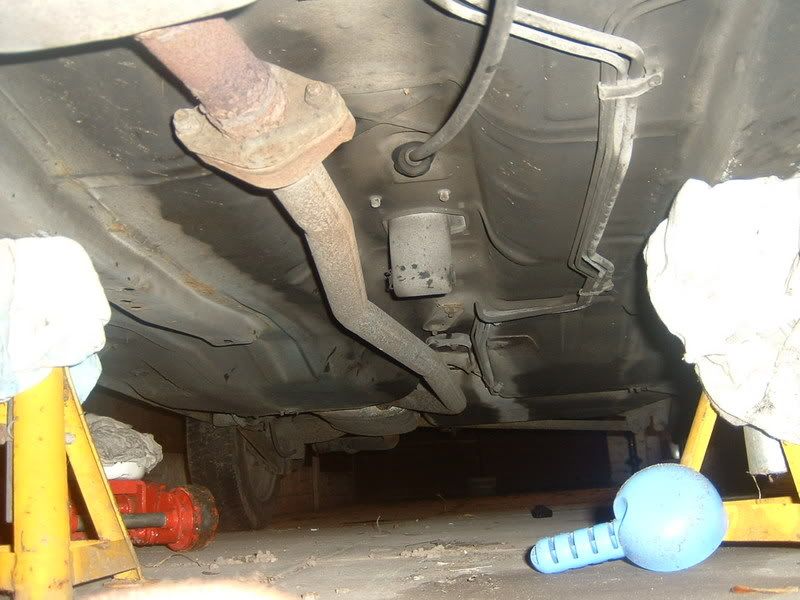
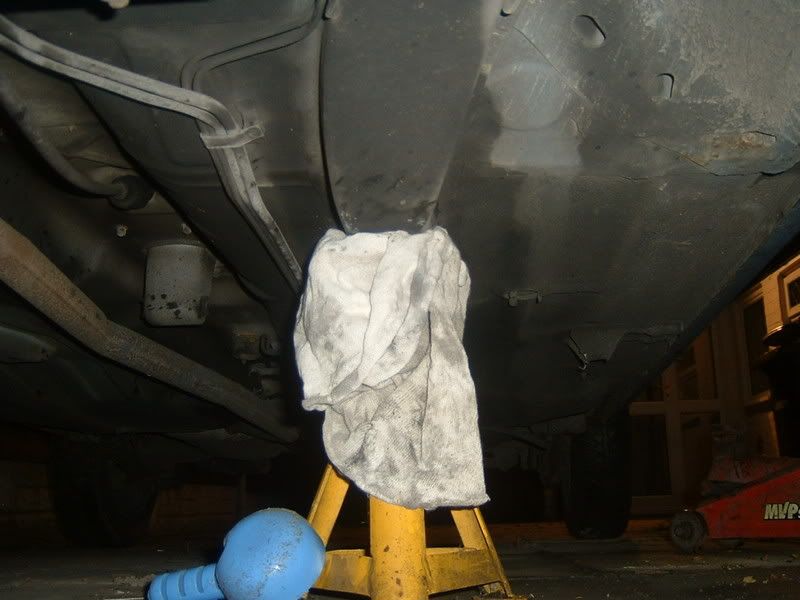
Now I have managed to source some rear seats from neilfree ( thanks again mate!! ) Just need to make some modifications to fit them as there MK1 items. The bottom piece fits fine but the catch area is smaller so needs the mk1 piece bolting on and the hinge is different but I don't know what I need to rectify this?
here is a pic anyhow
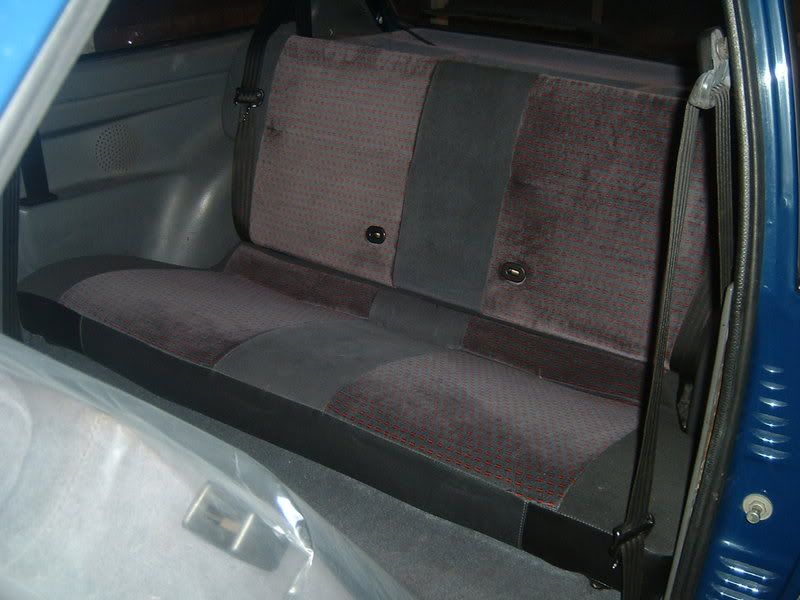
just need to change the carpet now as its bluer than the XR one and change to xr front door cards which are having a splash of 88-spec red dotted material added to them to match everything else


Now I have managed to source some rear seats from neilfree ( thanks again mate!! ) Just need to make some modifications to fit them as there MK1 items. The bottom piece fits fine but the catch area is smaller so needs the mk1 piece bolting on and the hinge is different but I don't know what I need to rectify this?
here is a pic anyhow

just need to change the carpet now as its bluer than the XR one and change to xr front door cards which are having a splash of 88-spec red dotted material added to them to match everything else

- xrt-mart
- Senior Poster

- Posts: 280
- Joined: Thu Apr 22, 2004 1:23 pm
- Location: Crewe, Cheshire
- Excursion
- Bulletin Board User


- Posts: 15265
- Joined: Thu Jan 01, 1970 1:00 am
- Location: Skynet
- Your car: Ford Fiesta
Car: 1990 Ford Fiesta XR2i
Catch those tiny bits of rust before they spread and go mad with some waxoil and that shell will stay clean for years to come!! 
You can use my car when you prise the keys out of my cold dead hands
- Sphinx
- Elite Post Master


- Posts: 8815
- Joined: Mon Nov 05, 2001 12:00 am
- Location: South Drives: depends on the week
I will be sorting the rust out along with the full respray and lots of wax oil over the summer. 
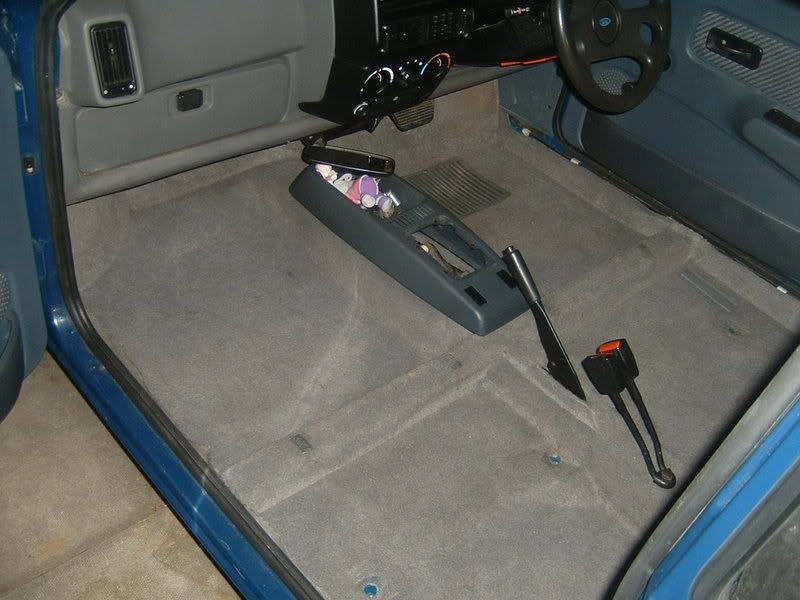
Right well I decided to change the carpet because it was blueish like the rest of the interior :roll:
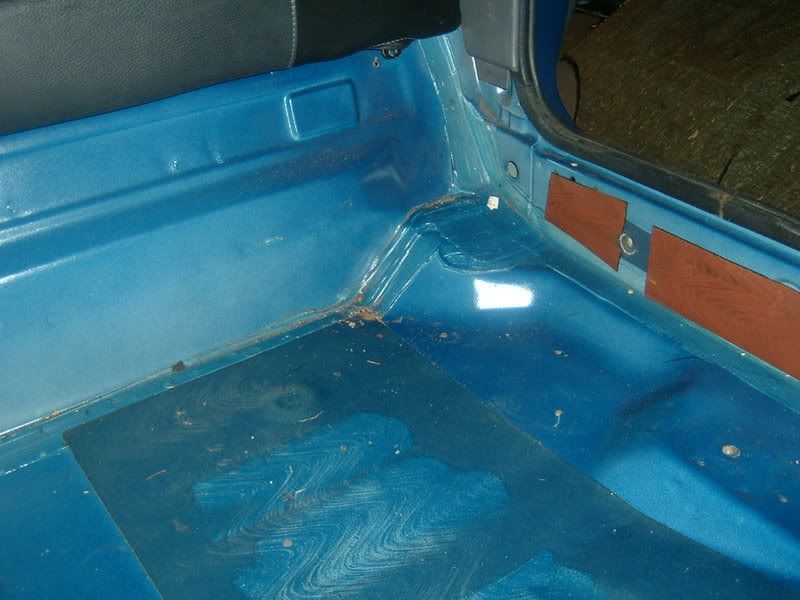
First of all removed the carpet and sound deadener to have a look at the floor. I was impressed
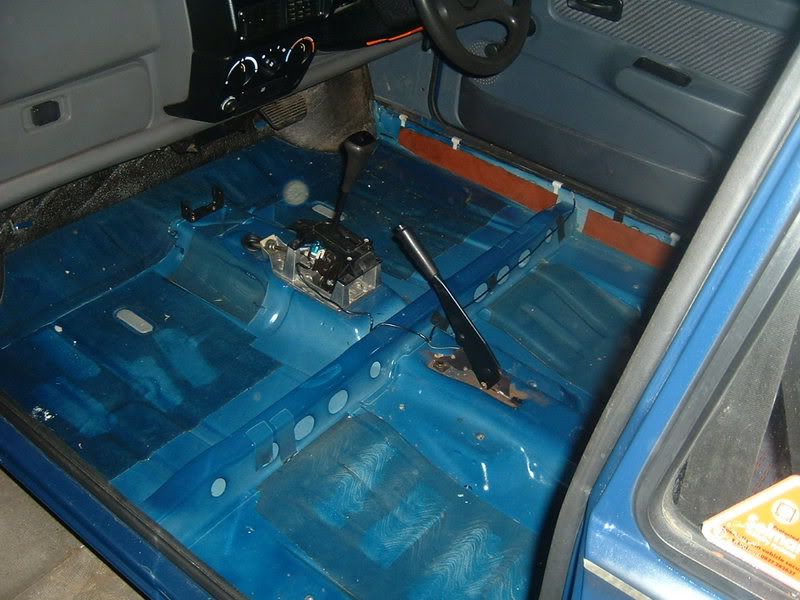
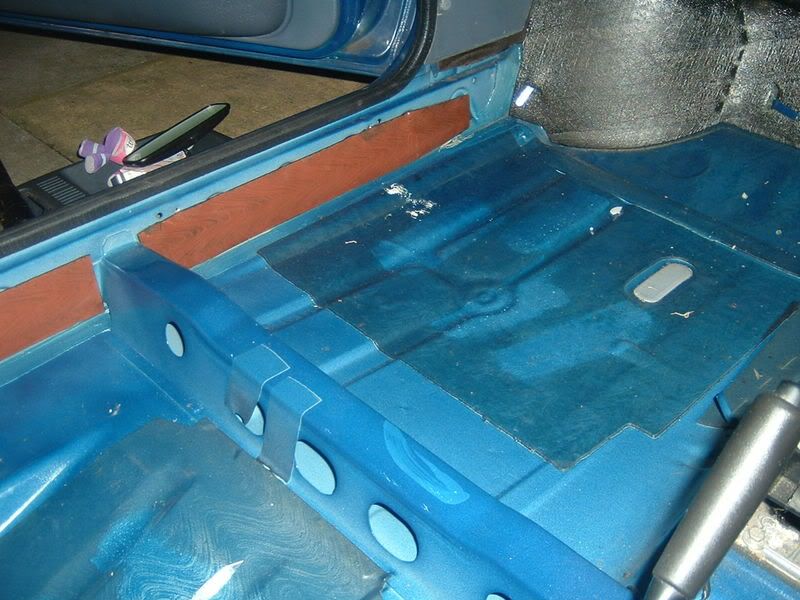
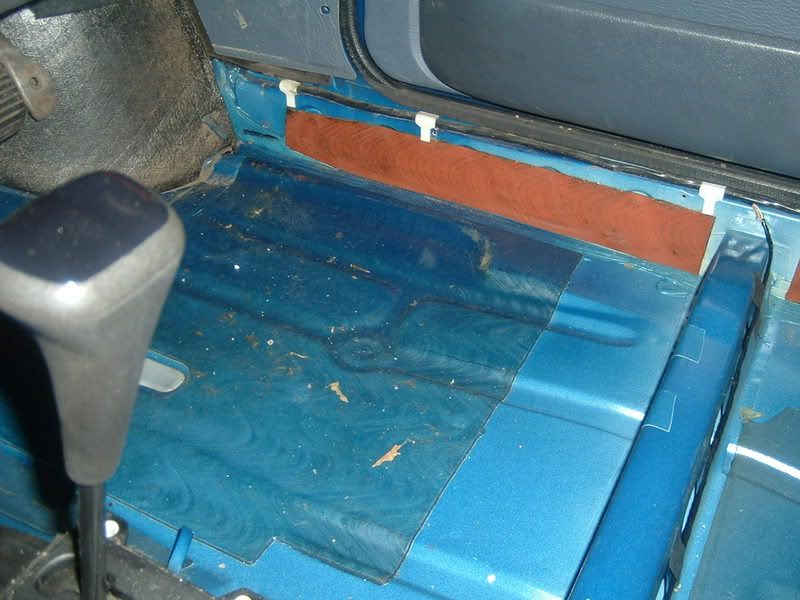
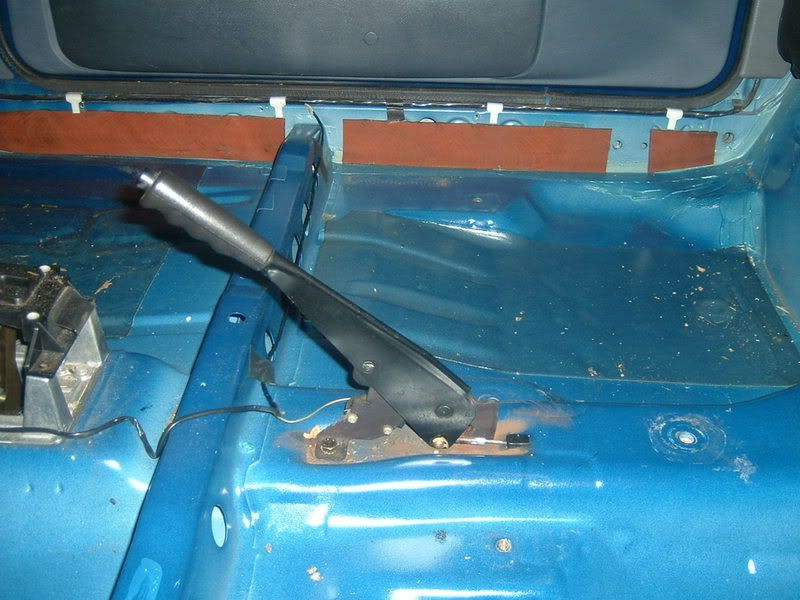
and the xr grey dash, clock set and steering wheel
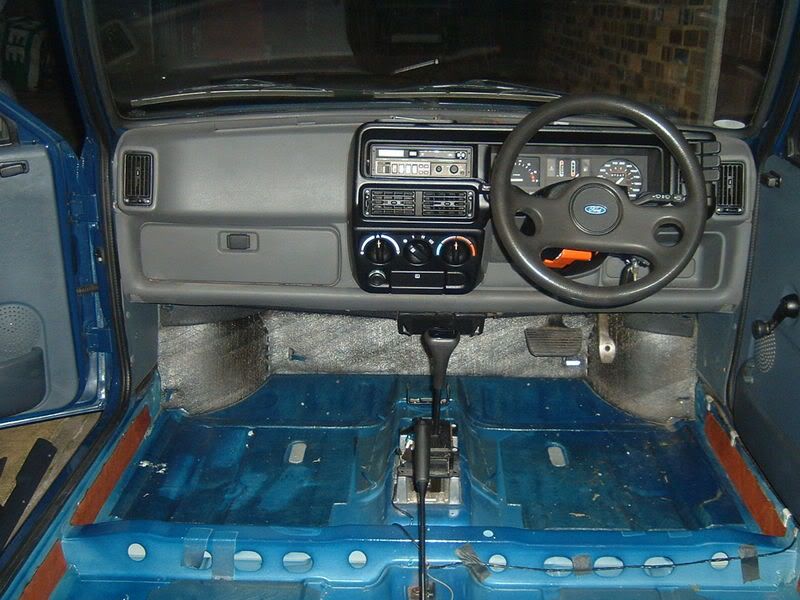
with grey carpet fitted (note the blue centre console :wall: )
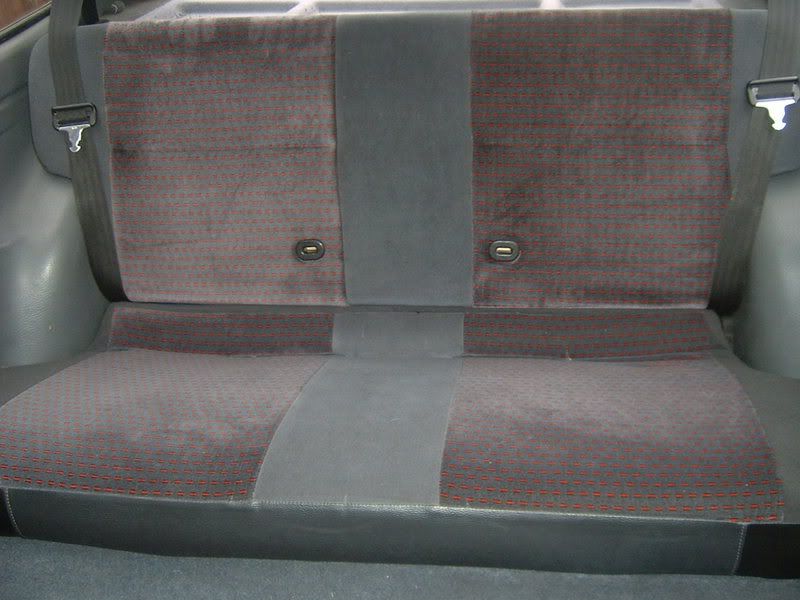
better pic of the rear seat and whole set
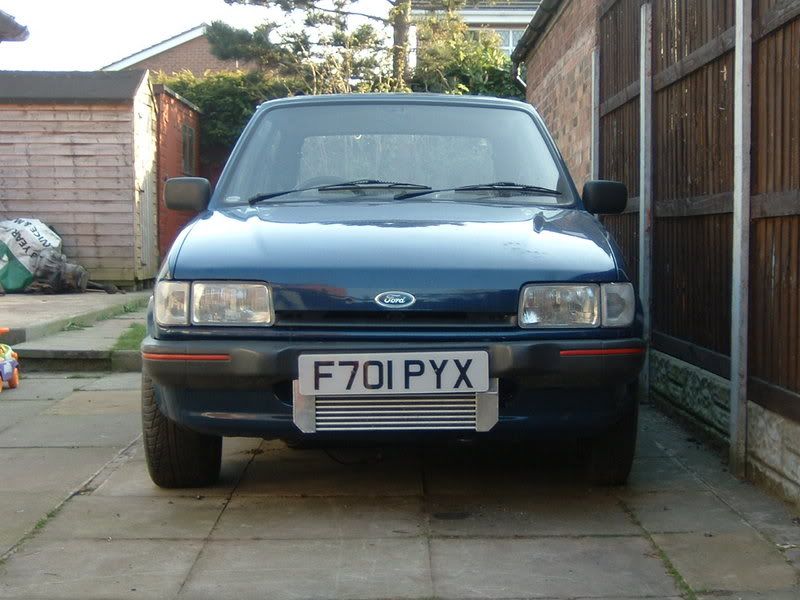
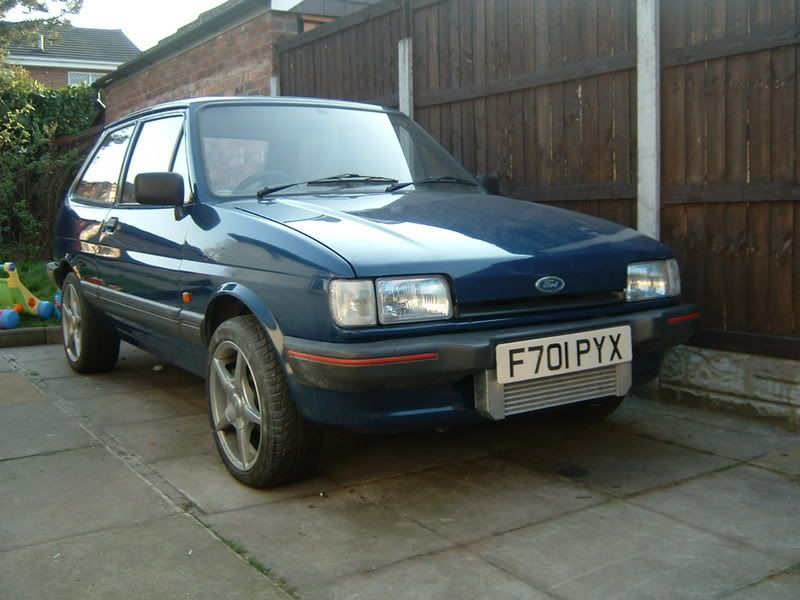
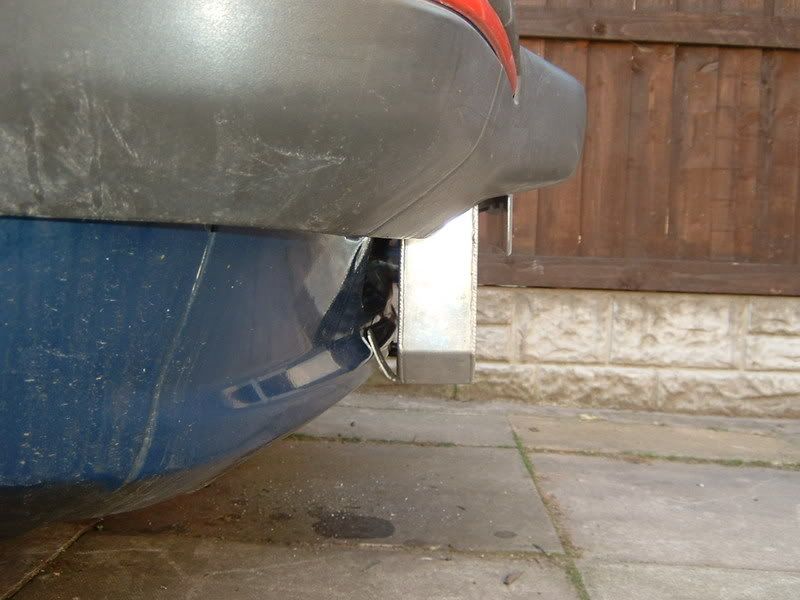
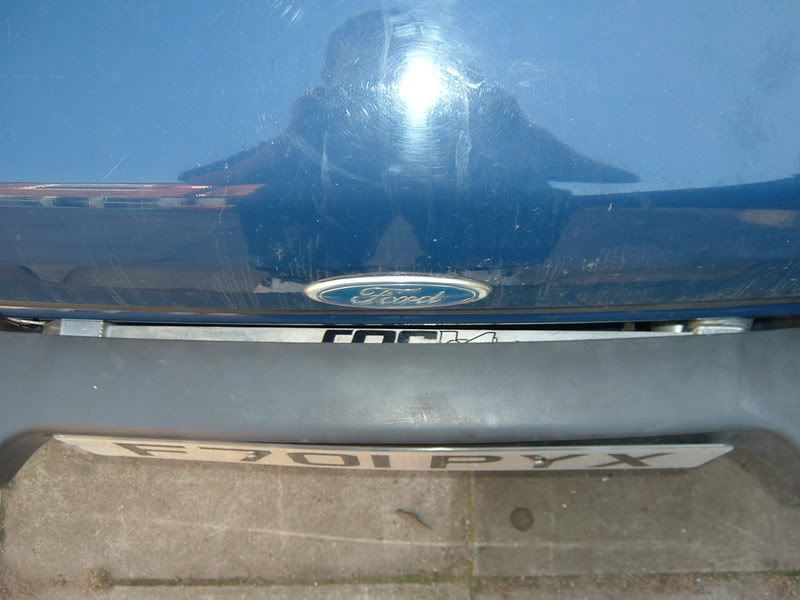
I had a trial fit of the intercooler just so I can get on with doing something while waiting to move house :evil:
Anyway here is a basic look of how I want it to be. The drivers side just needs lowering around a centimetre. There was a lot less cutting involved than my previous cooler which cant be a bad thing. The only reason for this is the cooler sits in font of the panel
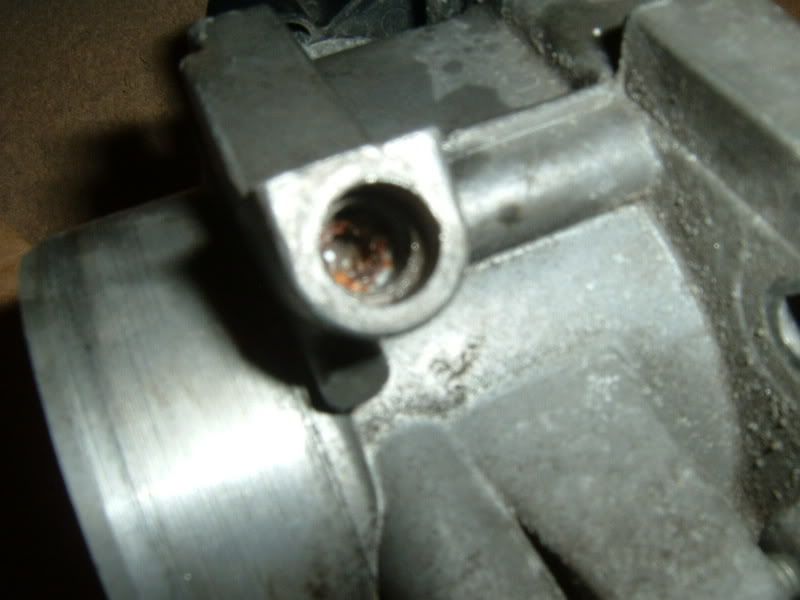
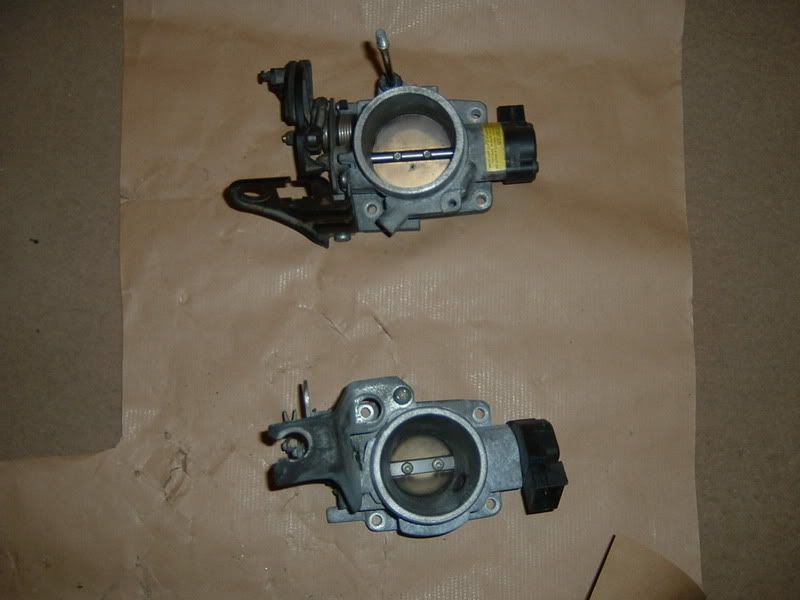
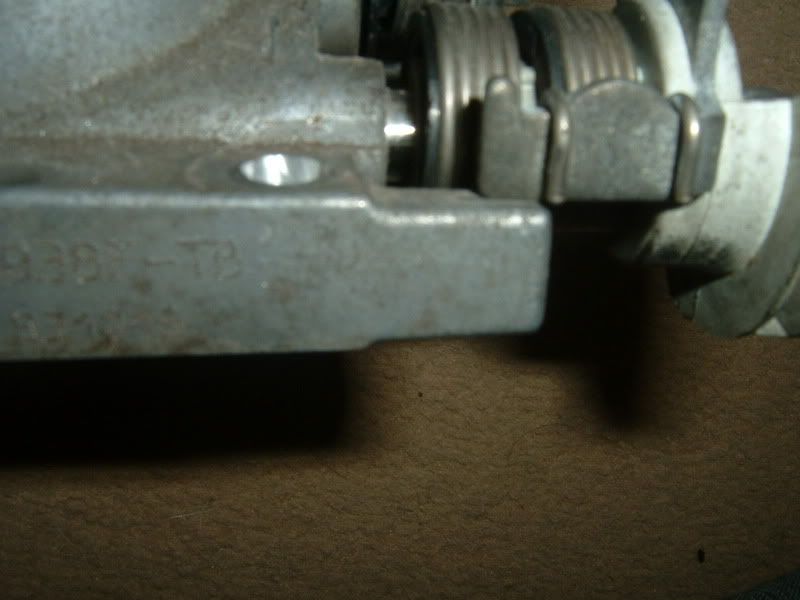
Also managed to get the tb sorted. The answer was staring me in the face to. I bought a tb off stu a while ago and it turns out that it has a air volume mixture screw built in which Ive never seen before on a zetec. I don't know what car exactly it came off but it is the answer I've been looking for.
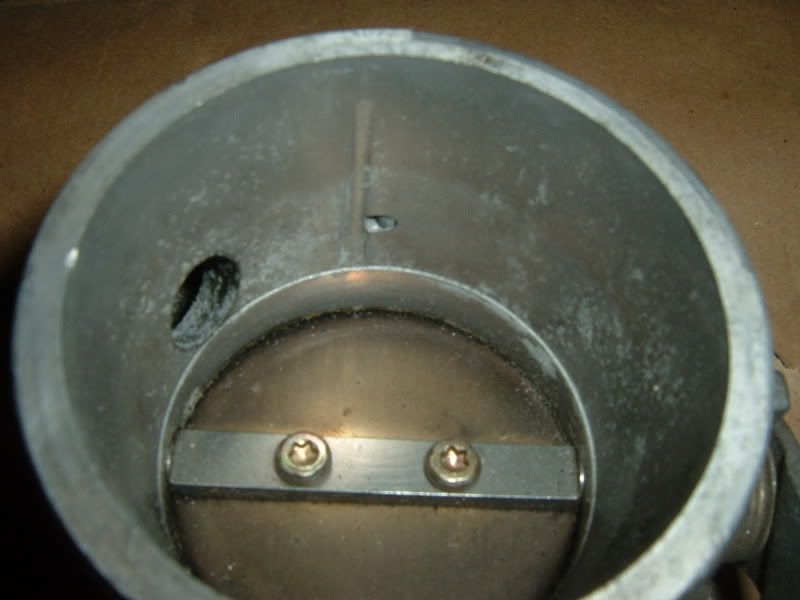
and here it is compared to the 1.6 throttle body
I've not got a completed pic but it was easy to sort out. Just needed to open out the spindle hole on the accelerator mechanism to 10mm and jobs a good'un
The engine is now OFAB engine management ready with the zetec manifold so it can all bolt together
mart
Right well I decided to change the carpet because it was blueish like the rest of the interior :roll:
First of all removed the carpet and sound deadener to have a look at the floor. I was impressed


and the xr grey dash, clock set and steering wheel

with grey carpet fitted (note the blue centre console :wall: )

better pic of the rear seat and whole set


I had a trial fit of the intercooler just so I can get on with doing something while waiting to move house :evil:
Anyway here is a basic look of how I want it to be. The drivers side just needs lowering around a centimetre. There was a lot less cutting involved than my previous cooler which cant be a bad thing. The only reason for this is the cooler sits in font of the panel


Also managed to get the tb sorted. The answer was staring me in the face to. I bought a tb off stu a while ago and it turns out that it has a air volume mixture screw built in which Ive never seen before on a zetec. I don't know what car exactly it came off but it is the answer I've been looking for.


and here it is compared to the 1.6 throttle body

I've not got a completed pic but it was easy to sort out. Just needed to open out the spindle hole on the accelerator mechanism to 10mm and jobs a good'un
The engine is now OFAB engine management ready with the zetec manifold so it can all bolt together
mart

- xrt-mart
- Senior Poster

- Posts: 280
- Joined: Thu Apr 22, 2004 1:23 pm
- Location: Crewe, Cheshire
That's one hell of a shell! What's with the wood inserts? 

Looking good, that floor is really impressive!
Looking good, that floor is really impressive!
- heeman10
- Elite Post Master


- Posts: 28746
- Joined: Fri Nov 08, 2002 5:32 pm
- Location: Somerset
- Your car: Audi TT TDI Quattro S line
heeman10 :That's one hell of a shell! What's with the wood inserts?
Looking good, that floor is really impressive!
What wood inserts mate? You mean the things on the inner sills? If thats what you mean it is sound deadener, looks original to. There is loads more sound deadener on the whole of the car. Must be because of the 1.1 engine
Also mate I have managed to get a set of beige injectors now along with a good condition friction plate for the AP 4 paddle clutch what I was asking you about
CHOOSEY The car is going on 15's and being lowered but will be having the kit put on and painted white as per my original XR2

- xrt-mart
- Senior Poster

- Posts: 280
- Joined: Thu Apr 22, 2004 1:23 pm
- Location: Crewe, Cheshire
Good good, glad you sourced what you were after  And yes, I was talking about the sound deadening panels, I think David Dickinson would be interested in those bobby dazzlers!
- heeman10
- Elite Post Master


- Posts: 28746
- Joined: Fri Nov 08, 2002 5:32 pm
- Location: Somerset
- Your car: Audi TT TDI Quattro S line
- JayC
- Elite Post Master


- Posts: 1685
- Joined: Tue Sep 14, 2004 2:19 pm
- Location: Somerset Drives: 2.0 Si Reworking: Fueling
- JayC
- Elite Post Master


- Posts: 1685
- Joined: Tue Sep 14, 2004 2:19 pm
- Location: Somerset Drives: 2.0 Si Reworking: Fueling
Thought id better get an update in 
Got some pictures of the 99% finished throttle body.
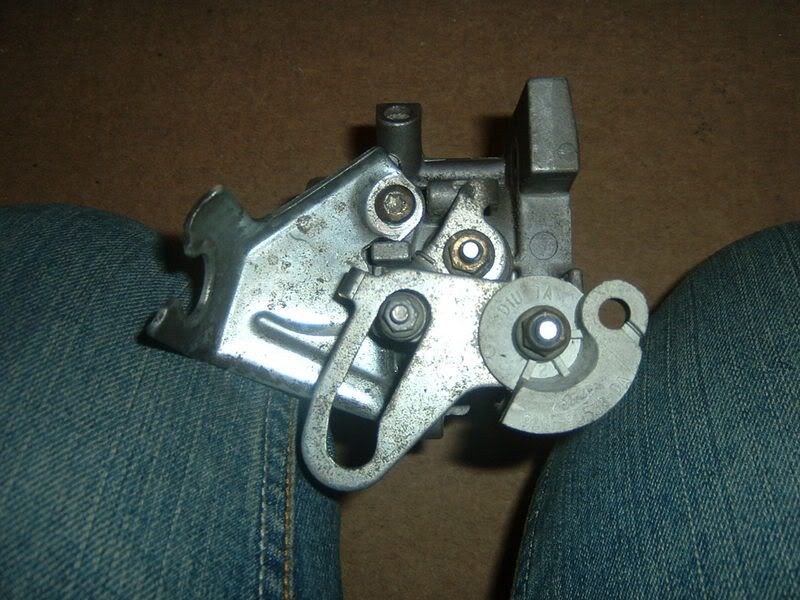
Now has the correct linkage on it just needs a big washer to hold the second bolt at the bottom of the cable bracket.
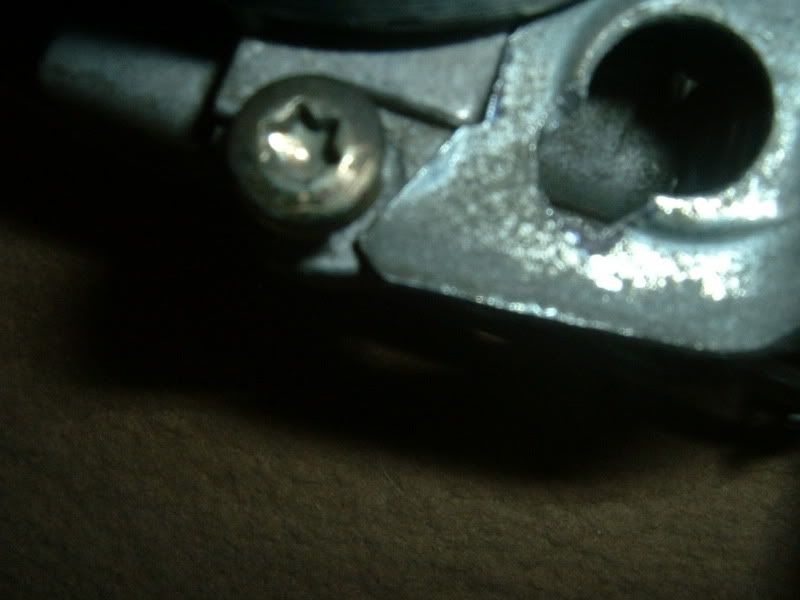
and a washer inbetween the spring/throttle body base as its loose and when up against the body full throttle cannot be had
Managed to do something to the car for a change as Im getting bored of waiting to move house.
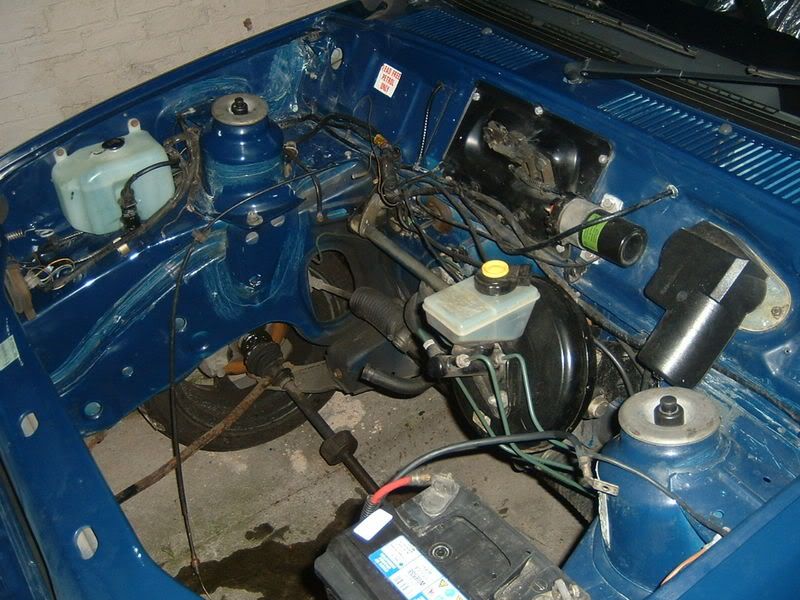
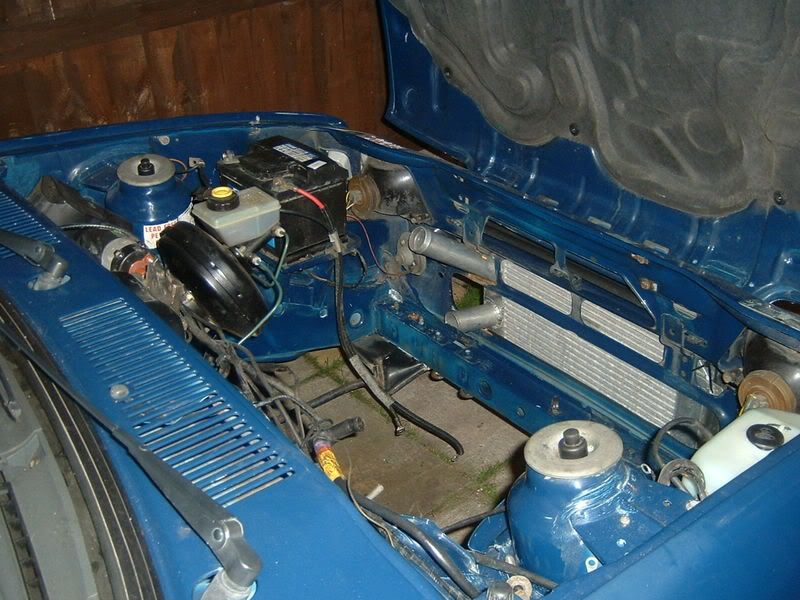
removed the engine
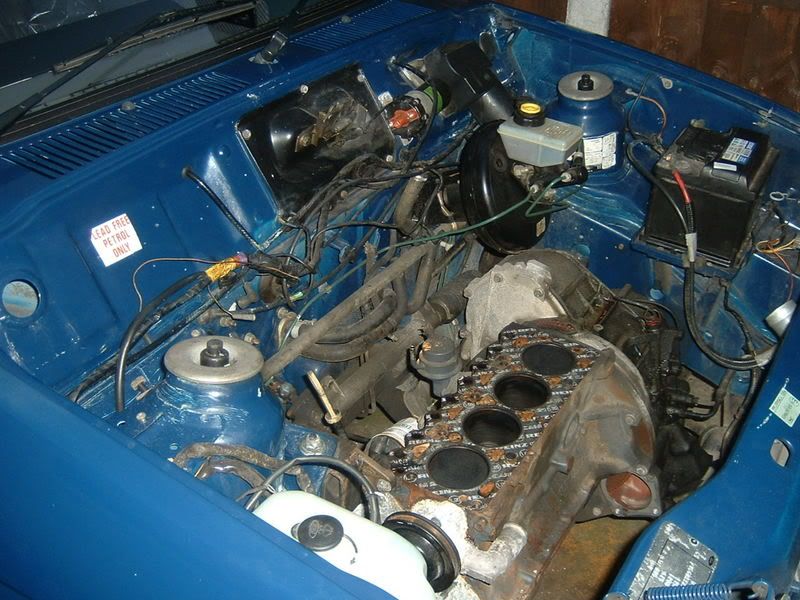
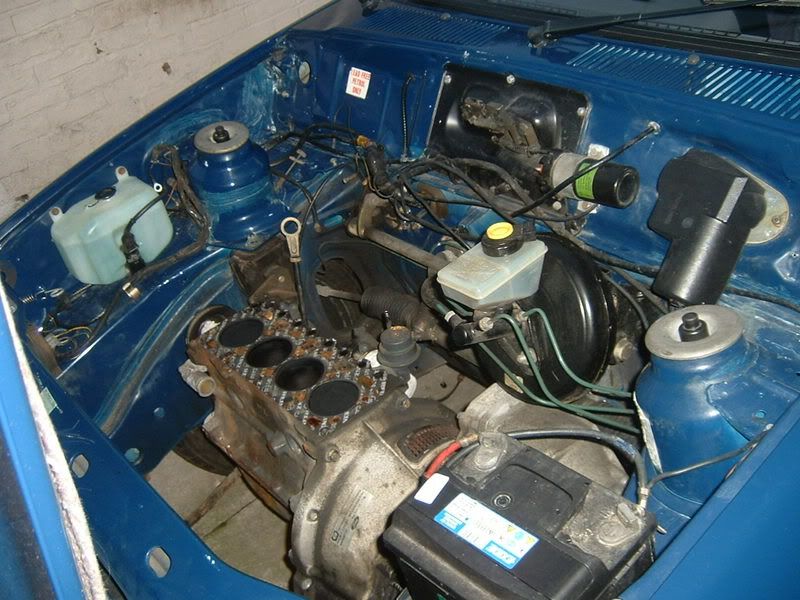
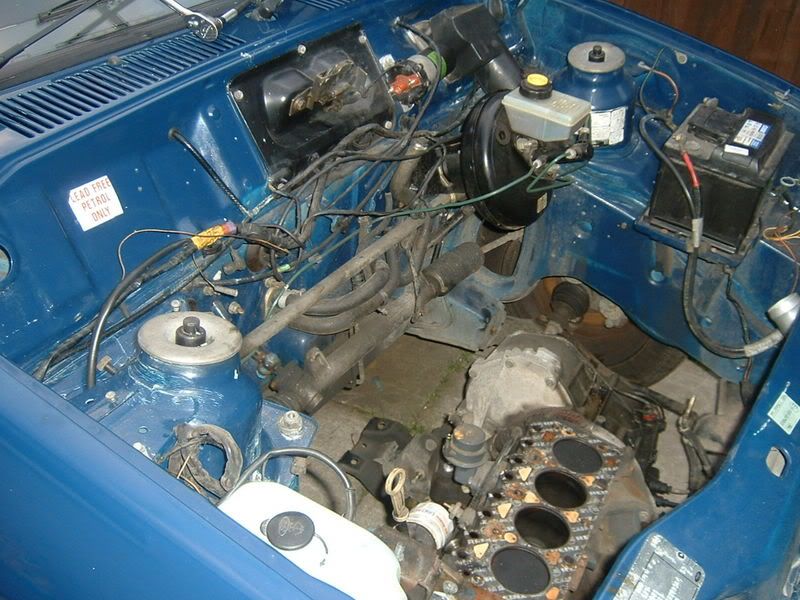
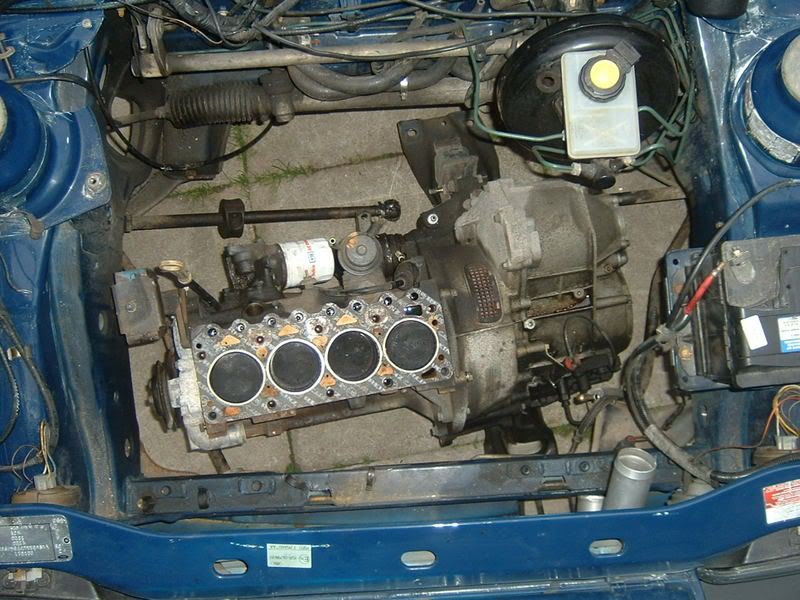
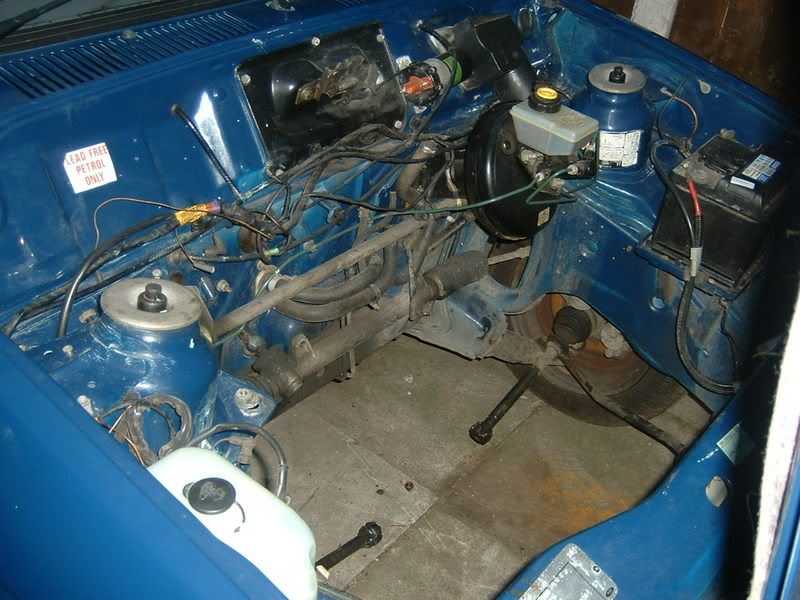
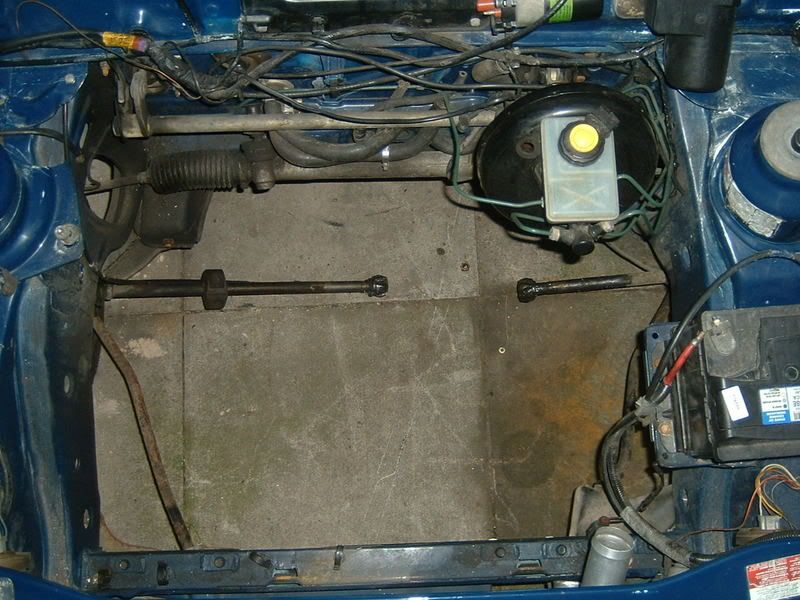
then gave it a quick clean up.
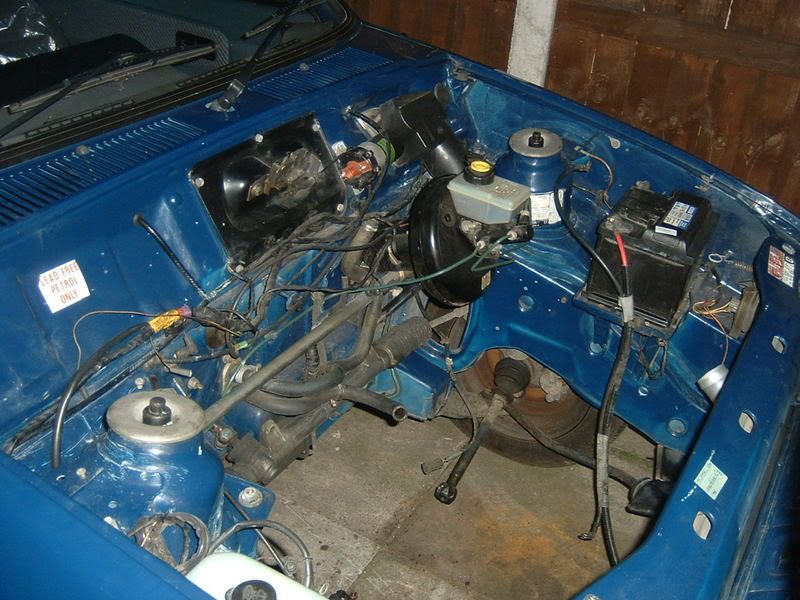
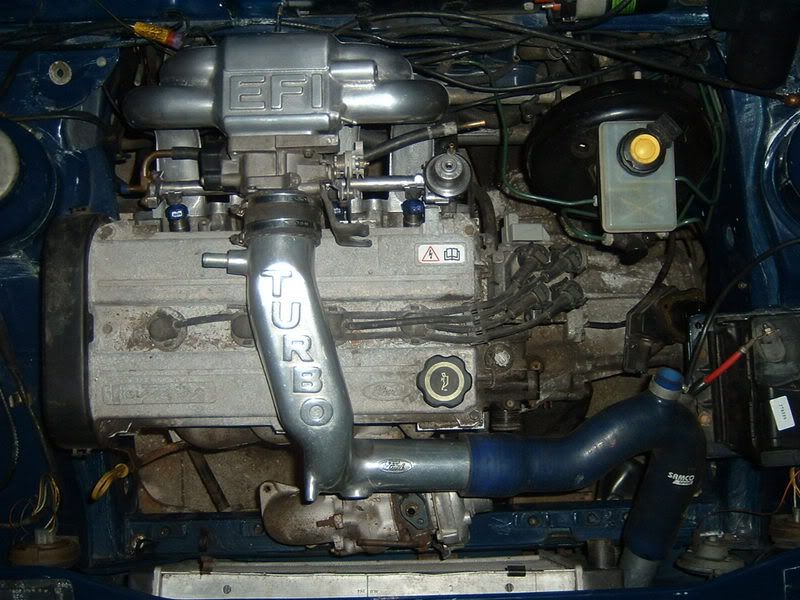
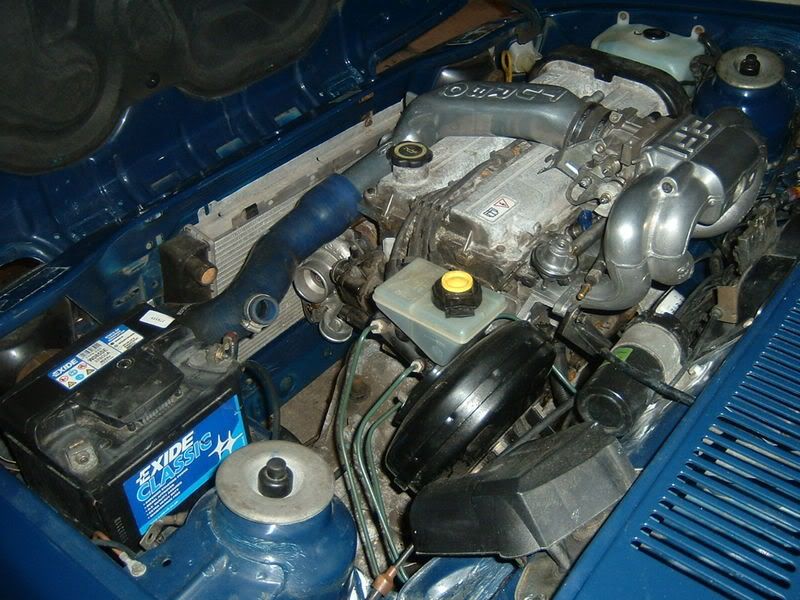
Fitted the engine but please bear in mind that it needs a good clean. I will do this when the build gets done.


This is the position I originaly had in mind for the radiator. The screw you can see is in a newly drilled hole, the old mounting point can be seen to the right about 6 inches at a guess. The bottom part is moved into the front panel by an added braket. You just make out the original retaining flaps in the chassis.
This allows the fitment of the cooler but makes it tight against the headlight. It was like this on my last conversion though and didnt give me any issues


I've placed some of the parts in the bay for a mock up so I can see where I need to cut the cross member and front panel for the rad. Also I wanted to check the bonnet would clear the crossover pipe which it apears to do just about
I took some pics of it so you can see where Im goin with it
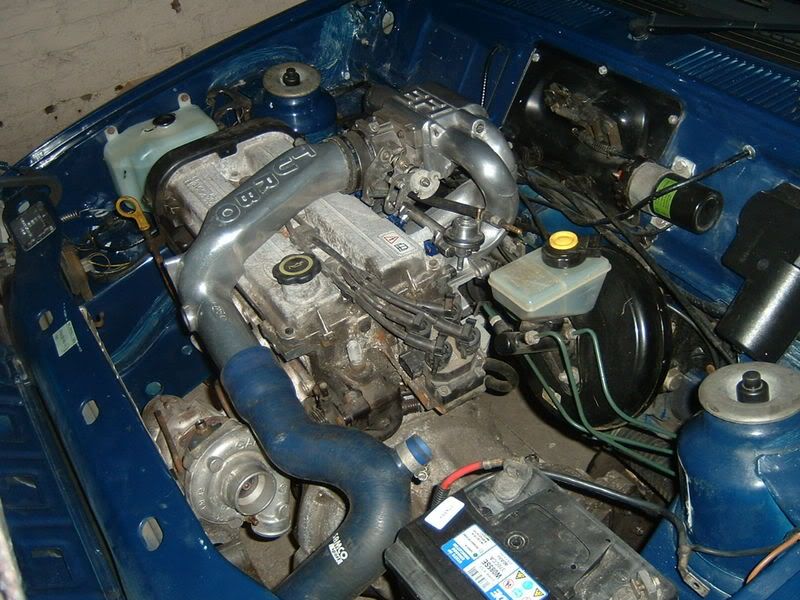
I have had to move the radiator again though as it was touching the turbo actuator bracket.
It now sits right down in the front panel and uses the mount bracket originaly intended for the lower spec small rads . It does move it away from the head light and leave more room for the fan to be fitted with it being lower down
mart
Got some pictures of the 99% finished throttle body.

Now has the correct linkage on it just needs a big washer to hold the second bolt at the bottom of the cable bracket.

and a washer inbetween the spring/throttle body base as its loose and when up against the body full throttle cannot be had

Managed to do something to the car for a change as Im getting bored of waiting to move house.
removed the engine


then gave it a quick clean up.


Fitted the engine but please bear in mind that it needs a good clean. I will do this when the build gets done.


This is the position I originaly had in mind for the radiator. The screw you can see is in a newly drilled hole, the old mounting point can be seen to the right about 6 inches at a guess. The bottom part is moved into the front panel by an added braket. You just make out the original retaining flaps in the chassis.
This allows the fitment of the cooler but makes it tight against the headlight. It was like this on my last conversion though and didnt give me any issues


I've placed some of the parts in the bay for a mock up so I can see where I need to cut the cross member and front panel for the rad. Also I wanted to check the bonnet would clear the crossover pipe which it apears to do just about
I took some pics of it so you can see where Im goin with it


I have had to move the radiator again though as it was touching the turbo actuator bracket.
It now sits right down in the front panel and uses the mount bracket originaly intended for the lower spec small rads
mart

- xrt-mart
- Senior Poster

- Posts: 280
- Joined: Thu Apr 22, 2004 1:23 pm
- Location: Crewe, Cheshire
Zetec Turbo in a Mk2, it's so funny!  It'll be a hilarious thing to drive!
  I run my turbo about 6mm off my radiator. As long as you have good mounts you can run them pretty darn close. Have you trial-fitted the bonnet yet? It looked as though the cam cover would probably be close to hitting, let alone the charge carrier! What are your plans there?
- heeman10
- Elite Post Master


- Posts: 28746
- Joined: Fri Nov 08, 2002 5:32 pm
- Location: Somerset
- Your car: Audi TT TDI Quattro S line
xrt-mart : I've placed some of the parts in the bay for a mock up so I can see where I need to cut the cross member and front panel for the rad. Also I wanted to check the bonnet would clear the crossover pipe which it apears to do just about
Although I may try and lower the engine a smidge to allow for engine movement
I have sorted what im doing now with the managment BTW. I going to run the beige injecotrs with no chip for now and low boost.
Ian Howell recommended this until I can afford the upgrade so that will do for me. Should see me to the 200BHP mark anyway and still have loads more torque than the last ERST conversion

- xrt-mart
- Senior Poster

- Posts: 280
- Joined: Thu Apr 22, 2004 1:23 pm
- Location: Crewe, Cheshire
What a w@nker  Clearly got distracted during my reading
Sounds like a good compromise, it'll still terrify everyone inside and outside the car
Sounds like a good compromise, it'll still terrify everyone inside and outside the car
- heeman10
- Elite Post Master


- Posts: 28746
- Joined: Fri Nov 08, 2002 5:32 pm
- Location: Somerset
- Your car: Audi TT TDI Quattro S line
- jayrs
- Elite Post Master


- Posts: 31520
- Joined: Mon Apr 19, 2004 10:32 pm
- Location: I.O.W
- Your car: FRST, XR2, ST170, ST225
Car: 1991 Ford Fiesta RS Turbo
Re: MK2 ZT turbo project UPDATE 13/4/07
Well things ground to a halt again after moving house. I still have no access into the rear where I need to work on the car. 
After contemplating going megasquirt for a while. I have decided its to expensive and to much of a gamble at the mo so have decided to stick with the OFAB for now. I figured that I might as well continue with the management side of things as much as I could so I have a little progress.
First of all back to the throttle body. I have put a spacer in front of the linkage to stop movement on the main spindal. This work a treat
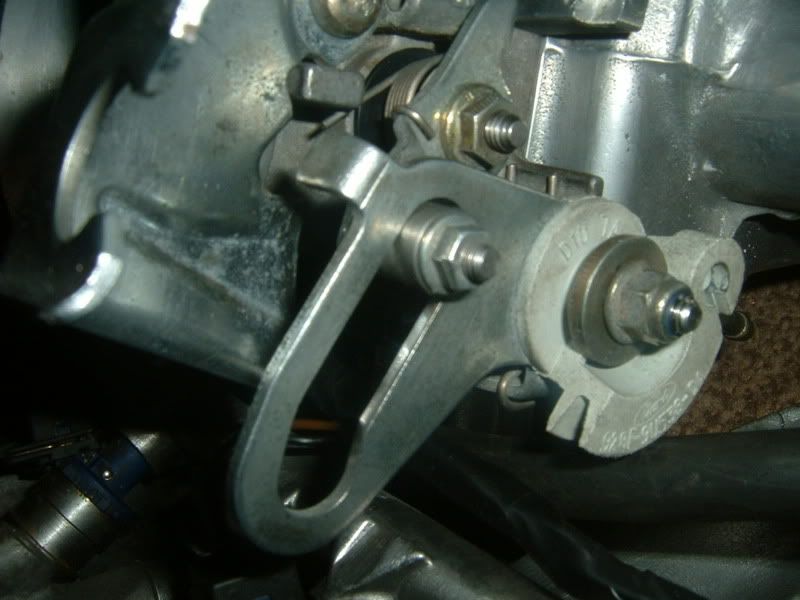
Then it was back to it with the die grinder so I could get back full throttle.
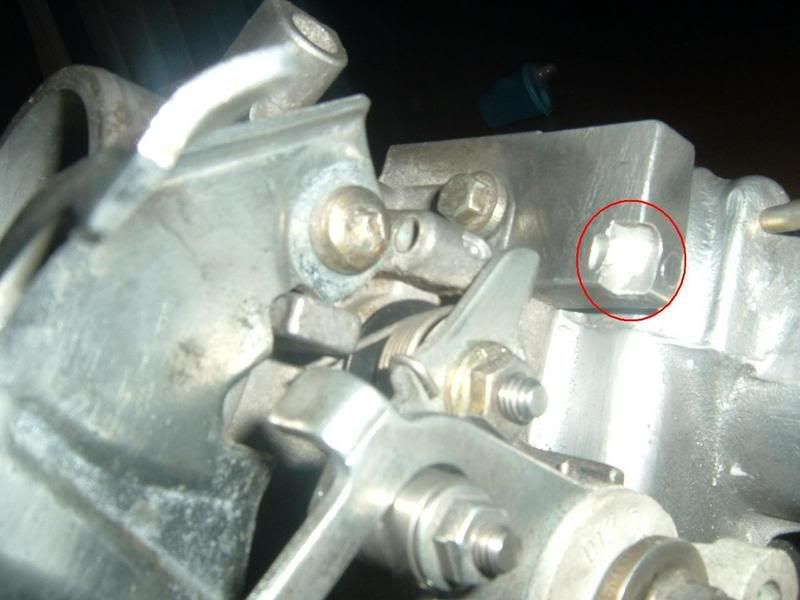
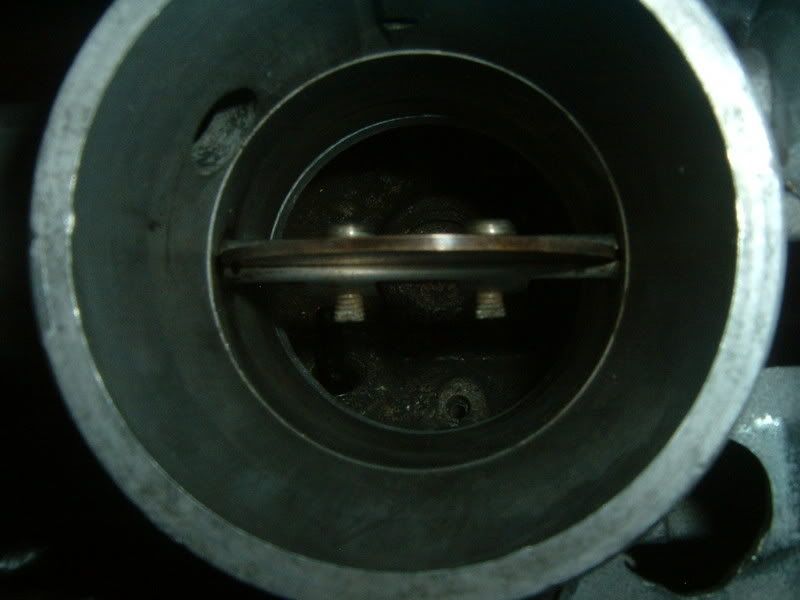
I have drilled and tapped the fuel rail mounts out to M10*1.5 the same as the 15mm munson ring all I need now is some threaded bar to complete the sandwich plate.
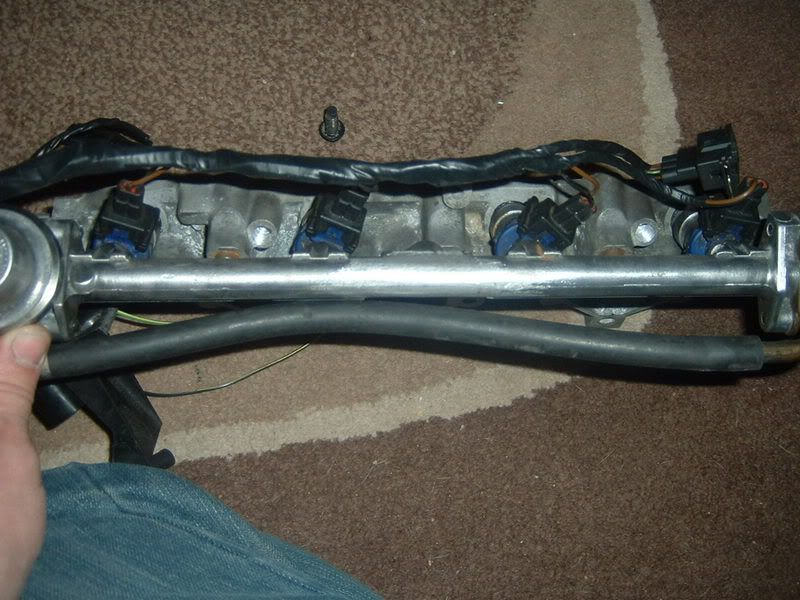
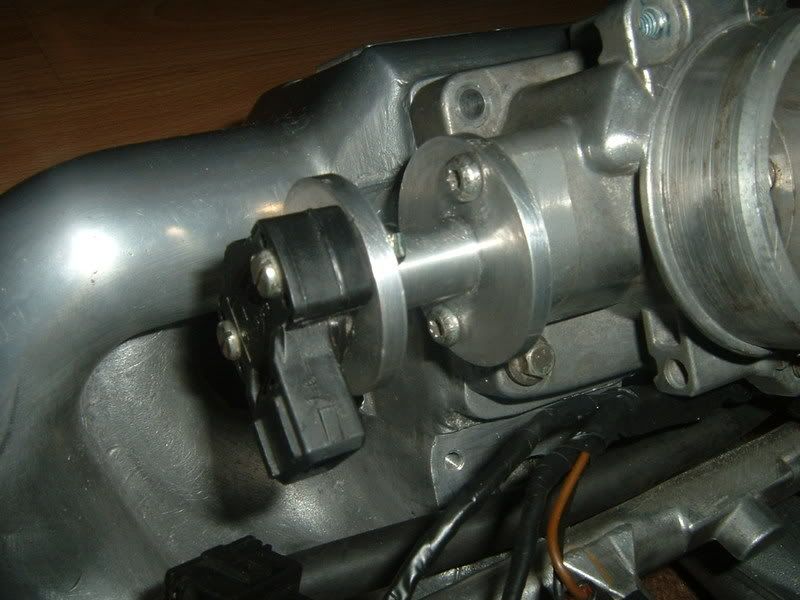
Then I made a start at modifying the throttle position sensor adapter so it would fit on to the throttle body first I drilled the mounting plate for the zetec end then put the spindal in and worked out roughly where I wanted the sensor. Next I cut the D shape into the spindal and positioned the sensor half a bolt hole back as that is where the original one was and mounted the FRST item there like so
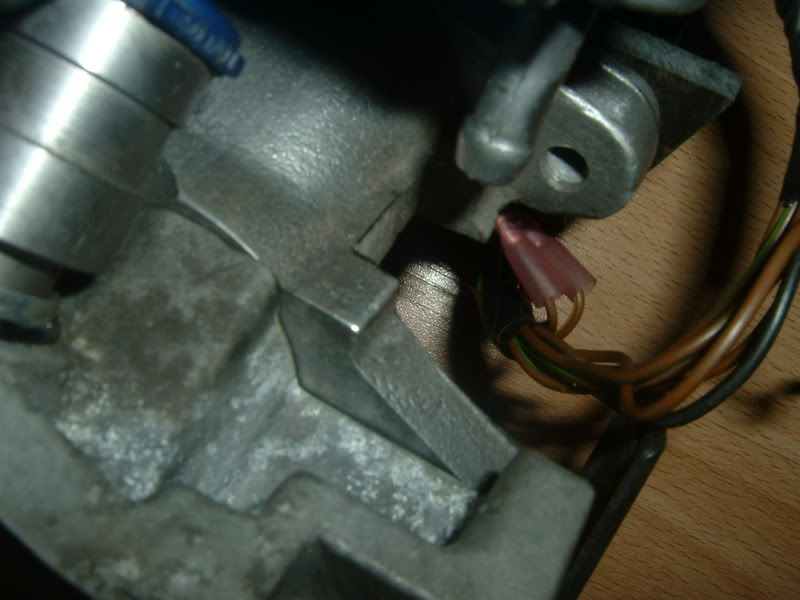
Next I dummied the two together again and I noticed that the fuel return pipe was heading straight for the inlet. So I got the die grinder out again and made a passage for the pipe and all is well again
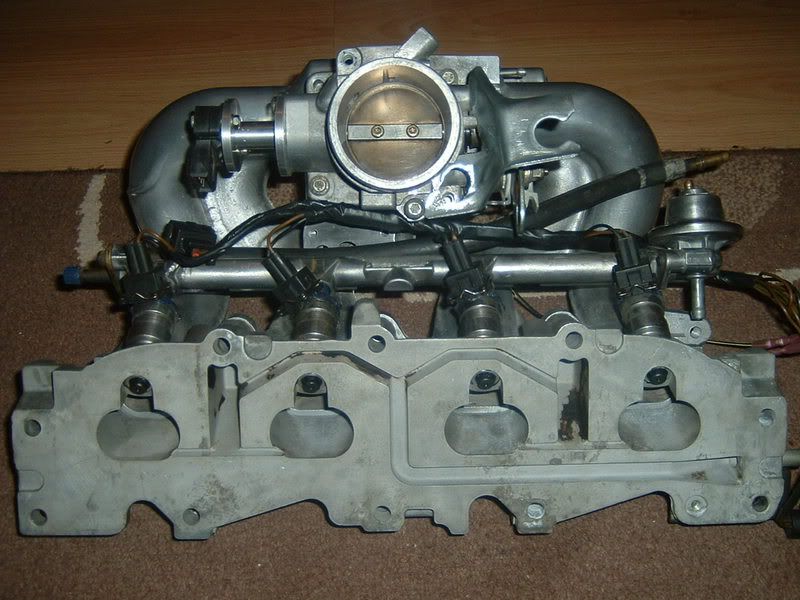
So at the moment it looking something like this
mart
After contemplating going megasquirt for a while. I have decided its to expensive and to much of a gamble at the mo so have decided to stick with the OFAB for now. I figured that I might as well continue with the management side of things as much as I could so I have a little progress.
First of all back to the throttle body. I have put a spacer in front of the linkage to stop movement on the main spindal. This work a treat

Then it was back to it with the die grinder so I could get back full throttle.


I have drilled and tapped the fuel rail mounts out to M10*1.5 the same as the 15mm munson ring all I need now is some threaded bar to complete the sandwich plate.

Then I made a start at modifying the throttle position sensor adapter so it would fit on to the throttle body first I drilled the mounting plate for the zetec end then put the spindal in and worked out roughly where I wanted the sensor. Next I cut the D shape into the spindal and positioned the sensor half a bolt hole back as that is where the original one was and mounted the FRST item there like so

Next I dummied the two together again and I noticed that the fuel return pipe was heading straight for the inlet. So I got the die grinder out again and made a passage for the pipe and all is well again

So at the moment it looking something like this

mart

- xrt-mart
- Senior Poster

- Posts: 280
- Joined: Thu Apr 22, 2004 1:23 pm
- Location: Crewe, Cheshire


Twitter
The second 20th Anniversary article, a dive into the history of how the site came about is available here: https://t.co/kbCfZ4sf0R
17:44, 4th December 2021 Twitter Web App
To celebrate https://t.co/wXVkvJipaS being 20 years old this year, I've written a series of articles detailing the… https://t.co/B0vE0Y3KvP
17:42, 4th December 2021 Twitter Web App
Follow fiestaturbo.com on Twitter:
http://twitter.com/fiestaturbo/
Facebook
New article! fiestaturbo.com is 20 years old this year and I'm writing a series delving into the history of it. …
Saturday, 4th December 2021 12:49
Some awesome Escorts from the Fair - FORD FAIR 2021: ESCORT EXHIBITION - …
Sunday, 31st October 2021 17:05
All the best Focuses from Ford Fair - FORD FAIR 2021: FOCUS PEEKING - Which was your …
Thursday, 7th October 2021 22:21
Become a fan:
http://www.facebook.com/fiestaturbo/
RSS Feeds
Subscribe to the RSS feed
What is RSS?
RSS is a technology that lets you use special applications or modern browsers to notify you you when a site is updated. You can then read the updated content in that application or your browser.
To subscribe to these RSS feeds you need to copy the links above. For instructions on how to add it to the feeds you keep track of, consult the documentation of your RSS reader.