The ST170 Track prepped Mk1, VVT Controller 08/05/14
141 posts • Page 1 of 5 • 1, 2, 3, 4, 5
The ST170 Track prepped Mk1, VVT Controller 08/05/14
Something I have had in for a couple of weeks now. I don't post any pictures of customers cars usually, however this is my brothers car, and he does not mind me putting up and keeping updated a post.
Basically he bought the car a couple of years ago as a 950 beige popular. The basic shell is very solid, the only spot of rust being on the scuttle panel. It also had a dented door.
He started by removing the interior, and buying a full weld in cage. This was started, unfortunately other things have kept him from completing the project. The ST170 engine and box was also purchased.
Thats when the car ws brought to me,
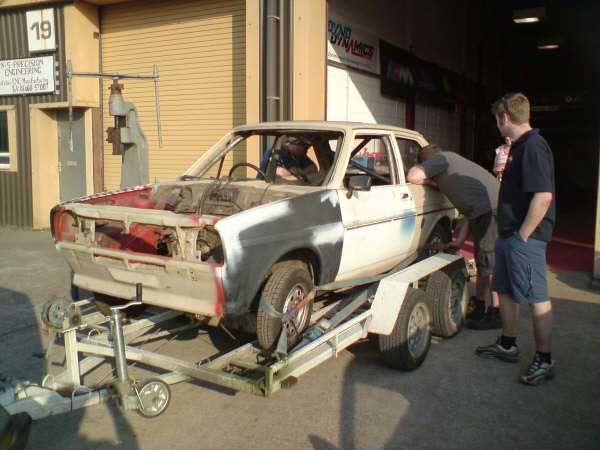
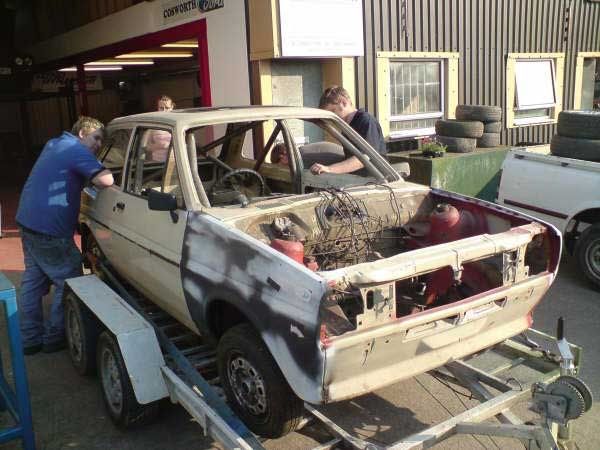
Not the most appealing looking thing at this point in time, I'm sure you will agree!
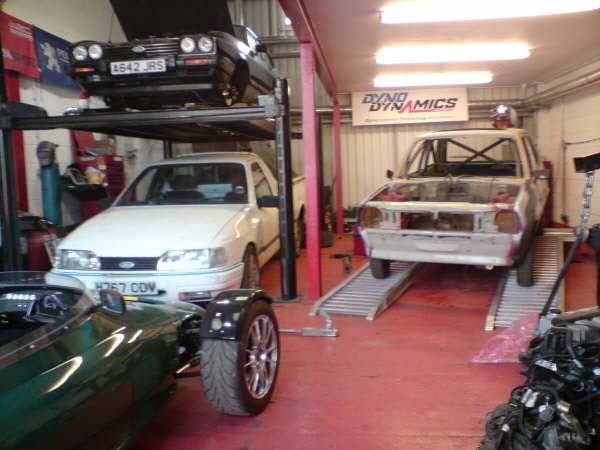
So anyways:
First thing to do was to start measuring up the engine and box to see where I could get away with mounting the engine:
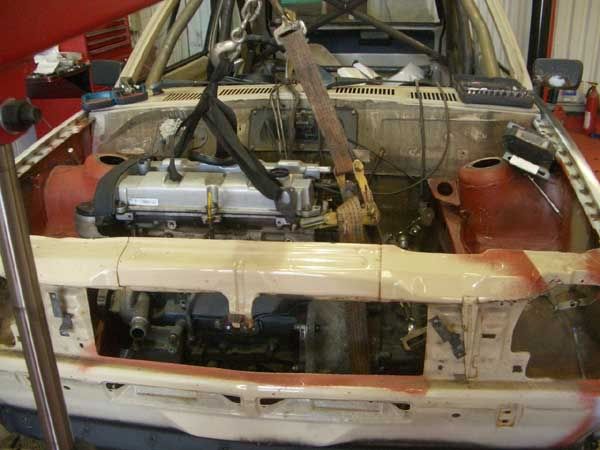
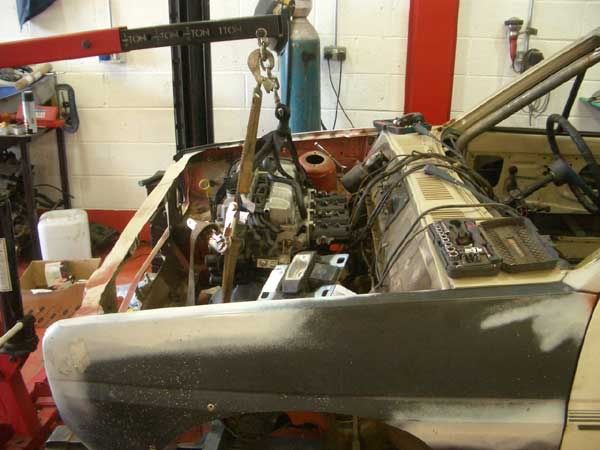
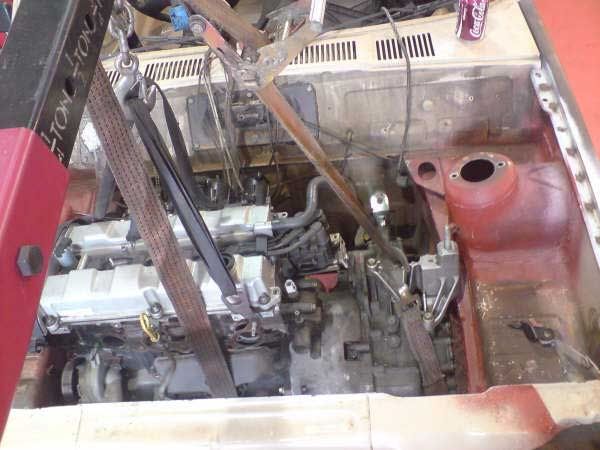
This is the most difficult part of any build such as this one,
Its important to keep the engine as low and as far back as I dare. It's also important to try and keep the weight balance as central as possible. The amount of car's I have seen with engine transplants, especially Mk1's, that move the whole engine and box over to the nearside is quite shocking!!
Right, so it was clear that a whole set of engine mounts needed to be fabricated and mounted to the shell. I've opted to use the ST170 mounts, for ease of use in the future.
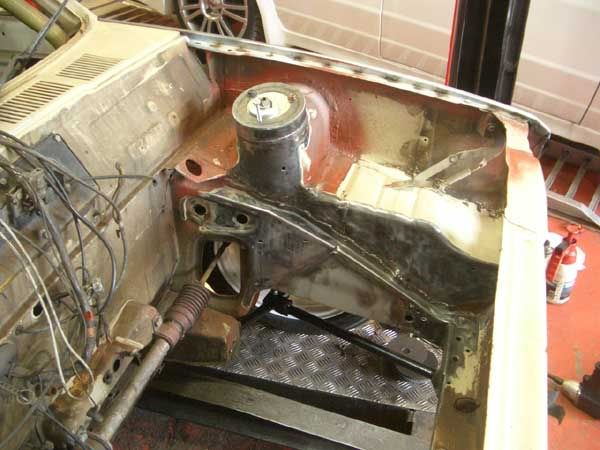
My brothers original plan was to use an IB5 and had cut out the chassis leg to use a fiestacentre kit. I replaced the now missing steel:
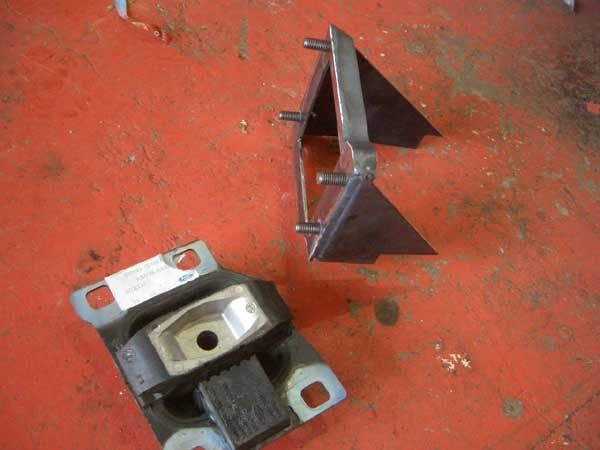
This is the cradle I made to mount the gearbox onto the chassis leg:
Welded in and completed nearside:
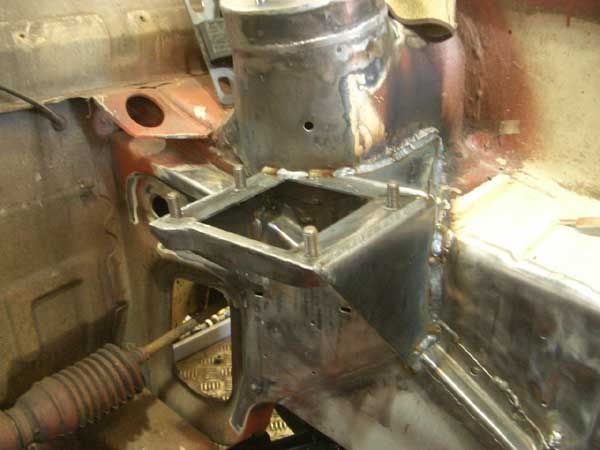
The offside also uses the standard ST engine mount, I had to fabricate another mounting for the mount on the inner wing:
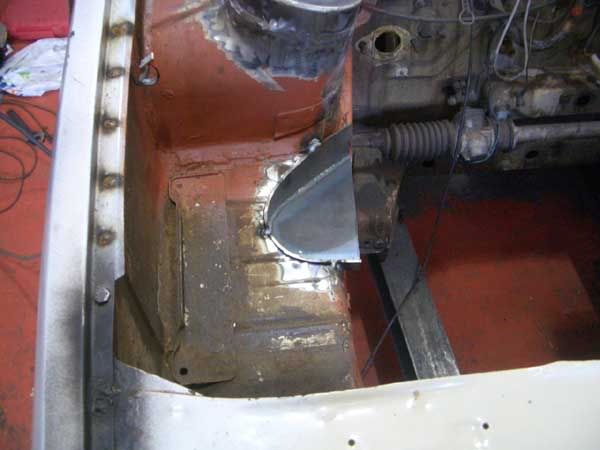
I cut back the chassis leg and re-inforced it with 3mm steel, to ensure ease of belt changing in the future, it also helps strengthen the mount:
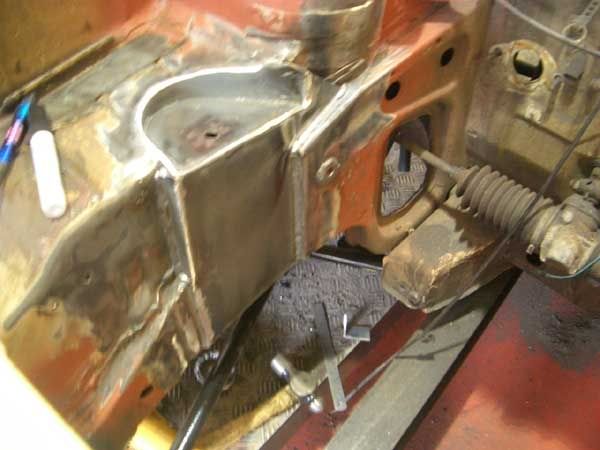
Some of you may have noticed the strut tops changed over through those photographs. I changed the original rubber top mounts for some eccentric bearing mounts:
Action Shot!
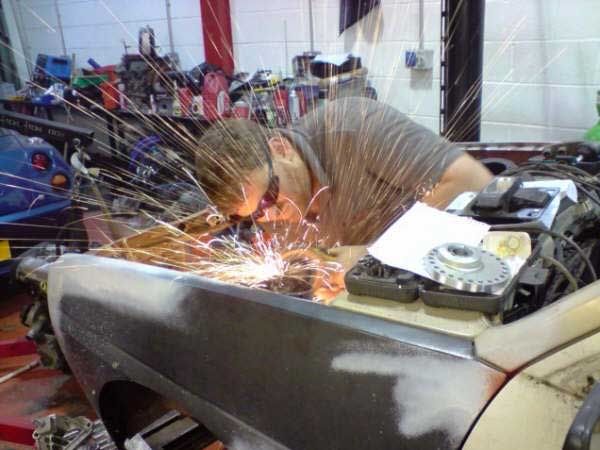
Removed:
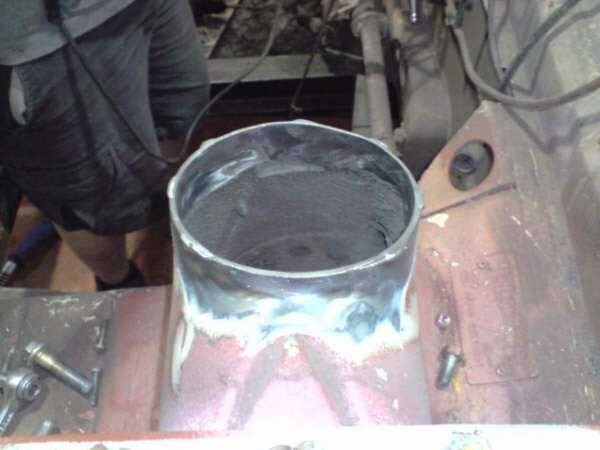
New fabricated strut tops being welded on:
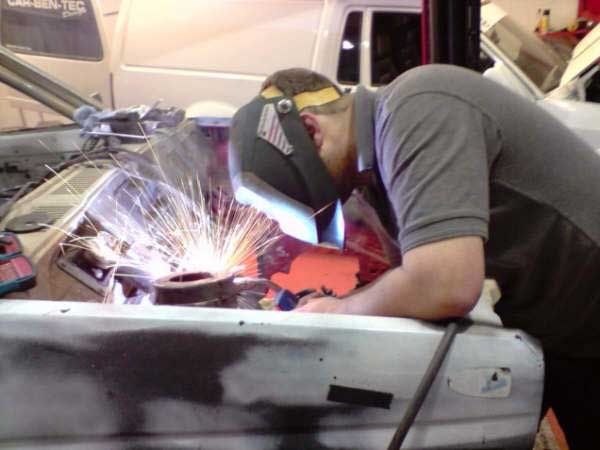
So, lets see the engine now in:
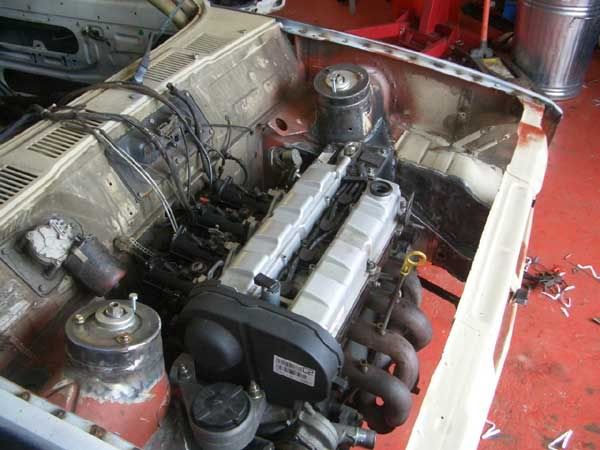
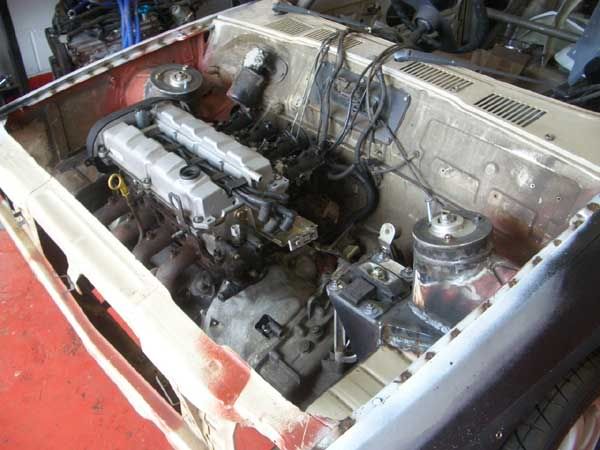
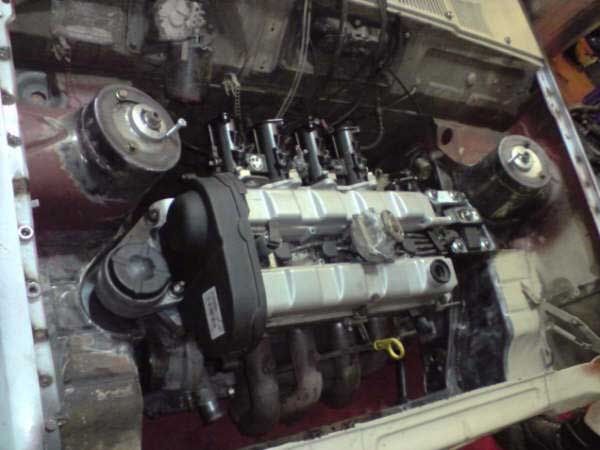
There is Jenvey 48mm throttle bodys mounted to the engine. I am removing the VCT, and the engine will be run on Emerald, mapped by our young Jim!
Ok cool, basic engine fitting now done. I'm planning on this car really sticking to the black top, so some suspension upgrades now. None of the usual polybush stuff here I'm afraid!
Set of speedlines for starters:

They are now wrapped in Proxes.
There are no decent front suspension setups available fot the Mk1 off the shelf to my knowledge. So we have gone for a set of Leda's.
Custom lower arms, They use M14 rose joints for all moving joints:
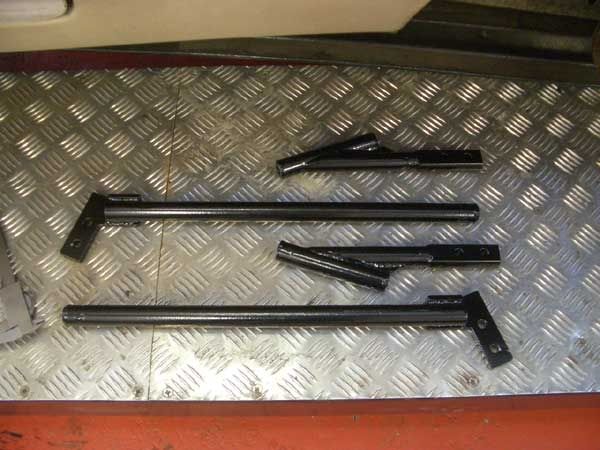
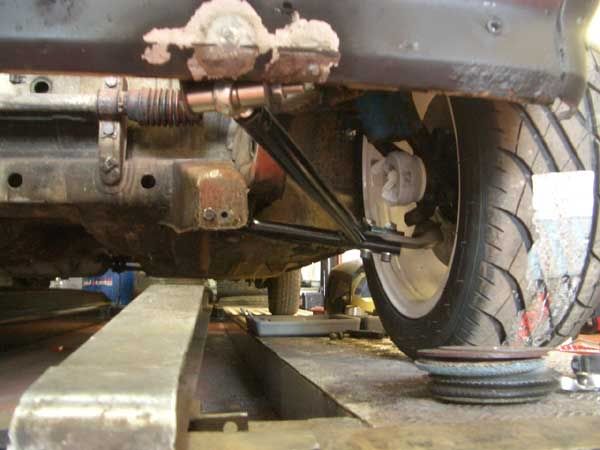
I made new crossmember mountings to mount the rose joints properly:
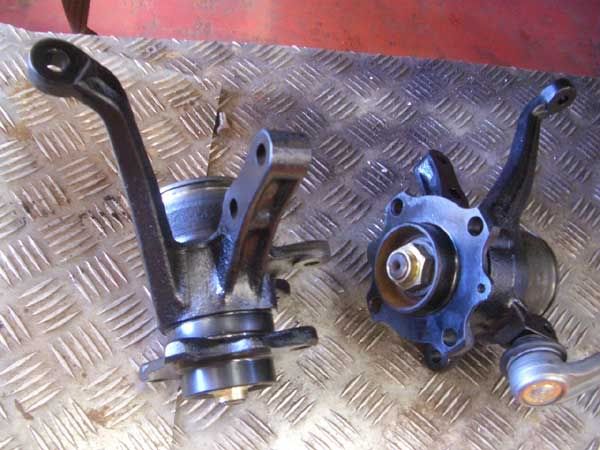
I reconditioned the front hubs:
The head has now gone off for three angle valve seats and porting & polishing. You can also see here I have brought the cage through the bulkhead to the strut tops:
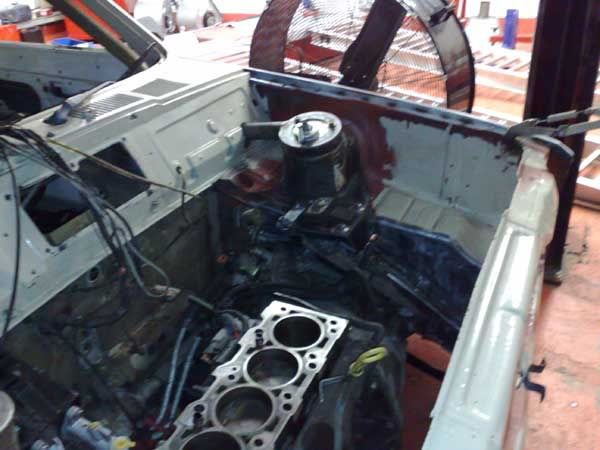
The wheels tyres and arch kit have now been fitted:
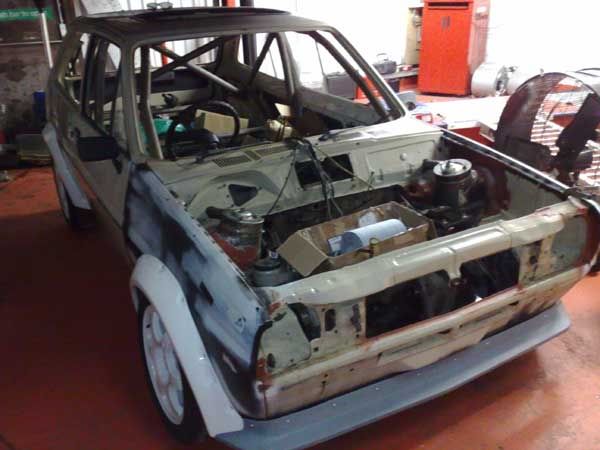
I will update as progress is made,
Comments and questions always welcome,
Tighty,
Basically he bought the car a couple of years ago as a 950 beige popular. The basic shell is very solid, the only spot of rust being on the scuttle panel. It also had a dented door.
He started by removing the interior, and buying a full weld in cage. This was started, unfortunately other things have kept him from completing the project. The ST170 engine and box was also purchased.
Thats when the car ws brought to me,


Not the most appealing looking thing at this point in time, I'm sure you will agree!

So anyways:
First thing to do was to start measuring up the engine and box to see where I could get away with mounting the engine:


This is the most difficult part of any build such as this one,
Its important to keep the engine as low and as far back as I dare. It's also important to try and keep the weight balance as central as possible. The amount of car's I have seen with engine transplants, especially Mk1's, that move the whole engine and box over to the nearside is quite shocking!!
Right, so it was clear that a whole set of engine mounts needed to be fabricated and mounted to the shell. I've opted to use the ST170 mounts, for ease of use in the future.
My brothers original plan was to use an IB5 and had cut out the chassis leg to use a fiestacentre kit. I replaced the now missing steel:

This is the cradle I made to mount the gearbox onto the chassis leg:

Welded in and completed nearside:

The offside also uses the standard ST engine mount, I had to fabricate another mounting for the mount on the inner wing:

I cut back the chassis leg and re-inforced it with 3mm steel, to ensure ease of belt changing in the future, it also helps strengthen the mount:

Some of you may have noticed the strut tops changed over through those photographs. I changed the original rubber top mounts for some eccentric bearing mounts:
Action Shot!

Removed:

New fabricated strut tops being welded on:

So, lets see the engine now in:


There is Jenvey 48mm throttle bodys mounted to the engine. I am removing the VCT, and the engine will be run on Emerald, mapped by our young Jim!
Ok cool, basic engine fitting now done. I'm planning on this car really sticking to the black top, so some suspension upgrades now. None of the usual polybush stuff here I'm afraid!
Set of speedlines for starters:

They are now wrapped in Proxes.
There are no decent front suspension setups available fot the Mk1 off the shelf to my knowledge. So we have gone for a set of Leda's.
Custom lower arms, They use M14 rose joints for all moving joints:

I made new crossmember mountings to mount the rose joints properly:

I reconditioned the front hubs:

The head has now gone off for three angle valve seats and porting & polishing. You can also see here I have brought the cage through the bulkhead to the strut tops:

The wheels tyres and arch kit have now been fitted:

I will update as progress is made,
Comments and questions always welcome,
Tighty,
Last edited by Captain Tightpants on Tue Oct 28, 2008 9:07 pm, edited 11 times in total.
- Captain Tightpants
- Elite Post Master


- Posts: 3723
- Joined: Fri Feb 20, 2004 8:25 pm
- Location: Somerset
Re: The ST170 Track prepped Mk1, Old School Cool,
My favourite part of this whole project so far has been learning that Mk1 Fiestas had a foot pump on the cabin floor to spray the washer jets! 
Cannot wait to get this on the rollers and have it singing
Cannot wait to get this on the rollers and have it singing
- heeman10
- Elite Post Master


- Posts: 28746
- Joined: Fri Nov 08, 2002 5:32 pm
- Location: Somerset
- Your car: Audi TT TDI Quattro S line
Re: The ST170 Track prepped Mk1, Old School Cool,
That does appear as though it's going to look, sound and go very nicely! Excellent work, Captain! 

- Tweek
- Elite Post Master


- Posts: 9240
- Joined: Sun Jul 17, 2005 1:22 am
- Location: Gloucester
- Your car: VW Golf GTD
Car: 1996 Ford Fiesta Zetec Turbo
Re: The ST170 Track prepped Mk1, Old School Cool,
Agree this is going to be special and very very mental 
- Brammer
- Elite Post Master


- Posts: 5292
- Joined: Wed Dec 01, 2004 7:12 pm
- Location: The North
- Your car: Sierra Cosworth
- hb69
- Elite Post Master


- Posts: 4995
- Joined: Mon Dec 12, 2005 7:56 pm
- Location: Kent
- Your car: Fiesta 1.1 LX
Re: The ST170 Track prepped Mk1, Old School Cool,
Top work fella, its going to be fun, 
we going to see it howling around Combe then ???

we going to see it howling around Combe then ???
- Turboboy67
- Elite Post Master


- Posts: 5605
- Joined: Thu Aug 24, 2006 8:39 pm
- Location: Shaftesbury, Dorset
- Your car: 911GT3 RS
Re: The ST170 Track prepped Mk1, Old School Cool,
superb work, who made the lower arms?
- Chris 2i
- Elite Post Master


- Posts: 4370
- Joined: Thu May 13, 2004 10:39 pm
- Location: Swindon
Re: The ST170 Track prepped Mk1, Old School Cool,
Thanks guys, 
CarbonBody, Indeed you will, hopefully at Eurofest.
Chris 2i, Thanks. Designed and made here.
Steve
CarbonBody, Indeed you will, hopefully at Eurofest.
Chris 2i, Thanks. Designed and made here.
Steve
- Captain Tightpants
- Elite Post Master


- Posts: 3723
- Joined: Fri Feb 20, 2004 8:25 pm
- Location: Somerset
Re: The ST170 Track prepped Mk1, Old School Cool,
Captain Tightpants :Chris 2i, Thanks. Designed and made here.
Steve
cool, I'd be interested to see how these perform. I might well want some for my XR2.
- Chris 2i
- Elite Post Master


- Posts: 4370
- Joined: Thu May 13, 2004 10:39 pm
- Location: Swindon
- j7aoc
- Elite Post Master


- Posts: 6194
- Joined: Mon Feb 28, 2005 6:52 pm
- Location: southampton
Car: 1991 Ford Fiesta RS Turbo
Re: The ST170 Track prepped Mk1, Old School Cool,
Steve, I know I've said this before as a joke but seriously now, I think I actually love you 
You can use my car when you prise the keys out of my cold dead hands
- Sphinx
- Elite Post Master


- Posts: 8815
- Joined: Mon Nov 05, 2001 12:00 am
- Location: South Drives: depends on the week
Re: The ST170 Track prepped Mk1, Old School Cool,
top notch work again mate! 
did you make the lower arms etc?
did you make the lower arms etc?

- garyhurn77
- Post Master

- Posts: 906
- Joined: Tue Jul 26, 2005 9:57 am
- Location: magor, south wales
Re: The ST170 Track prepped Mk1, Selector fitted, paint prep.
Thanks people,
Small update,
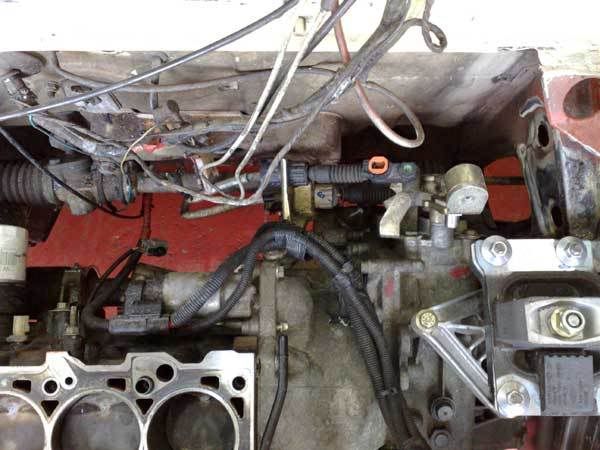
The gear selector and cables are now fitted, quite snug to be honest:
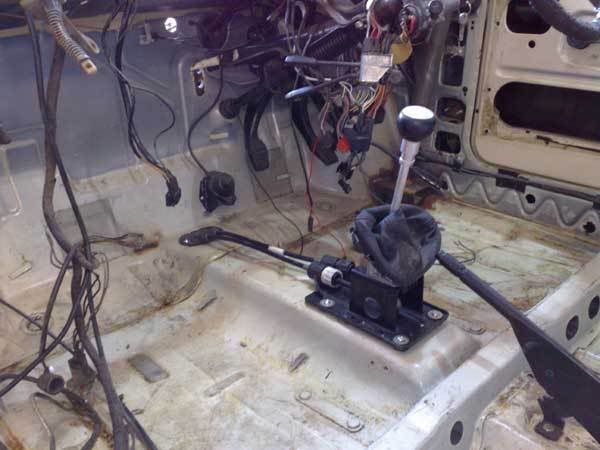
A view of the cables onto the box:
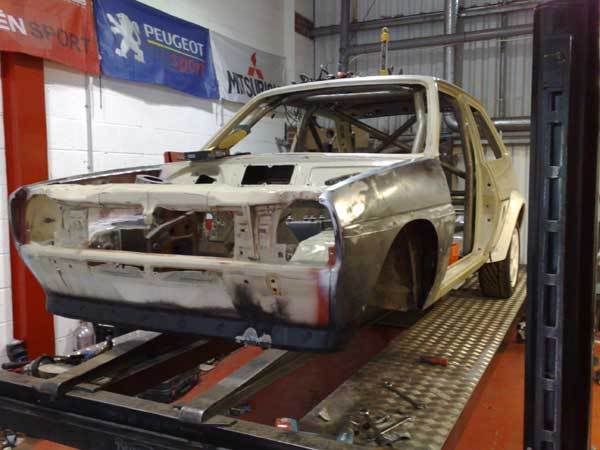
The front arches are trimmed to allow room for the wheels now,
The rear arches have been marked and ready for trimming over the weekend.
The car is now completely stripped, so the cage can be completed, and hopefully paint over the next few days.
Will update Sunday evening.
Tighty.
Small update,
The gear selector and cables are now fitted, quite snug to be honest:

A view of the cables onto the box:

The front arches are trimmed to allow room for the wheels now,

The rear arches have been marked and ready for trimming over the weekend.
The car is now completely stripped, so the cage can be completed, and hopefully paint over the next few days.
Will update Sunday evening.
Tighty.
- Captain Tightpants
- Elite Post Master


- Posts: 3723
- Joined: Fri Feb 20, 2004 8:25 pm
- Location: Somerset
Re: The ST170 Track prepped Mk1, Selector fitted, paint prep.
Cool, MK1s Rule  . Am keeping a close eye on this thread
  !!
!!
THE FUTURES BRIGHT, THE FUTURES BLU!


- BLU
- Poster

- Posts: 144
- Joined: Fri Jul 04, 2008 7:38 pm
- Location: North Wales
- Your car: Fiesta MK2
Re: The ST170 Track prepped Mk1, Selector fitted, paint prep.
mate that is top work and am loving it, did you make the lower arms or buy them?

- cowie20
- Elite Post Master

- Posts: 1215
- Joined: Wed Nov 07, 2007 7:56 am
Re: The ST170 Track prepped Mk1, Selector fitted, paint prep.
thats very much my bag mate, loving it. 

:2004 Merc Vito: - :1983 Nissan Datsun 280zx: - :1992 GT Pro Series: - :2012 Mondraker Dune R:
- ~nomad~
- Elite Post Master


- Posts: 12504
- Joined: Fri Jan 18, 2002 12:00 am
- Location: hertfordshire
- Your car: Breadvan
- rsonblackwheels
- Post Master

- Posts: 787
- Joined: Tue Nov 13, 2007 10:16 am
- Location: near basingstoke hampshire
Re: The ST170 Track prepped Mk1, Update, 07-07-08
Thanks for everyones comments. 
All parts you see thus far are made here on site. I rarely buy anything in to be honest. I try to avoid the buy it bolt it on approach. The front arms were designed and made between my brother and I.
So...............
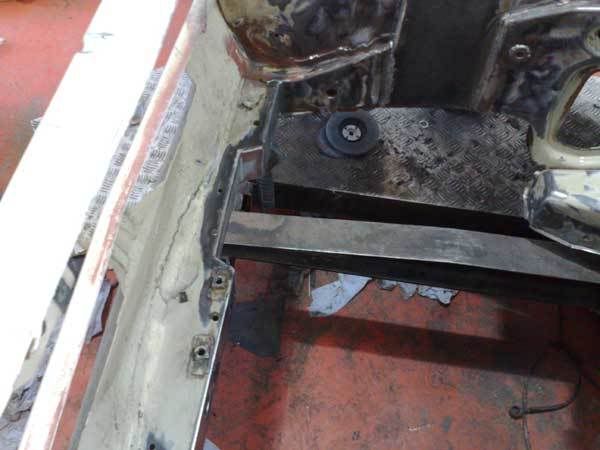
Moved on this morning by cutting out the front crossmember, to allow extra room for the exhaust manifold. I think with careful modifying of the manifold I could have got away with it, but I would prefer to allow a bit of extra room.
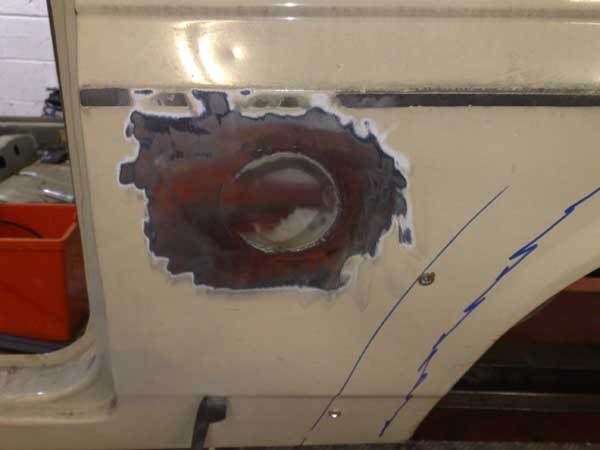
While I had the welder out, we removed the fuel filled cap:
I also seam welded the front of the vehicle, using the old favourite, weld an inch, miss an inch:
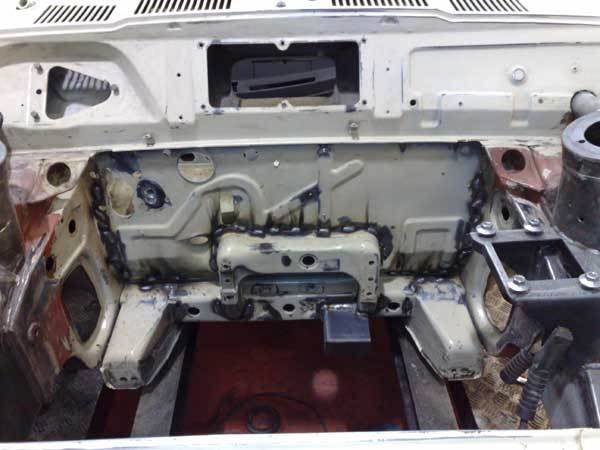
Close up:
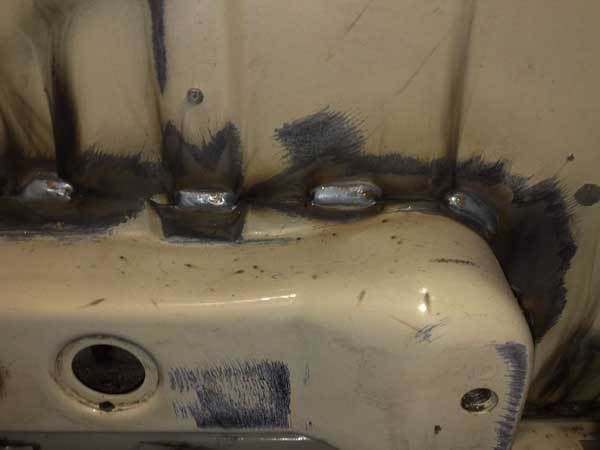
PENETRATION!!
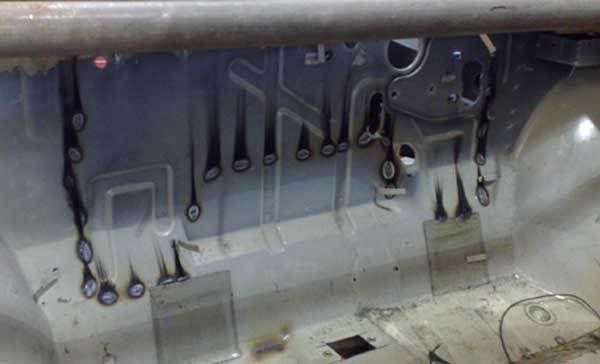
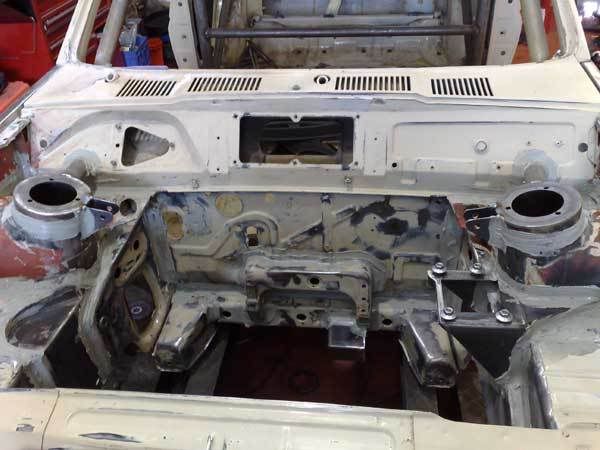
I also added on the brackets to the strut tops which will mount the front strut brace. This picture shows this, plus all the seams and joints now sealed:
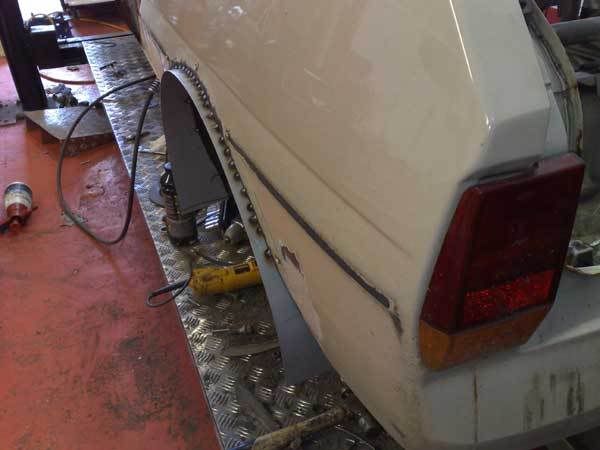
Whilst waiting for the sealer to dry, I started to rework the rear arches to allow room for the wheels and tyres.
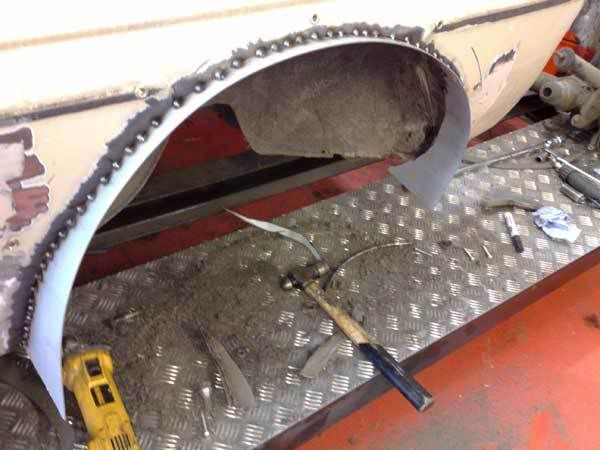
I cut away about 2" of the arch, and inner arch to suit. The piece of zintex steel you see sticking out is joining the two panels. This will be cut down once I have finished welding it. It is spot welded slowly to ensure minimum panel damage.
I then stonechipped some of the engine bay:
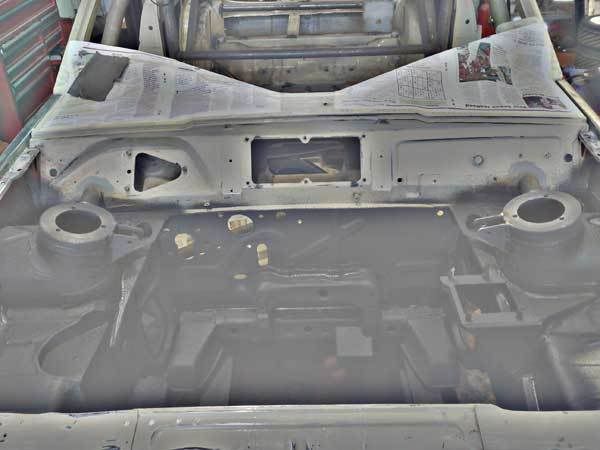
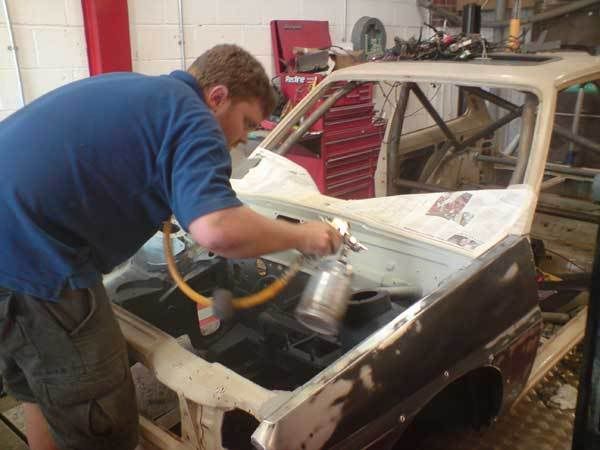
Followed by a couple of coats of etching primer: (Notice the invisible breathing aparatus. )
)
Completed etch primer:
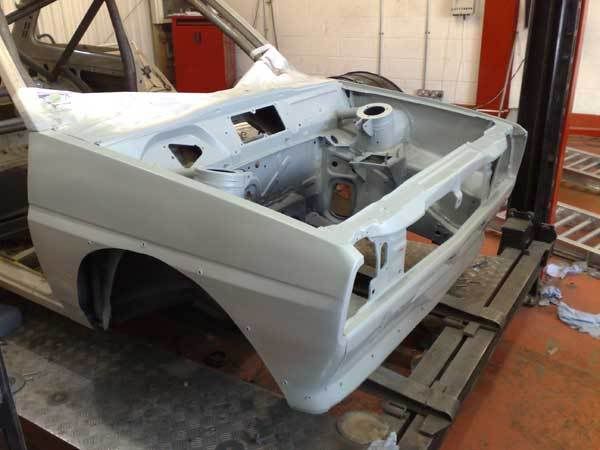
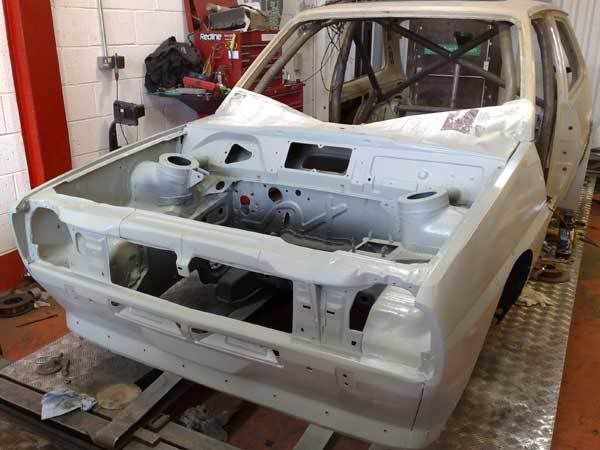
Upon drying the top coat was then painted on.
The car colour won't be to everyones taste, but it's this colour for a few very good reasons:
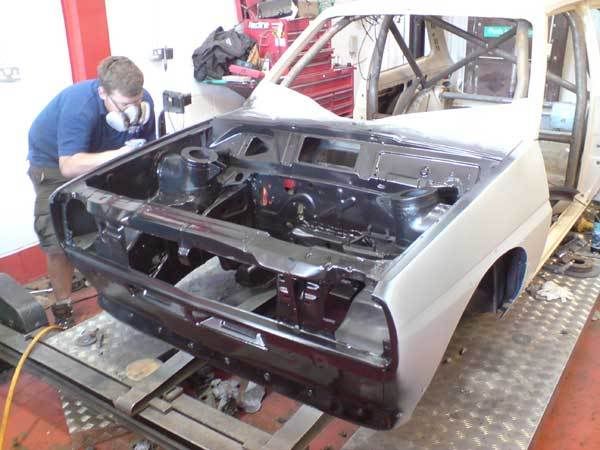
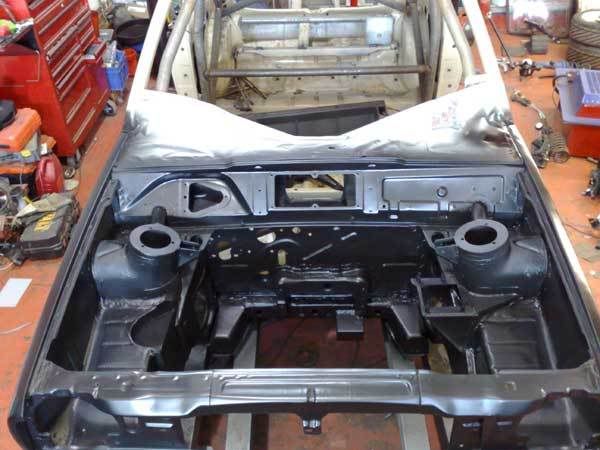
Completed Matt black:
The vehicle is to be fitted with 4-Pot wilwoods all round, so I needed to sort a method of getting a rear hub to fit. I thought initially that an ERST rear hub would fit, but unfortunately they are too long. We therefore had to look into another option. The option we took up was to turn down the standard drums to leave us with two hubs to mount the disks on:
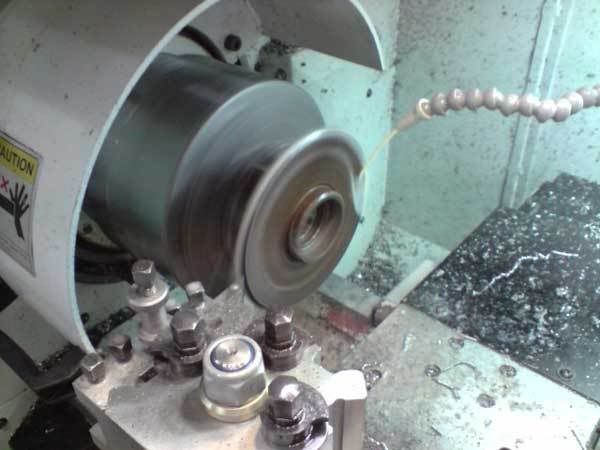
So the front of the car is now completely painted and ready for components to be bolted in for good now. The cylinder head is still not back yet, but I went down to the machine shop today and it's looking pretty good. The inlet ports have been opened out to suit the inlet manifold we have. The polishing was being done when I was there. I should see the return of the head on Wednesday, which means the engine can be fitted for good then.
More updates to follow tomorrow,
Cap'n
All parts you see thus far are made here on site. I rarely buy anything in to be honest. I try to avoid the buy it bolt it on approach. The front arms were designed and made between my brother and I.
So...............
Moved on this morning by cutting out the front crossmember, to allow extra room for the exhaust manifold. I think with careful modifying of the manifold I could have got away with it, but I would prefer to allow a bit of extra room.

While I had the welder out, we removed the fuel filled cap:

I also seam welded the front of the vehicle, using the old favourite, weld an inch, miss an inch:

Close up:

PENETRATION!!

I also added on the brackets to the strut tops which will mount the front strut brace. This picture shows this, plus all the seams and joints now sealed:

Whilst waiting for the sealer to dry, I started to rework the rear arches to allow room for the wheels and tyres.

I cut away about 2" of the arch, and inner arch to suit. The piece of zintex steel you see sticking out is joining the two panels. This will be cut down once I have finished welding it. It is spot welded slowly to ensure minimum panel damage.

I then stonechipped some of the engine bay:

Followed by a couple of coats of etching primer: (Notice the invisible breathing aparatus.

Completed etch primer:


Upon drying the top coat was then painted on.
The car colour won't be to everyones taste, but it's this colour for a few very good reasons:

Completed Matt black:

The vehicle is to be fitted with 4-Pot wilwoods all round, so I needed to sort a method of getting a rear hub to fit. I thought initially that an ERST rear hub would fit, but unfortunately they are too long. We therefore had to look into another option. The option we took up was to turn down the standard drums to leave us with two hubs to mount the disks on:

So the front of the car is now completely painted and ready for components to be bolted in for good now. The cylinder head is still not back yet, but I went down to the machine shop today and it's looking pretty good. The inlet ports have been opened out to suit the inlet manifold we have. The polishing was being done when I was there. I should see the return of the head on Wednesday, which means the engine can be fitted for good then.
More updates to follow tomorrow,
Cap'n
- Captain Tightpants
- Elite Post Master


- Posts: 3723
- Joined: Fri Feb 20, 2004 8:25 pm
- Location: Somerset
- Turboboy67
- Elite Post Master


- Posts: 5605
- Joined: Thu Aug 24, 2006 8:39 pm
- Location: Shaftesbury, Dorset
- Your car: 911GT3 RS
Re: The ST170 Track prepped Mk1, Update, 07-07-08
So cool  Matt black too
  Best colour ever
- hb69
- Elite Post Master


- Posts: 4995
- Joined: Mon Dec 12, 2005 7:56 pm
- Location: Kent
- Your car: Fiesta 1.1 LX
Re: The ST170 Track prepped Mk1, Update, 07-07-08
would you be interested in making the gearbox bracket up to sell and the engine mount bracket?
the car is looking stunning
the car is looking stunning
- scotty86d
- Poster

- Posts: 64
- Joined: Fri Oct 28, 2005 12:00 am
Re: The ST170 Track prepped Mk1, Update, 07-07-08
Chop chop Tighty P, I want it on the dyno next Tuesday! 
- heeman10
- Elite Post Master


- Posts: 28746
- Joined: Fri Nov 08, 2002 5:32 pm
- Location: Somerset
- Your car: Audi TT TDI Quattro S line
Re: The ST170 Track prepped Mk1, Update, 07-07-08
stev you have a pm about some fabrication 
awesome work again, your not hanging about with this one should be abit of an animal when complete
awesome work again, your not hanging about with this one

- garyhurn77
- Post Master

- Posts: 906
- Joined: Tue Jul 26, 2005 9:57 am
- Location: magor, south wales
Re: The ST170 Track prepped Mk1, Update, 07-07-08
quality! Matt black looks hard as nails on mk1's too - great choice of colour.
- Chris 2i
- Elite Post Master


- Posts: 4370
- Joined: Thu May 13, 2004 10:39 pm
- Location: Swindon
Re: The ST170 Track prepped Mk1, Update, 07-07-08
oo i can feel my trousers dampening... this cars gunna be a beast..its crying out for RWD though ..no...ok

- Andyfloss03
- Elite Post Master


- Posts: 1496
- Joined: Tue Jan 15, 2008 10:56 am
- Location: Rugby
Re: The ST170 Track prepped Mk1, Update, 07-07-08
loving the progress on this car.its going to be an absolute animal and stealth look very cool 


- MENACE
- Elite Post Master

- Posts: 1108
- Joined: Fri Jan 18, 2008 6:33 pm
Re: The ST170 Track prepped Mk1, Update, 07-07-08
awsome progress very cool, love the colour
can't wait to see it,its going to be an animal

can't wait to see it,its going to be an animal


- rsonblackwheels
- Post Master

- Posts: 787
- Joined: Tue Nov 13, 2007 10:16 am
- Location: near basingstoke hampshire
Re: The ST170 Track prepped Mk1, Update, 08-07-08 Cage Complete.
Scotty, I suppose it's possible in the future.  I will keep you updated if you like.
Gary, PM received, I wouldn't use the gearbox mount on your Ka if I were you, it will put the engine out of balance onto the other mounts. You would need to fabricate a different mount from the front of the box if I were you.
Thanks again for everyones comments, I will try not to dissapoint.
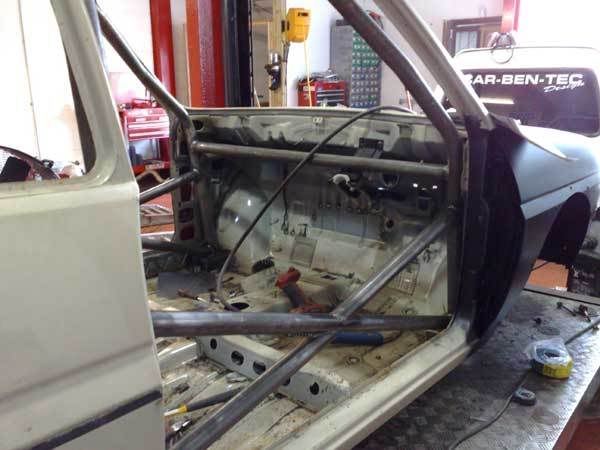
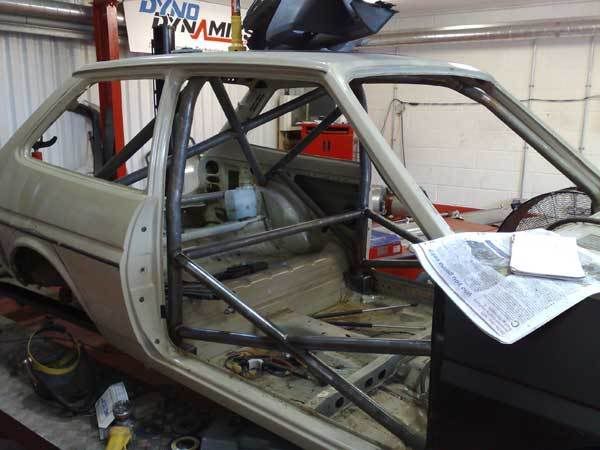
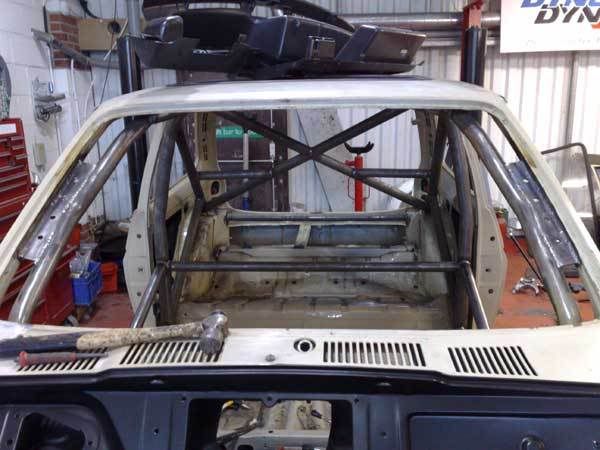
Spent the day completing the roll cage:
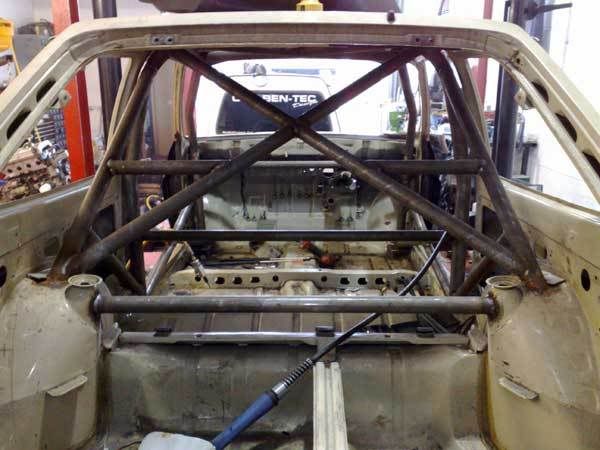
The paint has gone great on the front wings. My brother was happy with it, but I was not. Fortunately the rest of the car is going to be painted tomorrow, so I can repaint the front wings at the same time.
More updates tomorrow,
Cap'N'tighty
Gary, PM received, I wouldn't use the gearbox mount on your Ka if I were you, it will put the engine out of balance onto the other mounts. You would need to fabricate a different mount from the front of the box if I were you.
Thanks again for everyones comments, I will try not to dissapoint.
Spent the day completing the roll cage:


The paint has gone great on the front wings. My brother was happy with it, but I was not. Fortunately the rest of the car is going to be painted tomorrow, so I can repaint the front wings at the same time.
More updates tomorrow,
Cap'N'tighty
- Captain Tightpants
- Elite Post Master


- Posts: 3723
- Joined: Fri Feb 20, 2004 8:25 pm
- Location: Somerset
Re: The ST170 Track prepped Mk1, Update, 08-07-08 Cage Complete.
coming along at a stunning pace mate! that cage looks very familer

:2004 Merc Vito: - :1983 Nissan Datsun 280zx: - :1992 GT Pro Series: - :2012 Mondraker Dune R:
- ~nomad~
- Elite Post Master


- Posts: 12504
- Joined: Fri Jan 18, 2002 12:00 am
- Location: hertfordshire
- Your car: Breadvan
- muz
- Elite Post Master

- Posts: 2596
- Joined: Sat Nov 20, 2004 5:52 pm
- Location: Hereford Drives:1988 Escort RST & 1982 Escort XR3
Car: 1993 Ford Fiesta Special Edition
Re: The ST170 Track prepped Mk1, Update, 08-07-08 Cage Complete.
holy s**t mate your flying throught this build.....did you just get extra bars for cage and weld them in? car is looking so good!

- cowie20
- Elite Post Master

- Posts: 1215
- Joined: Wed Nov 07, 2007 7:56 am
Re: The ST170 Track prepped Mk1, Update, 09-07-08 More progress.
Nomad,  Deffo, seems like years ago I did your cage now!! I remember meeting you and Paul at the well known dogging roundabout.
Muz, Why thankyou sir!
Cowie, I don't like to hang around too much to be honest! Many thanks, your Pm will be replied to in due course.
  The cage is a full FIA spec weld in cage, so it's all only CDS pipe scalloped and welded together.
Soooo, todays update:
I spent most of the day joining the inner and outer skins on the rear arches, and making the rear quarter look sensible where we welded it over.
I did get a few fun things done though!
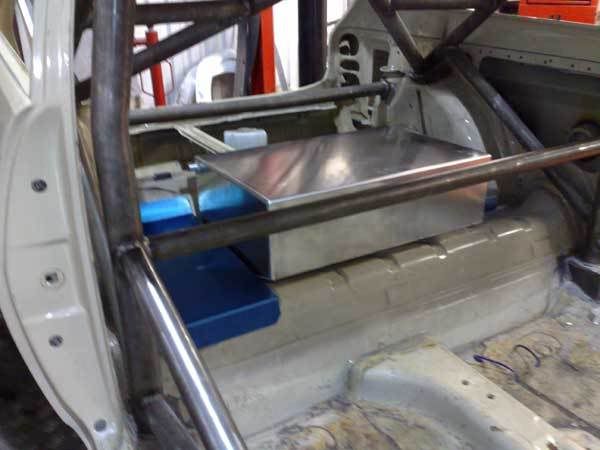
I commissioned a new fuel tank and swirl pot along with a few other bits and pieces, my good friend James from JEK popped over to give me a stiff one. He also put together a few nice bit's and pieces for me:
A mock up of the fuel tank in position:
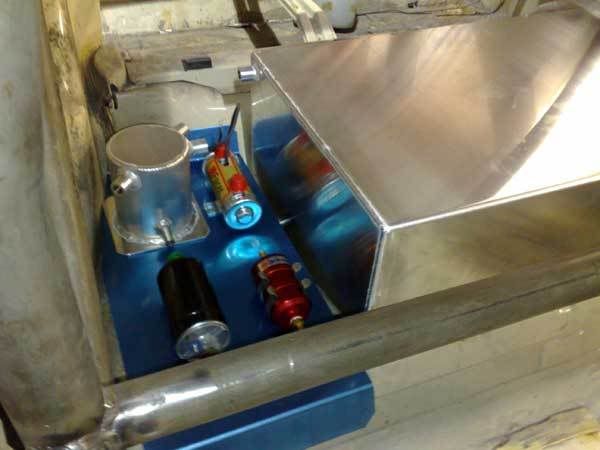
I also put together a few mock ups of the lift pump, filter and pressure pump:
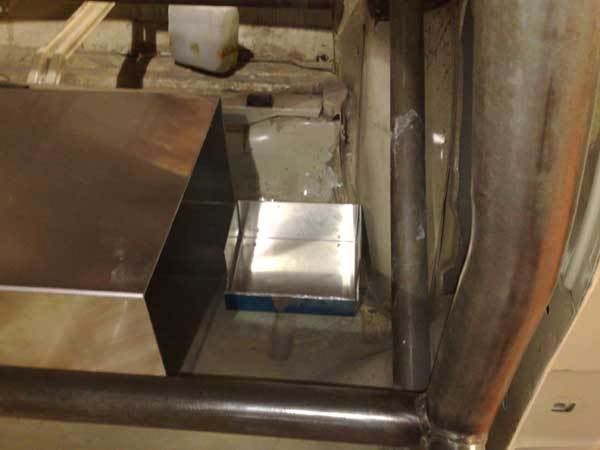
And made up a battery tray to locate the small gel acid battery:
One of the issues with using the blacktop engine is reversing the water pump. Since I first saw it done I didn't like the idea of reversing it. In the USA ford racing even made the part. I however am not planning on reversing it, but keep it rotating in the same direction, using an extra idler pulley.
We decided on using a smaller alternator anyway, to save as much drag on the engine as we could. We opted for a small Denso item.
This came with a single 'V' pulley though, as opposed to the multi'V required by the blacktop engine.
A picture of the new alternator on the left, and the old one on the right, both with drive pulleys removed:
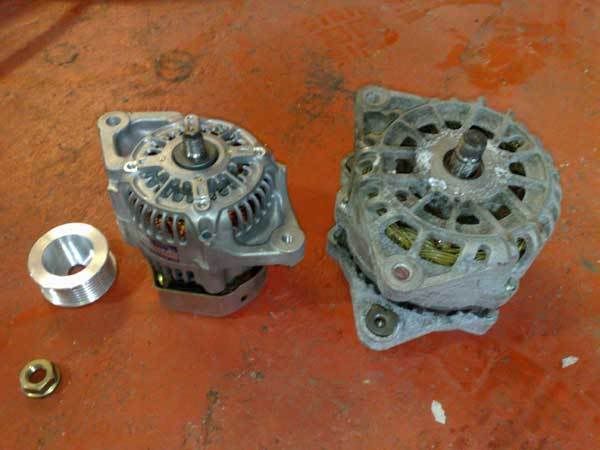
You can see the new alloy drive pulley we made up to fit the new alternator.
A view of the new alternator with new drive pulley fitted:

Paint is going on tomorrow, just didn't manage to get time today unfortunately.
More updates tomorrow.
Regards,
Capytan-Tighty-Panty
Muz, Why thankyou sir!
Cowie, I don't like to hang around too much to be honest!
Soooo, todays update:
I spent most of the day joining the inner and outer skins on the rear arches, and making the rear quarter look sensible where we welded it over.
I did get a few fun things done though!
I commissioned a new fuel tank and swirl pot along with a few other bits and pieces, my good friend James from JEK popped over to give me a stiff one. He also put together a few nice bit's and pieces for me:
A mock up of the fuel tank in position:

I also put together a few mock ups of the lift pump, filter and pressure pump:

And made up a battery tray to locate the small gel acid battery:

One of the issues with using the blacktop engine is reversing the water pump. Since I first saw it done I didn't like the idea of reversing it. In the USA ford racing even made the part. I however am not planning on reversing it, but keep it rotating in the same direction, using an extra idler pulley.
We decided on using a smaller alternator anyway, to save as much drag on the engine as we could. We opted for a small Denso item.
This came with a single 'V' pulley though, as opposed to the multi'V required by the blacktop engine.
A picture of the new alternator on the left, and the old one on the right, both with drive pulleys removed:

You can see the new alloy drive pulley we made up to fit the new alternator.
A view of the new alternator with new drive pulley fitted:

Paint is going on tomorrow, just didn't manage to get time today unfortunately.
More updates tomorrow.
Regards,
Capytan-Tighty-Panty
- Captain Tightpants
- Elite Post Master


- Posts: 3723
- Joined: Fri Feb 20, 2004 8:25 pm
- Location: Somerset
Re: The ST170 Track prepped Mk1, Update, 09-07-08 More progress.
very very impressive. lovin your work
this is gonna be so much fun when its finished!
i used to have a mk1 supersport which unfortunately went to scrap heaven
Always nice to see a mk1 gettin saved.............and then some
this is gonna be so much fun when its finished!
i used to have a mk1 supersport which unfortunately went to scrap heaven
Always nice to see a mk1 gettin saved.............and then some
- Swiss
- Senior Poster

- Posts: 246
- Joined: Mon Feb 25, 2008 11:06 am
- Location: High Wycombe _ Drives: XR2i 2.0 Zetec
141 posts • Page 1 of 5 • 1, 2, 3, 4, 5




Twitter
The second 20th Anniversary article, a dive into the history of how the site came about is available here: https://t.co/kbCfZ4sf0R
17:44, 4th December 2021 Twitter Web App
To celebrate https://t.co/wXVkvJipaS being 20 years old this year, I've written a series of articles detailing the… https://t.co/B0vE0Y3KvP
17:42, 4th December 2021 Twitter Web App
Follow fiestaturbo.com on Twitter:
http://twitter.com/fiestaturbo/
Facebook
New article! fiestaturbo.com is 20 years old this year and I'm writing a series delving into the history of it. …
Saturday, 4th December 2021 12:49
Some awesome Escorts from the Fair - FORD FAIR 2021: ESCORT EXHIBITION - …
Sunday, 31st October 2021 17:05
All the best Focuses from Ford Fair - FORD FAIR 2021: FOCUS PEEKING - Which was your …
Thursday, 7th October 2021 22:21
Become a fan:
http://www.facebook.com/fiestaturbo/
RSS Feeds
Subscribe to the RSS feed
What is RSS?
RSS is a technology that lets you use special applications or modern browsers to notify you you when a site is updated. You can then read the updated content in that application or your browser.
To subscribe to these RSS feeds you need to copy the links above. For instructions on how to add it to the feeds you keep track of, consult the documentation of your RSS reader.